
This post contains affiliate links. As an Amazon Associate I earn from qualifying purchases, at no extra cost to you. Thank you for supporting Diynify!
Paper stars can feel warm and collected rather than crisp and generic when the construction, paper texture, and placement work together. These paper star decor ideas lean into pleats, faceted folds, stitched seams, rolled paper, deckled edges, and quiet layered surfaces that suit a cozy Christmas room.
Most use cardstock, decorative paper, book pages, scissors, a ruler or scoring tool, and paper-safe adhesive. A few call for thread, thin chipboard, a smooth rod for forming paper tubes, or a small central dowel. The collection stays with sheet paper rather than paper-bag stars, and several ideas use existing display pieces such as a tray, vase, photo frame, or glass cloche.
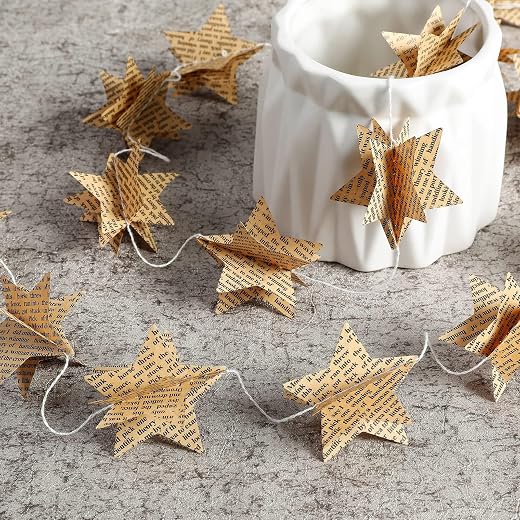
1. Pleated Book-Page Rosette Stars for a Mantel Tray
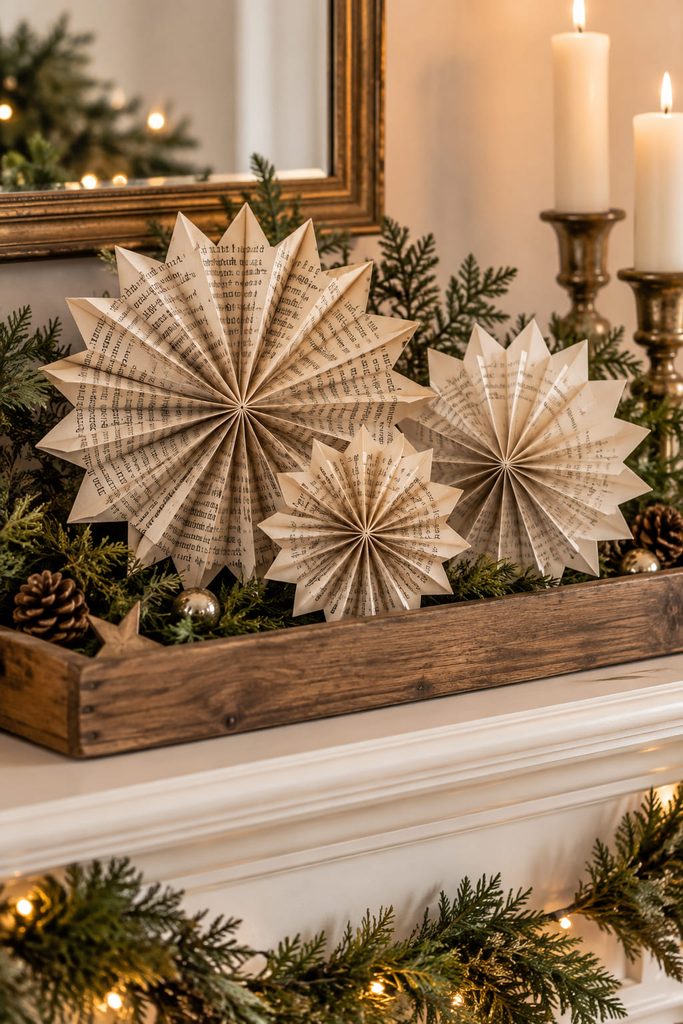
For a soft vintage look, turn narrow strips of book paper or lightweight printed paper into accordion rosettes, then cut shallow V-notches around the outer edge so each opened fan reads as a many-point star. Back each rosette with a plain cardstock circle to keep the center from relaxing, and make two or three noticeably different sizes rather than a row of near-identical pieces. Rest them upright inside a shallow tray with greenery or plain wood accents behind them; the tray supplies the support, so the paper can stay light and delicately pleated. The printed surface gives visual detail without glitter or extra embellishment, while the deep folds create the shadow that keeps pale paper from disappearing against a neutral mantel.
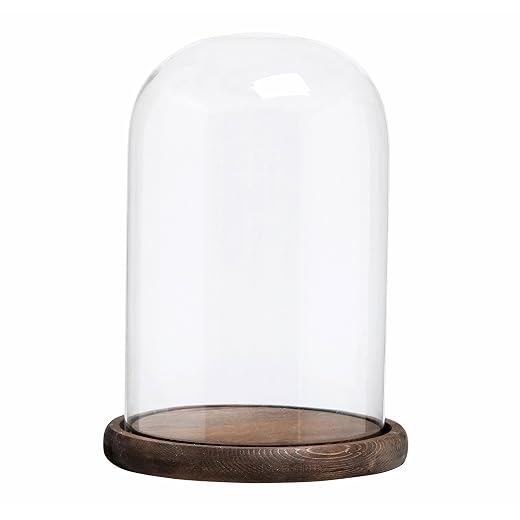
2. Faceted Pyramid-Point Star Under a Glass Cloche
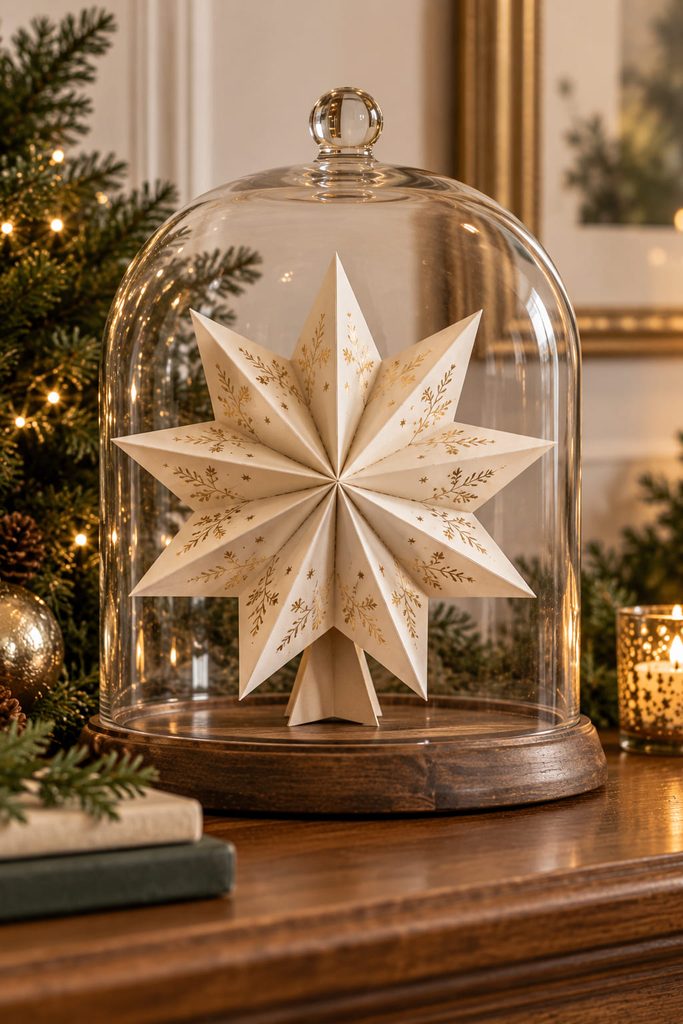
Build the star from repeated folded kite modules instead of scoring one flat silhouette. Each module becomes a shallow pyramid point when its side flaps are creased inward; arrange the points around a stiff cardstock center disk and join neighboring flaps on the back. The center disk keeps the geometry from drifting while the raised faces catch warm side light.
A glass cloche makes this construction useful even when the paper is delicate. Mount the finished star on a small folded cardstock easel or short paper pedestal so the lowest point does not bear the whole load, then leave open space around it rather than filling the dome with mini decorations. The star should be the one sculptural object inside the cloche, with the faceted paper doing the decorative work.
3. Rolled Paper Cone Starburst on a Pedestal
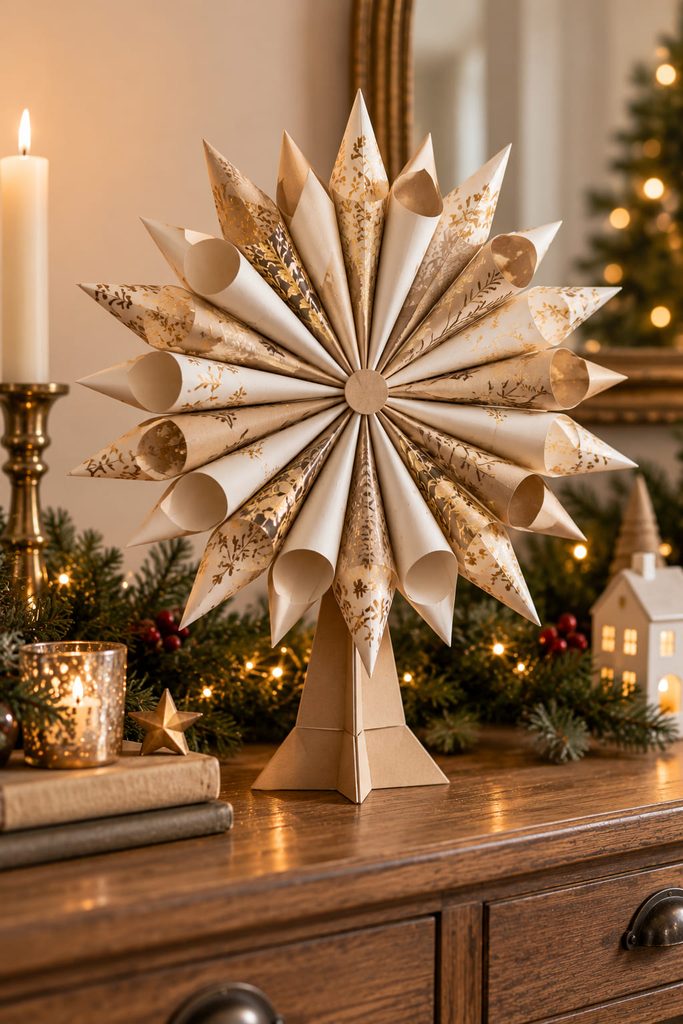
Around a small backing disk, narrow paper cones create a starburst without a complicated cut pattern. Roll matching squares of medium-weight paper into cones and use two staggered rings so the outer points alternate.

- Make one cone and use it as the size reference for the batch.
- Mark even guide points around the backing disk before gluing anything.
- Attach the first ring of cones, then place a second ring in the gaps so the outer points alternate.
- Cover the center with a small paper disk and attach the finished burst to a folded, cross-braced cardstock pedestal.
Stability Check: Set the pedestal on the display surface before adding the starburst. If it rocks empty, widen or square the base first. Adding a larger paper sculpture to an unstable foot only magnifies the lean.
This version works well on a console or sideboard because the silhouette is bold from several feet away, while the rolled edges create softer shadow than sharply faceted cardstock.
4. Stitched Patchwork Star Garland Across a Hutch
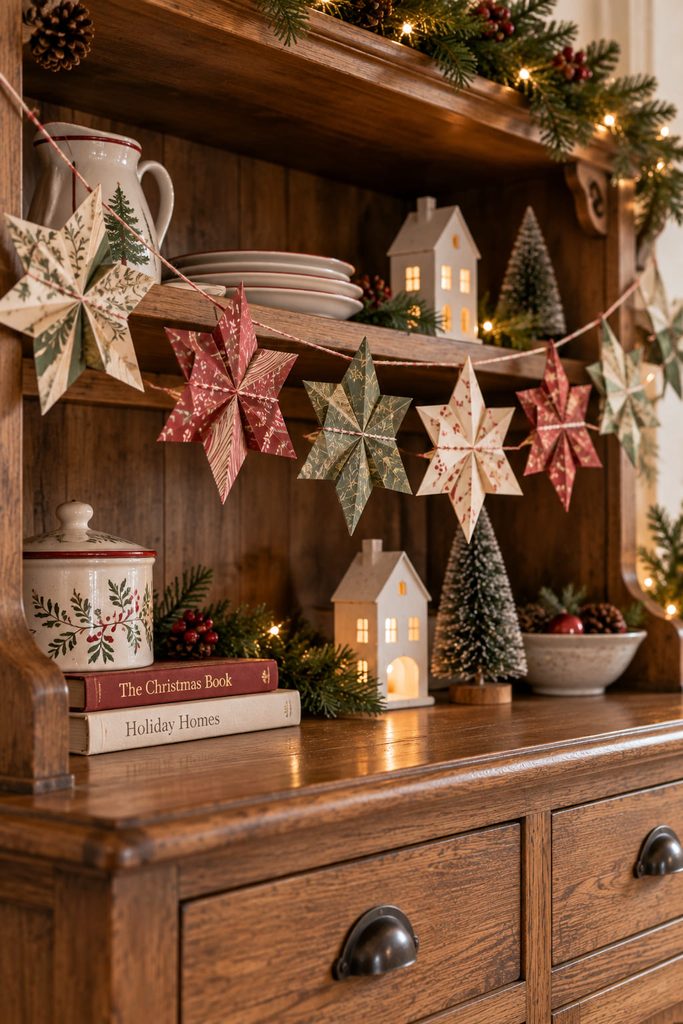
Stitching changes the character of a paper garland because the seam becomes part of the decoration. Build each star from four or eight folded diamond units cut from coordinated papers, overlap the inner points, and run a straight line of machine or hand stitching through the center zone. The thread secures the patchwork while leaving the outer points free enough to lift slightly.

There are two useful ways to turn the finished stars into a garland. Continuous stitching is fastest for a long run: feed each star through with a short thread gap between pieces. Individual hanging loops take longer but let you reposition each star on a cord and replace one without dismantling the whole strand. Across the front of a hutch or open shelf, the second route is easier to tune around handles and objects; for a simple uninterrupted span, continuous stitching keeps the line cleaner.
5. Deckle-Edge Layered Stars Along a Linen Table Runner
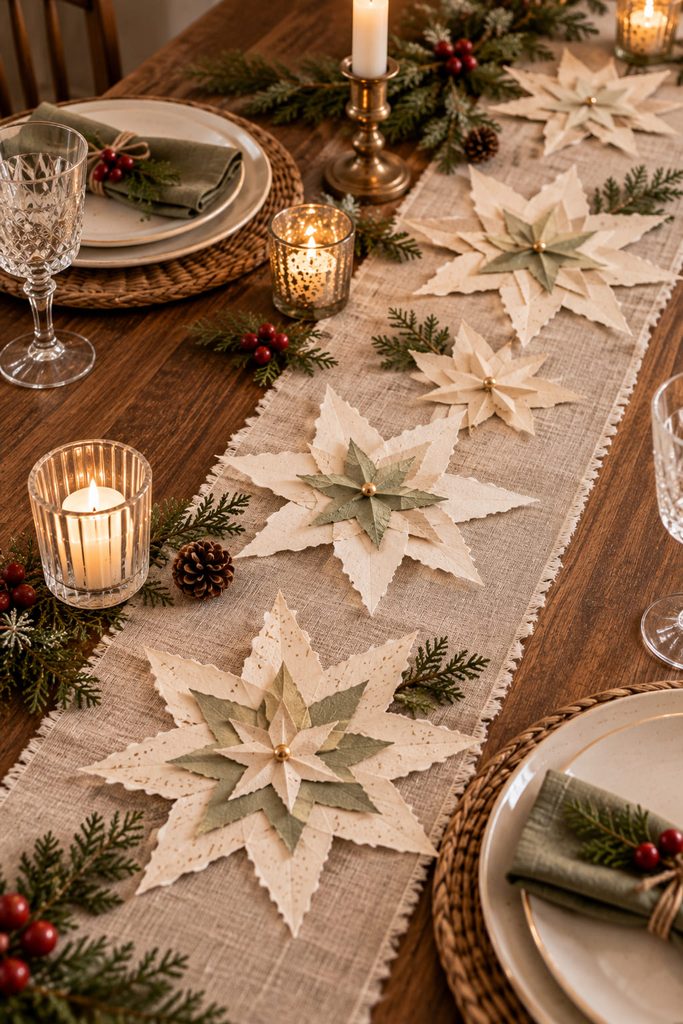
Let the imperfect paper edge supply the softness. Tear or water-score handmade paper into broad star silhouettes, then layer a smaller smooth-cut star on top with adhesive only at the center. The raised outer edges cast a faint shadow and keep the shapes from looking like flat confetti. Space the stars irregularly along a linen runner, leaving clear gaps around plates and serving pieces; three strong clusters usually look calmer than an unbroken trail. This is one of the easiest ideas to scale down after dinner because the layers stay almost flat and can be stored between sheets of cardstock.
6. Folded Star Pockets for Evergreen Sprigs
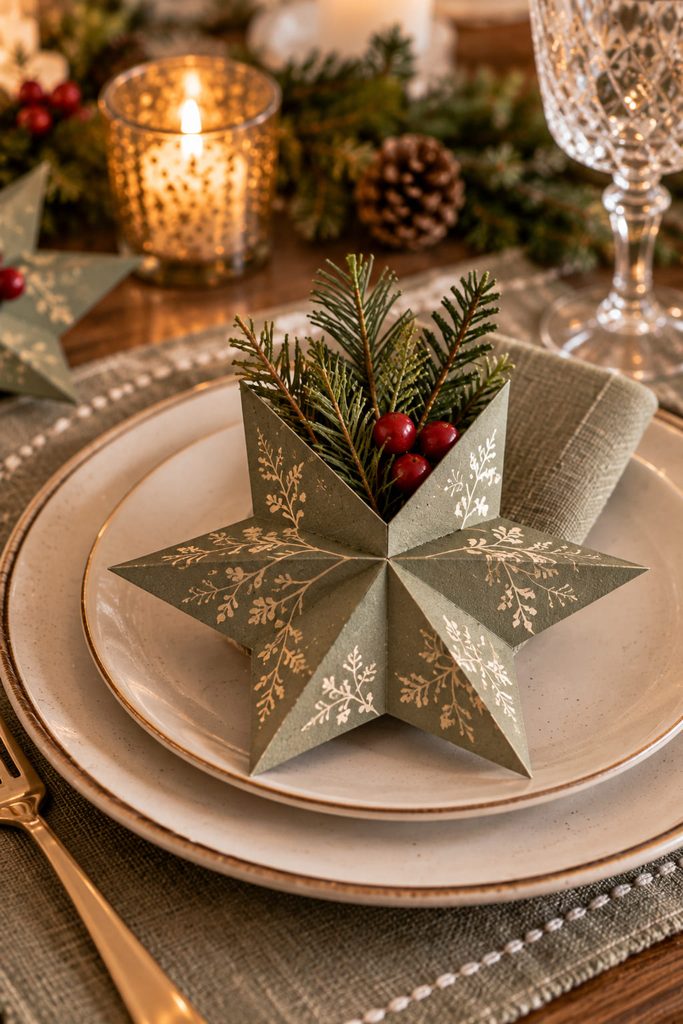
At each place setting, a shallow star pocket can hold a small faux evergreen sprig or a paper botanical stem without becoming another napkin ring. Use two matching cardstock stars. Keep the front one intact, but score short side and lower tabs on the back star so the two pieces join around the lower half while the upper valley remains open for loading.
Before making a full set, check four things:
- the pocket opening is wide enough for the sprig without forcing the points apart;
- the lower tabs sit flat enough that the star does not rock on the plate;
- the inserted stem stops above the glued bottom edge instead of punching through it;
- the decoration lifts away in one piece when the table is cleared.
A matte paper in oatmeal, deep green, oxblood, or muted gold keeps the shape festive without turning the place setting into a theme display.
7. Rolled Paper-Tube Star Picks in a Ceramic Vase
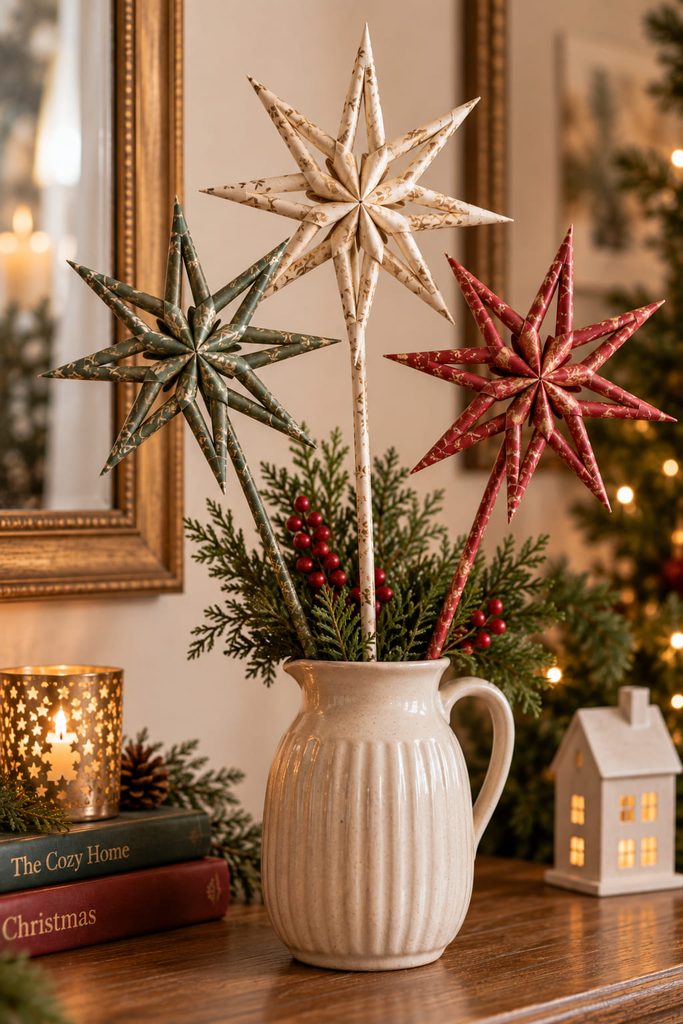
Once narrow paper strips are rolled tightly around a smooth rod, the resulting tubes can form a light, linear star. Secure each final edge, slide the tubes off when dry, then cut equal lengths and join the angled ends around a small double-layer cardstock hub. Because the silhouette is mostly open space, these stars look lighter than solid cardstock cutouts even when they are fairly large.
Attach each finished star to a long, tightly rolled paper stem with a reinforced paper collar at the back of the hub. A ceramic vase can then hold three or five modest-size stars at different heights like a graphic winter arrangement. Let the stems reach the bottom of the vase; if they stop halfway down, the star heads can lever them outward and make the arrangement splay.
8. Stacked Star Christmas Tree Sculpture
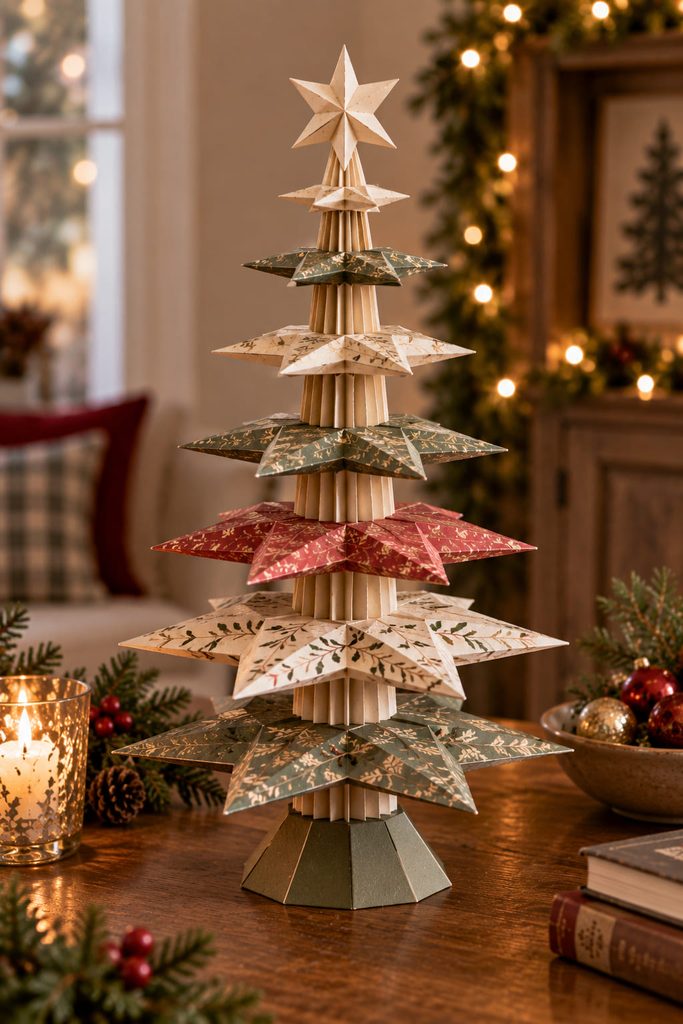
If you want the star motif to become the whole centerpiece, stack graduated star plates around a vertical paper spine. Cut several sturdy cardstock stars from large to small, pierce or punch a centered opening in each, and separate the layers with short accordion-folded paper collars. The collars create air between the star levels, so the finished object reads as a tree-shaped tower rather than a compressed pile of cutouts.
Build from the base upward. A wide double-layer cardstock foot supports a tightly rolled paper tube or a slim dowel wrapped in paper. Slide on the largest star, add a spacer, then continue toward the smallest top layer. The center openings should fit closely enough that the stars cannot drift far off-axis, but they should not grip so tightly that the paper buckles.

Alignment Test: Rotate the sculpture slowly on the table. If the silhouette seems to wobble from one side, check the center holes and spacer heights before trimming star points. A crooked spine is a structural problem; changing the decorative edges will not correct it.
For a quieter aesthetic, keep the paper family consistent and let scale provide the variation. Alternating cream, kraft, and one metallic accent at widely spaced levels gives the tower rhythm without making every tier compete.
9. Quilted Folded-Paper Star Placemats
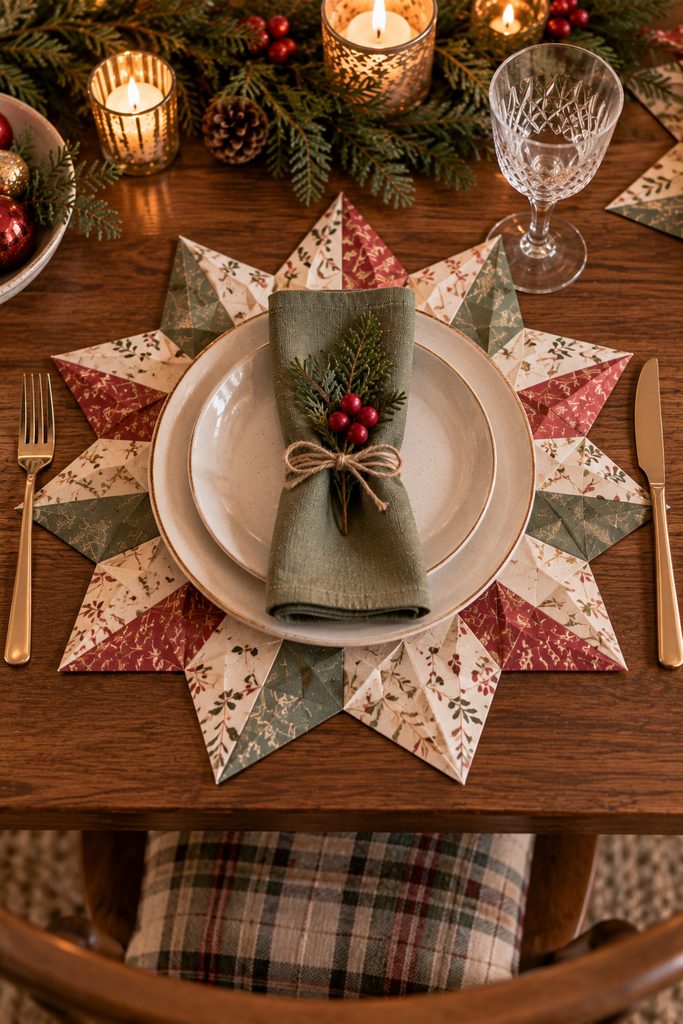
The calmest way to make a large star for the table is to assemble it from repeated folded units instead of cutting one oversized sheet. Fold sturdy paper into kite-shaped modules, flatten the seams, and join the modules edge-to-edge around a central polygon until the outer tips form one broad star. The repeated seams create a quilted surface that still reads when a dinner plate covers the middle. Use the finished piece as a decorative placemat or charger layer only, not as protection from hot cookware; paper is there for the visual frame around the plate, not for heat resistance.
10. Spiral-Cut Star Drops for a Stair Newel
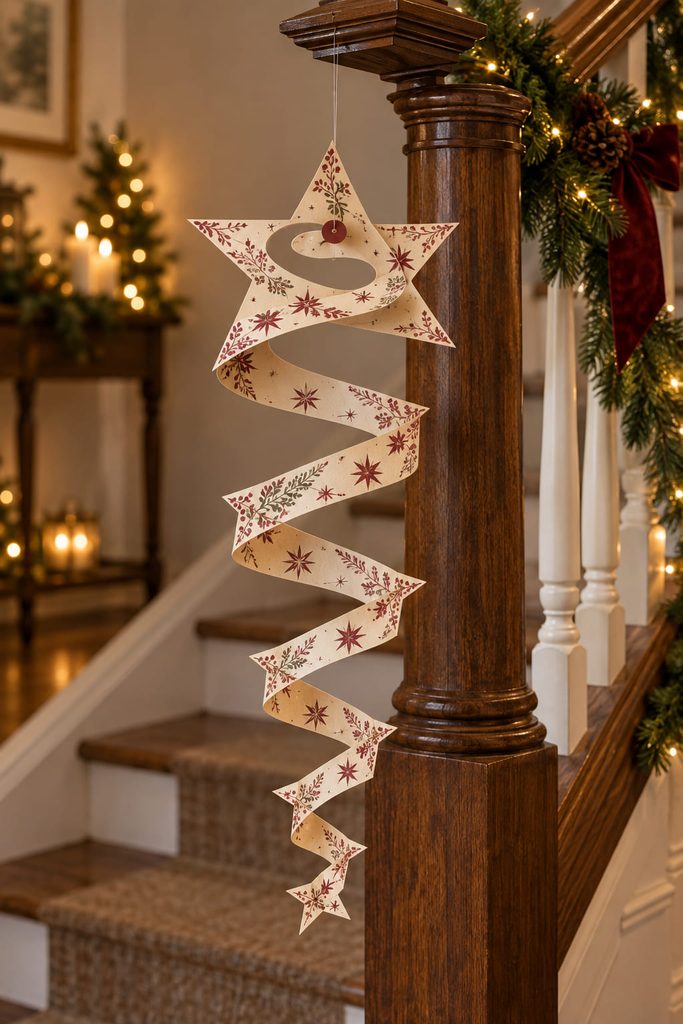
Cutting a continuous spiral inside a broad paper star turns a flat shape into a long hanging helix. Start with sturdy but flexible paper, leave a generous uncut center, and follow the star outline inward with an even-width spiral until only the central tab remains. Attach the hanging thread through that reinforced center, then let the outer edge fall downward under its own weight.
If the drop does not open cleanly, the symptom usually points to the cut:
- It stays almost flat: the spiral band is too wide or too short.
- It twists into a tight kink: the band width changes sharply around one point.
- The center tears: the hanging hole is too close to the spiral cut; add a backing patch before rehanging.
- The lower points catch the railing: shorten the overall drop or move the tie point rather than trimming random tips.
A single oversized spiral star tied to the inside of a stair newel gives movement without becoming a full mobile. Leave enough clearance that it can turn without brushing the banister or a passing sleeve.
11. Folded Star Tassels for Cabinet Knobs
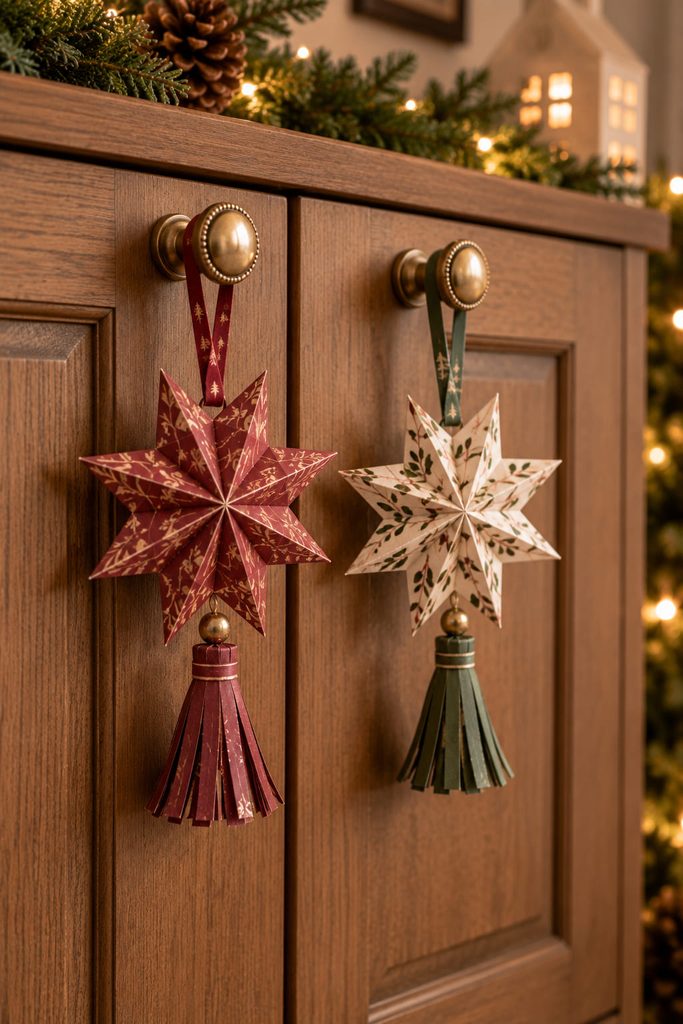
Cabinet pulls and drawer knobs are useful small-scale display points when a room does not need another large installation. Make a compact double-sided star from two lightly folded cardstock faces, sandwich a narrow paper loop between them, and add a short paper-fringe tassel below the center. The upper loop carries the load, so the star itself does not need a hole through a fragile point.
Keep the tassel short enough that it clears the cabinet door when it swings. On a kitchen hutch, sideboard, or hallway cabinet, a few matching tassels create a repeated Christmas detail at hand level; using every knob usually looks busier and increases the chance of snagging.
12. Lidded Star-Shaped Paper Boxes for a Shelf
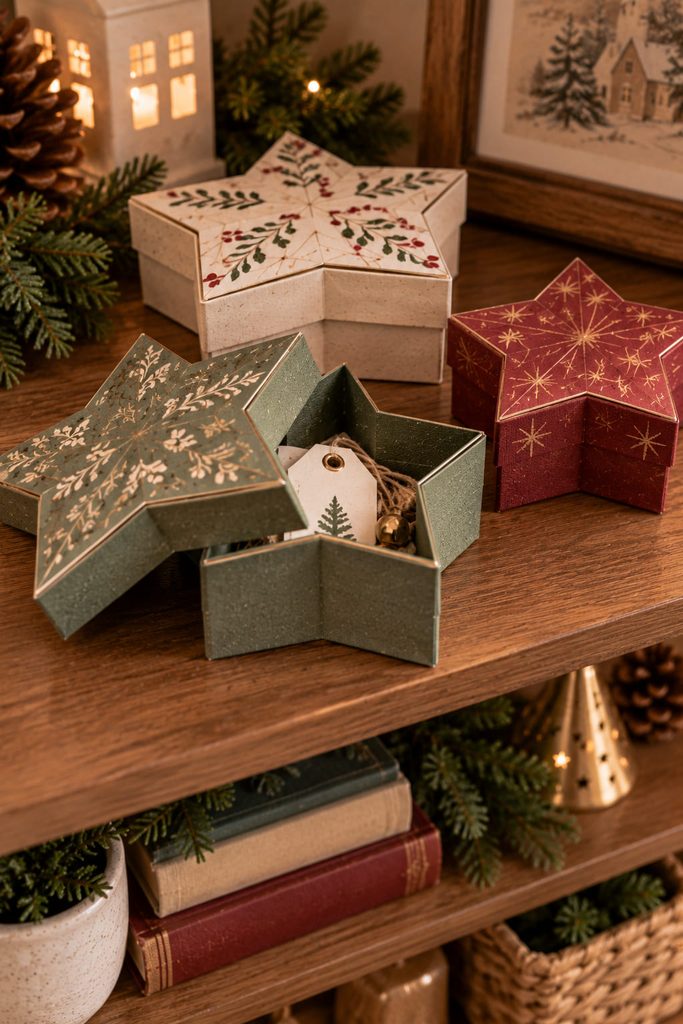
To turn the star into a real container, start with a flat star base and build the side wall separately. Score a long cardstock strip into short segments that follow the alternating outer points and inner valleys, then add narrow glue tabs along one edge. Work around the base a few segments at a time so each crease lands exactly at a corner. A second star becomes the lid, but it needs its own slightly looser wall band so it can slide over the box rather than locking against it.
The finished box should pass a dry-fit before decoration:
- Set the empty base on a flat surface and check that all valleys touch evenly.
- Load it with only lightweight items such as paper notes, spare tags, or tiny unbreakable ornaments.
- Lower the lid without squeezing the side walls.
- Lift the box by supporting the base, not by pulling on a star point.
If the lid jams, increase the wall-band allowance or reduce bulky inner seams; forcing the lid over a tight corner can split the paper at a valley. Several boxes in two or three sizes can sit on a shelf as sculptural decor while still hiding small seasonal odds and ends.
13. Removable Starburst Corners for a Holiday Photo Frame
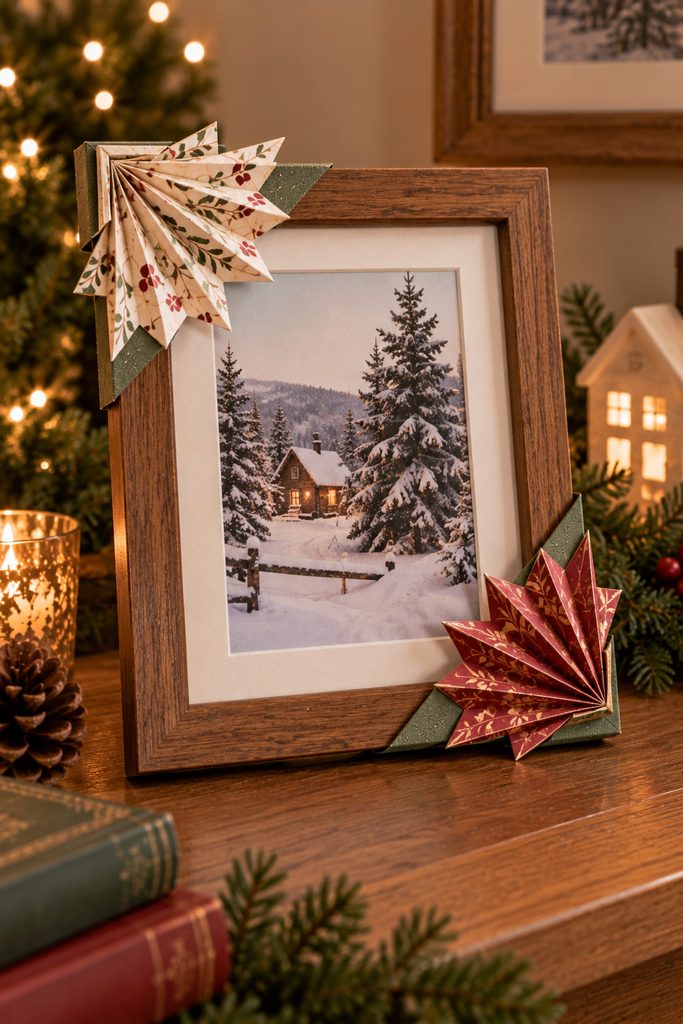
Instead of covering a frame with glued-on shapes, make two corner pieces that can come off after Christmas. Fold each starburst from a short accordion strip, close it into a quarter-fan, and mount the fan on an L-shaped cardstock sleeve that slips over a frame corner. The sleeve provides the grip; the decorative pleats stay outside the frame and never need adhesive on the finished surface.
A tiny material set is enough:
- lightweight decorative paper for the pleated starbursts;
- firmer cardstock for the corner sleeves;
- paper-safe adhesive used only inside the removable pieces.
Use one upper corner and the opposite lower corner so the decoration frames the photograph instead of boxing it in. If the sleeve slides, deepen the folded return on the back rather than tightening it with glue against the frame.
14. Make a Removable Star Collar for a Tabletop Vase
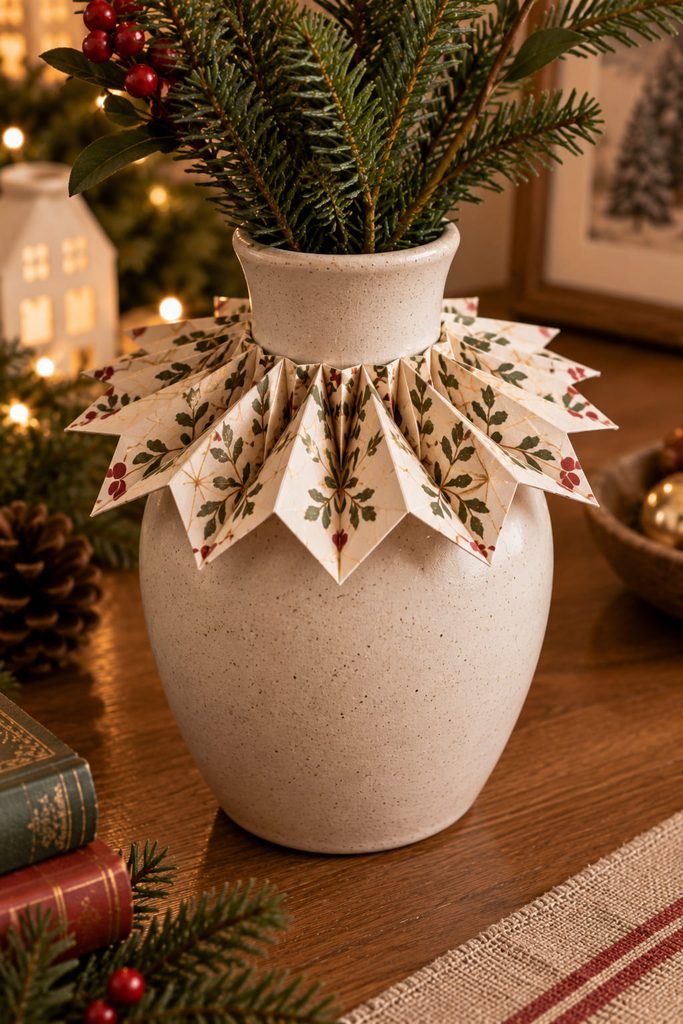
Two construction routes produce noticeably different vase collars. A flat slotted collar starts as one large cardstock star with a center opening and a radial slit; overlap the slit edges around the vase neck and secure them with a small paper tab. It gives a crisp, graphic outline and stores flat. A pleated collar uses short folded star-point segments joined into a ring, so the edge rises and falls around the vase with more shadow and texture.
Choose by the vase rather than by the paper. A straight-sided cylinder suits the flat collar because the opening can sit level. A vase with a shoulder gives a pleated ring somewhere to rest without sliding downward. In either case, dry-fit the collar before closing it and keep paper clear of water, condensation, and any candle flame nearby.
15. Low Star-Shaped Paper Tray for a Coffee Table
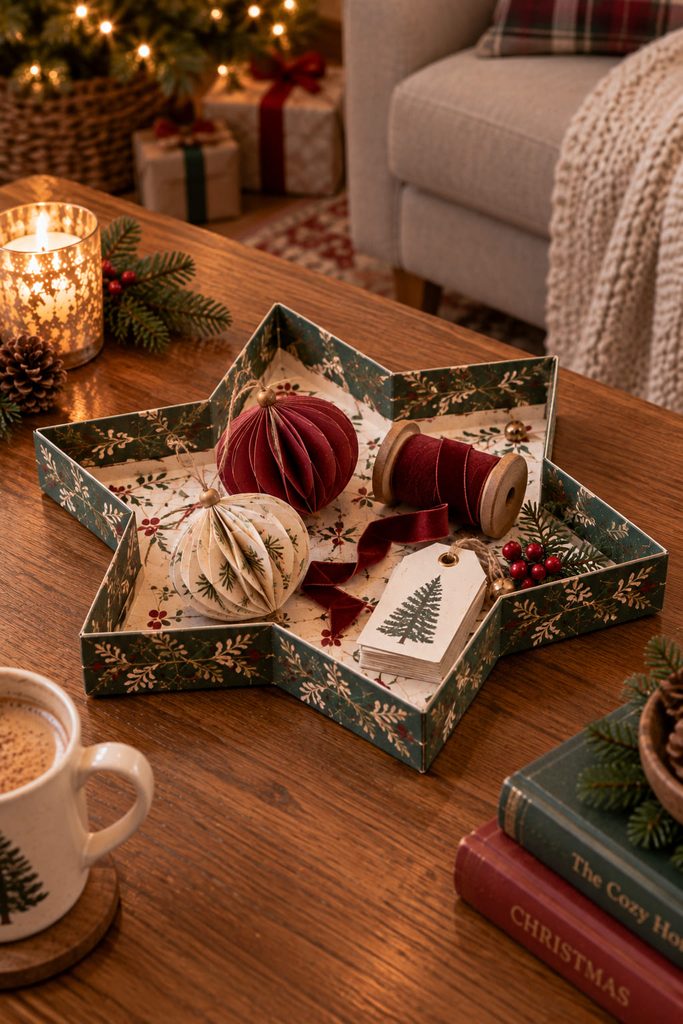
When a coffee-table vignette needs one defined boundary, a shallow star tray can gather a few lightweight decorations without adding another bowl. Cut a sturdy star base, then score a narrow wall strip into alternating outer-point and inner-valley segments. Glue the tabs to the underside of the base, reinforcing the deepest valleys with small paper patches where the wall changes direction most sharply. The tray only needs low sides: enough to keep paper ornaments, ribbon spools, or other light seasonal pieces visually contained while leaving the star outline visible. Support the tray from underneath when moving it, and keep heavy or wet objects out; its job is decorative organization, not load-bearing storage.
Choosing Paper Star Decor for a Cozy, Collected Look
A cozy room does not need every star to use the same paper. It needs a repeatable visual rule. Pick one main texture—matte cardstock, book paper, handmade paper, or a restrained print—then repeat it across two or three projects while changing scale and construction. That gives the room continuity without turning the decorations into a matching set.
| If the room already has… | Let the paper stars add… |
|---|---|
| Lots of patterned textiles | Plain paper, stronger silhouettes, wider negative space |
| Pale wood and neutral surfaces | Printed paper, deckled edges, or one muted metallic |
| Dense greenery | Cream, kraft, or light-reflective paper that separates from the foliage |
| Many small ornaments | One or two larger sculptural stars instead of more tiny pieces |
The most useful edit is often subtraction. If two star projects compete at the same height and scale, keep the one with the stronger silhouette and move the other to a different surface or save it for another room.
Choose the Construction That Changes the Mood
Start with the star whose structure matches the atmosphere you want. Pleats and deckled edges feel softer; rolled tubes and cone bursts look more graphic; a faceted cloche star or stacked star tree gives one small area a stronger sculptural focus. Once that first piece is in place, repeat only one cue—paper family, scale, or fold style—somewhere else in the room.
For more construction-driven options such as woven ornaments, luminaries, mobiles, and tree toppers, continue with 13 Paper Stars DIY Ideas for Easy Holiday Decorating.








