This post contains affiliate links. As an Amazon Associate I earn from qualifying purchases, at no extra cost to you. Thank you for supporting Diynify!
Quilling Christmas cards feel unmistakably handmade because the maker’s choices stay visible in every loop, pinch, scroll, and paper edge. The strongest designs do more than place a quilled motif on folded cardstock: they use the technique to frame a window, support a moving detail, protect a keepsake, or create depth that a printed card cannot imitate.
Most of these ideas use quilling strips, a slotted or needle tool, tweezers, folded cardstock, a ruler, and paper-safe glue. A few also need vellum, fine thread, foam tape, a paper fastener, or extra cardstock for sliders, spacers, and display folds. If you plan to mail the finished card, start with the flatter designs; save the deeper easel, recessed, accordion, and box-card constructions for hand delivery or protective packaging.

1. Comb-Quilled Fir Garland Border Card
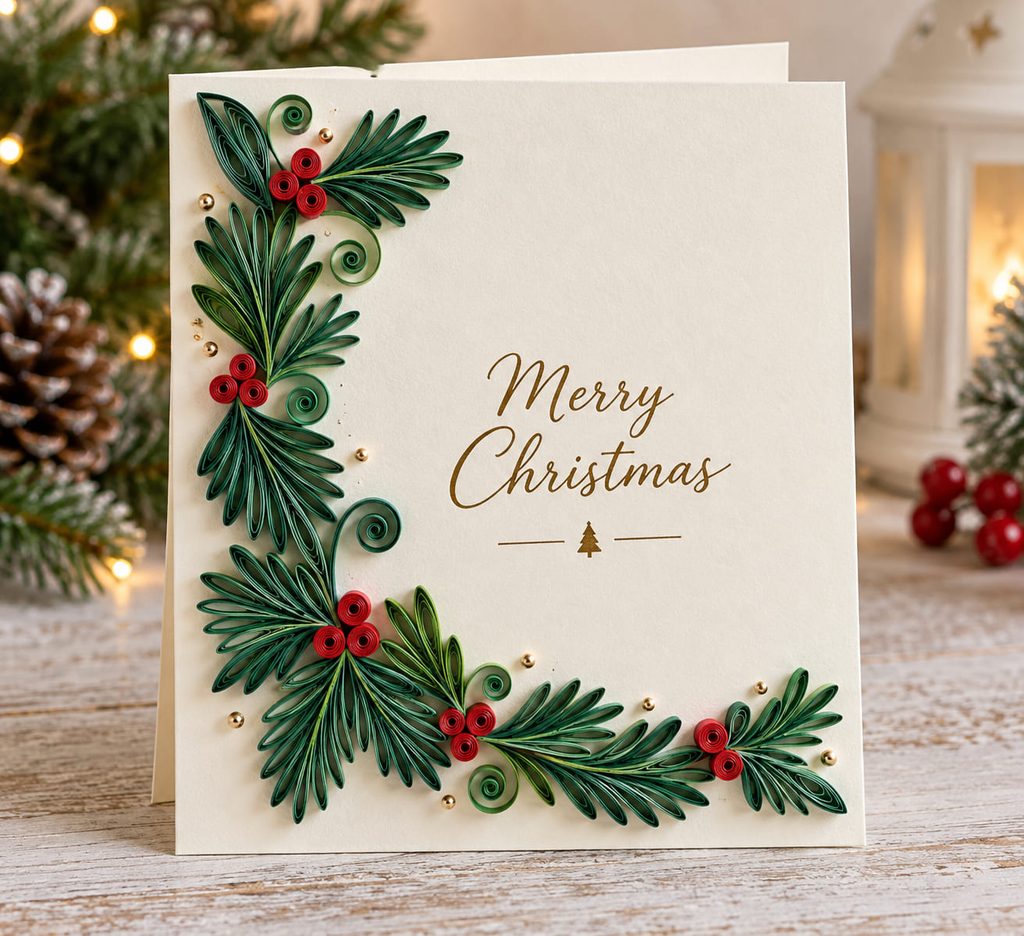
Comb quilling creates repeated loops quickly enough to build an evergreen border without filling the whole card front. Make several graduated loop units in green paper, pinch one end into a soft point, and overlap them along the lower edge and one side like short fir sprigs. Small tight red coils can sit between the sprigs as berries, while the center of the card stays open for a handwritten or printed greeting.
The border works best when its depth is controlled. Press the loop units flatter near the outer perimeter and reserve thicker coils for the lower corner, where they are less likely to catch as the card enters an envelope. Dry-arrange the garland before gluing so the greenery tapers rather than ending abruptly; a few shorter units near the top make the border look intentionally finished instead of cut off.

2. White Snowflake Card on a Deep-Color Shadow Mat
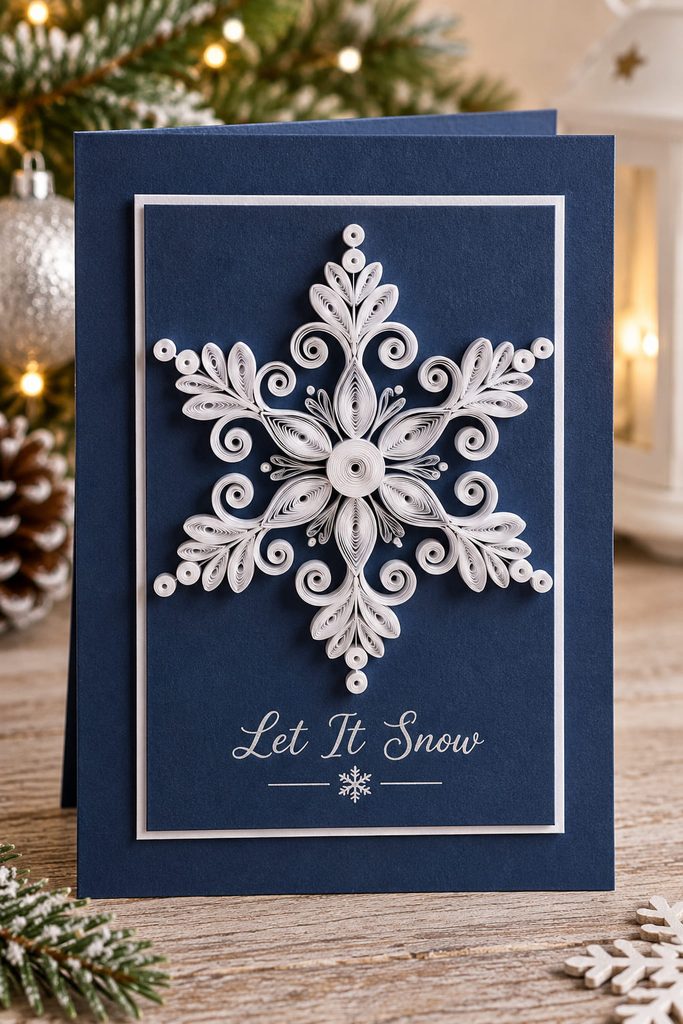
A white quilled snowflake becomes more legible when the background does the visual work. Build six matching arms from a small central coil, using open scrolls or marquises that let the navy, forest green, or burgundy mat show through; that contrast makes even a modest number of paper units look intricate. Work opposite arms as pairs rather than completing the snowflake clockwise, because radial errors are easier to spot while the glue is still adjustable. Before mounting it, set the finished piece over a simple six-spoke pencil guide and check that the tips reach roughly the same radius; the mat should frame the snowflake, not disguise an uneven center.
3. Suspended Quilled Bauble Window Card
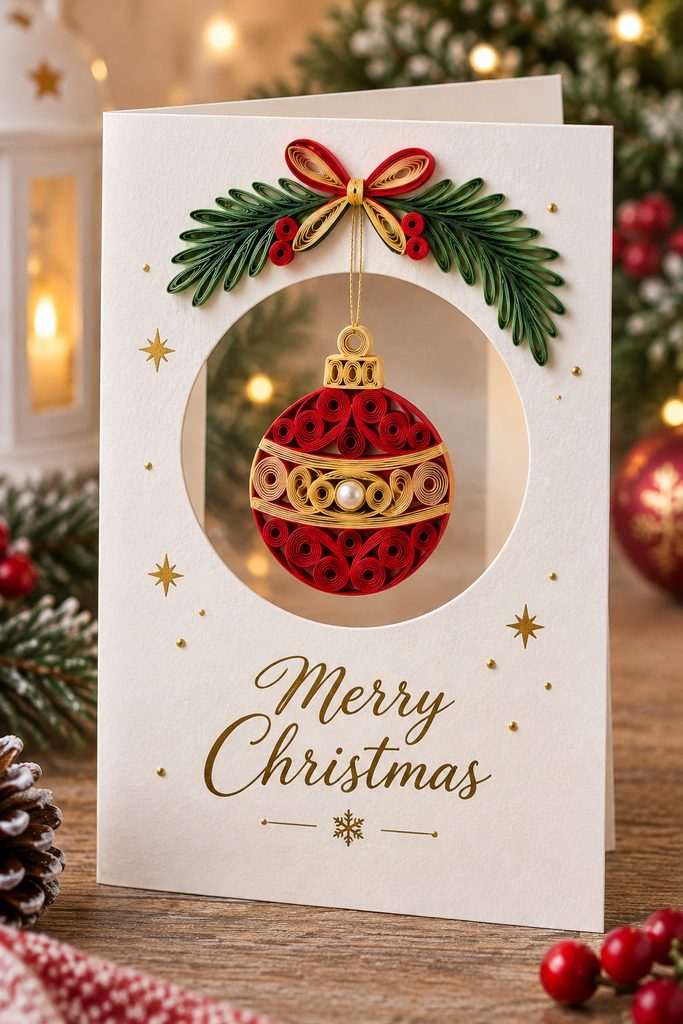
The movement comes from a quilled ornament hanging freely inside a circular opening rather than being glued flat to the card front. The window needs enough margin to support the thread, and the ornament needs enough clearance to swing without scraping the cut edge.

- Cut the front aperture before adding any quilling, then reinforce the top inside edge with a small hidden cardstock patch.
- Tie or glue fine thread to a closed quilled loop at the top of the bauble and anchor the thread between the card front and an inner facing layer.
- Build the bauble from concentric coils, scrolls, or teardrops, keeping the widest point smaller than the aperture.
- Close the card and gently tilt it. The ornament should move inside the opening without catching the edge or touching the fold.
Pivot Clearance Check: Leave visible air around the suspended piece. If the quilled edge brushes the window while the card moves, reduce the ornament diameter rather than widening a finished aperture and weakening the front panel.
4. Poinsettia Gatefold Card With an Off-Center Bloom
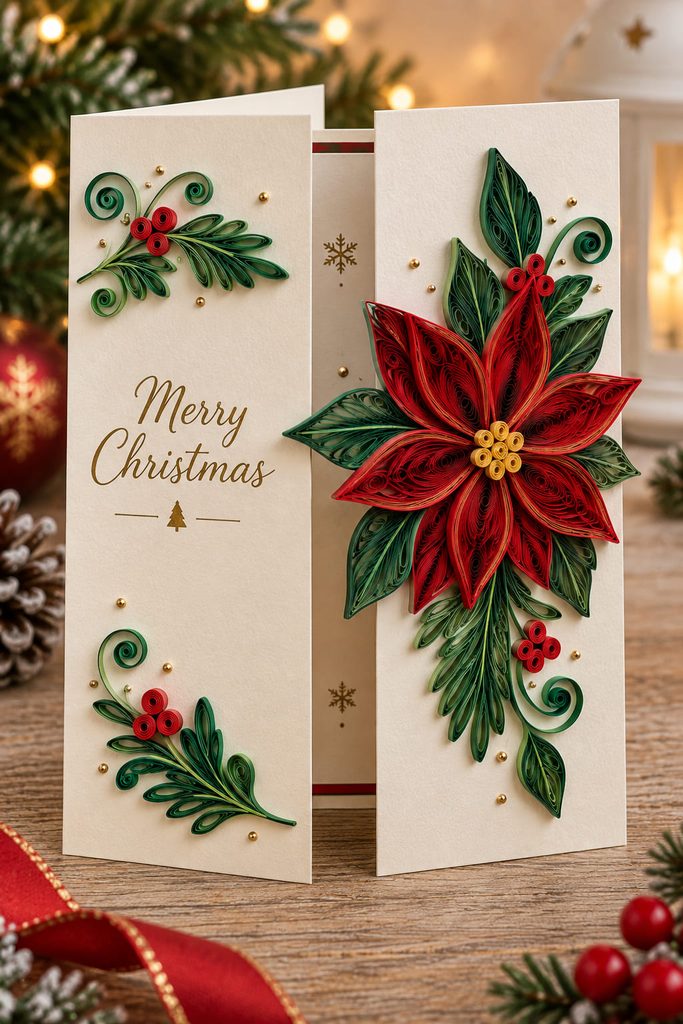
A gatefold gives a large quilled poinsettia room to feel dimensional, but the flower should belong to one door instead of physically bridging both. Place the bloom slightly off center on the left or right panel, then use a few paper scrolls or leaves to lead the eye across the seam. When the recipient opens the card, the flower moves safely with a single gate and the inside message is revealed without tearing a glued joint.
Build the petals from pinched teardrops and add the center only after the outer ring is set, so you can correct the spacing before the deepest coils go on. The fold itself should remain bare: quilling glued across a working crease will either flatten or pull loose. If you want the closed card to look visually continuous, let printed lines, a narrow paper strip, or unglued foliage cross the composition rather than making the quilled flower act as a latch.

5. Quilled Wreath Easel Card for Shelf Display
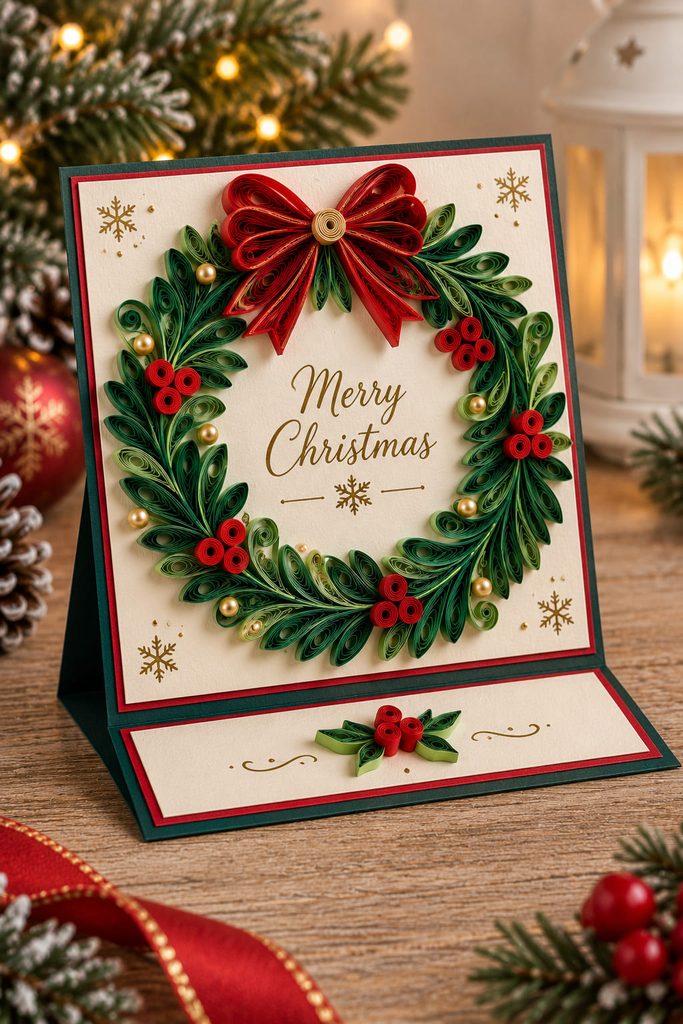
Choose an easel format when the card is meant to stay visible after it is opened. The quilled wreath sits on the upright display panel, while a raised stop on the base catches that panel at a controlled angle. Because the wreath adds weight above the fold, the base and stop matter more than extra decoration.
If the card slides flat: raise the stop slightly with layered cardstock or foam tape so the front panel has a firm edge to rest against.

If the card tips backward: reduce the angle or move heavy coils lower on the display panel; a top-heavy wreath needs a wider footprint.
If the wreath looks oval: dry-arrange leaf-shaped coils around a penciled circle before gluing, and distribute berry coils across both sides instead of loading one quadrant.
Easel Stability Check: Set the card on a smooth table and tap the surface lightly. It should remain upright without the quilled wreath touching the base.
6. Candle Vellum Window Card With Quilled Evergreen
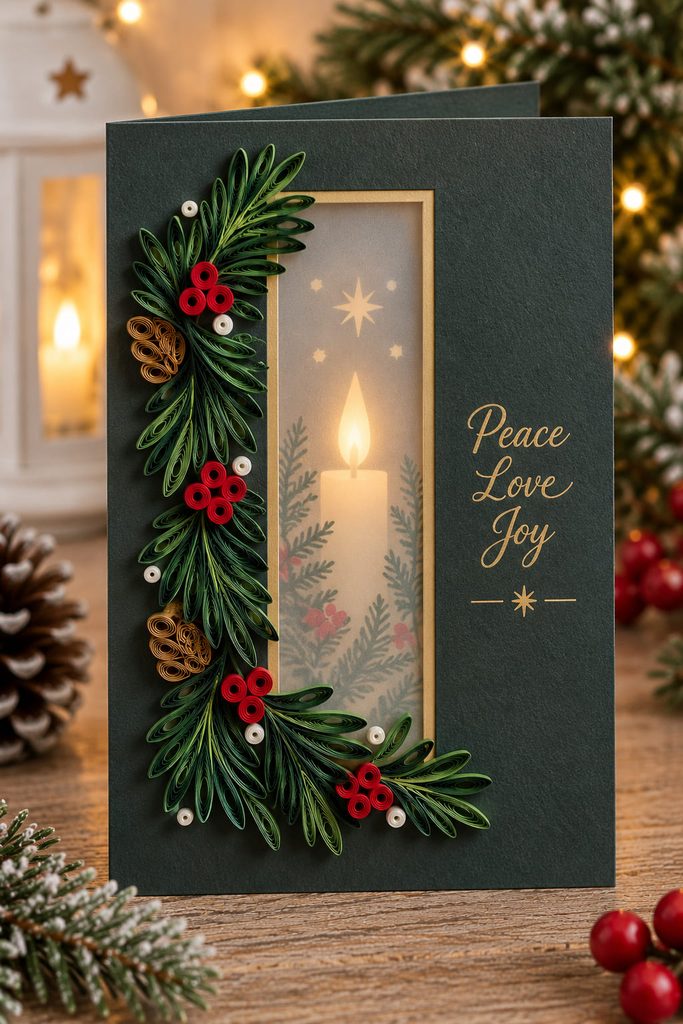
Vellum is useful here because it softens the contrast behind a simple candle silhouette without requiring an actual light source. Cut a narrow window in the card front, back it with vellum, and frame one side with quilled evergreen sprigs made from small marquises or combed loops. Keep the center of the window relatively open so the candle shape remains readable; filling every edge with coils defeats the translucent effect. A few red tight coils can suggest berries, but the handmade character comes from the combination of crisp cardstock, cloudy vellum, and visible paper coils rather than from adding more motifs.
7. Holly Z-Fold Mantel Card With Staggered Quilling
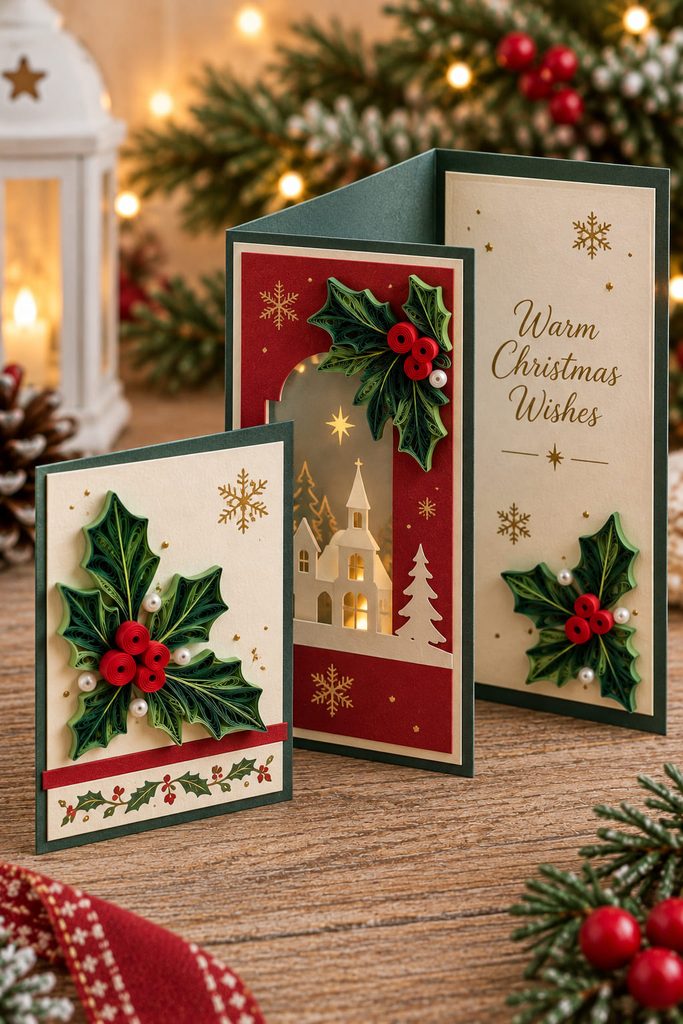
Opened on a table, a Z-fold can read like a tiny mantel scene: the back panel carries the greeting area, the middle fold creates depth, and the front strip acts as a low ledge for quilled holly. The useful trick is to assign each quilled cluster to one plane. Leaves that straddle two folds will be crushed or torn the first time the card closes.
Score the Z-fold first and test it without decoration. Then mark three safe zones: one for a holly cluster on the front strip, one for a smaller cluster on the middle panel, and one clear area on the back panel. Build the holly with marquise leaves and tight berry coils, rotating some leaves so the clusters do not look stamped from a single template.
For more depth, let one paper branch extend visually behind another panel, but keep the physical quilling inside its own fold zone. This preserves the layered scene without creating a collision point.
Closed-State Test: Fold the card completely flat before the final glue cures. If a berry coil presses into the opposite panel, move that unit inward or replace it with a flatter coil; do not force the folds around the decoration.
8. Quilled Star Pull-Tab Reveal Card
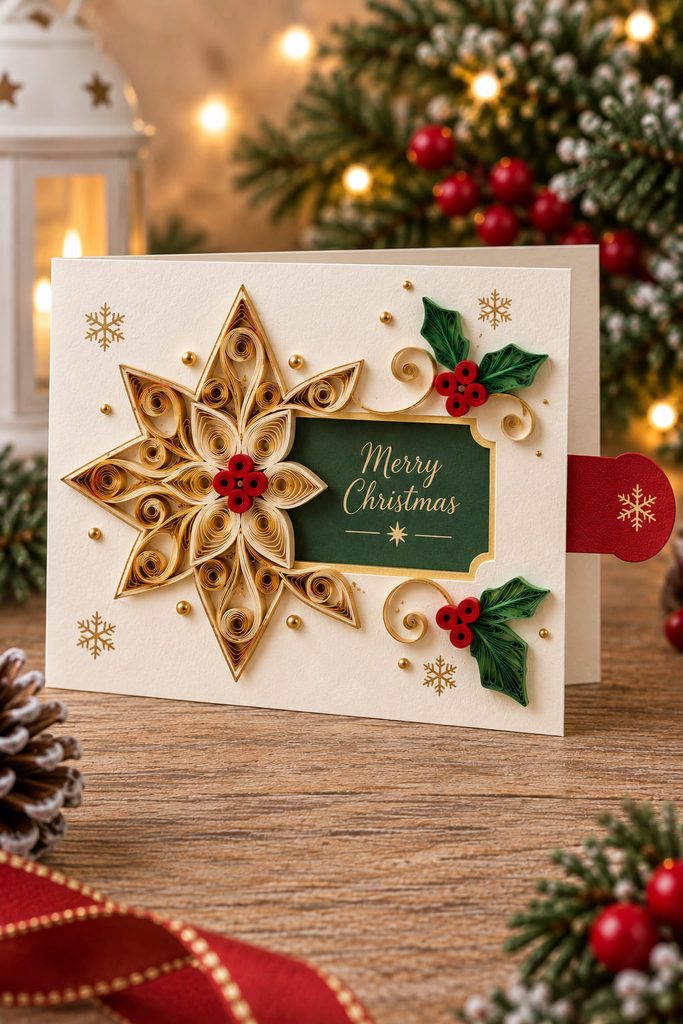
Keep the quilling fixed and let the paper mechanism move. A star-shaped quilled frame can sit around a small reveal window while a cardstock slider travels behind it, exposing a short holiday message or contrasting paper when the tab is pulled.
- Cut the reveal window and slider channel in the top panel, making the channel slightly wider than the slider so paper friction does not jam it.
- Add a hidden back panel that traps the slider but leaves the pull tab accessible at the edge.
- Glue the quilled star frame only to the stationary front layer, keeping every coil clear of the channel.
- Add a simple stop at the far end of the slider so it cannot be pulled completely out.
Pull the tab several times before adding the card front to its base. If the motion drags, fix the channel first; trimming quilling after it is glued near a moving edge is much harder.
9. Quilled Bell Sleeve Card With a Pull-Out Message Insert
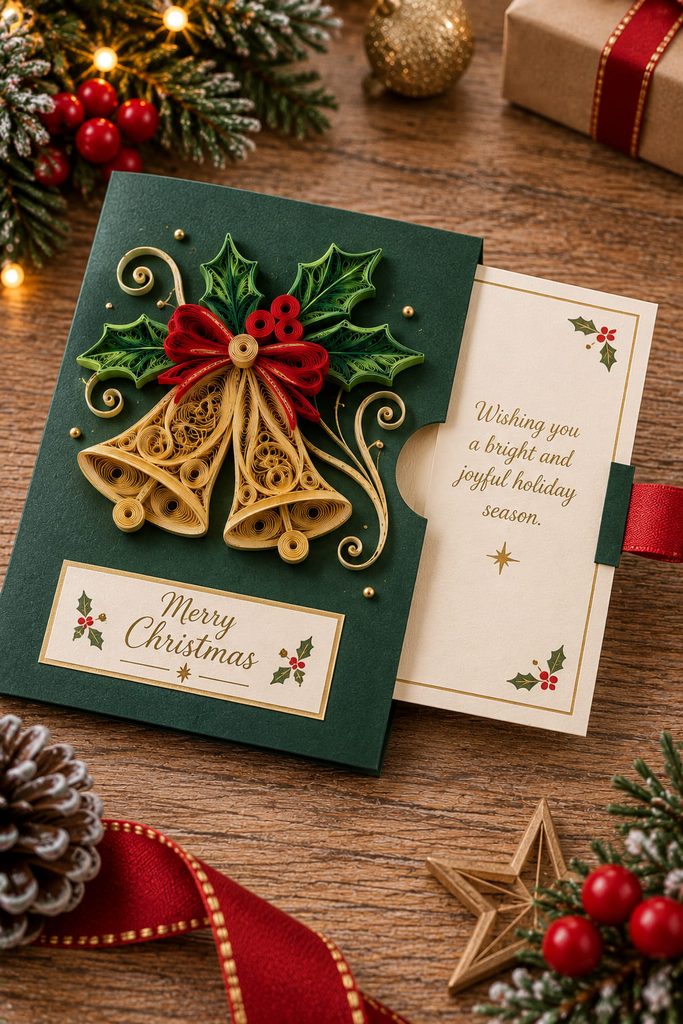
A sleeve card separates the fragile quilling from the message surface. Build a cardstock sleeve that stays decorated and a flat insert that slides out for writing; quilled bells, loops, and holly can remain on the sleeve while the recipient handles only the smooth inner card. The opening needs enough clearance for the insert but not so much that it slips out on its own.
| Sleeve Route | Best For | Main Trade-Off |
|---|---|---|
| Side-opening sleeve | A landscape card and a visible pull tab | The open edge needs a firm stop on the opposite side |
| Top-opening sleeve | A tall composition with hanging bell motifs | The insert can sink too deeply if the sleeve is oversized |
Insert Fit Check: Push the insert fully in, then pull it out with two fingers. It should move without bowing the sleeve or rubbing the quilled bells. If it binds, widen the paper clearance before adding more decoration.
10. Detachable Quilled Angel Keepsake Card
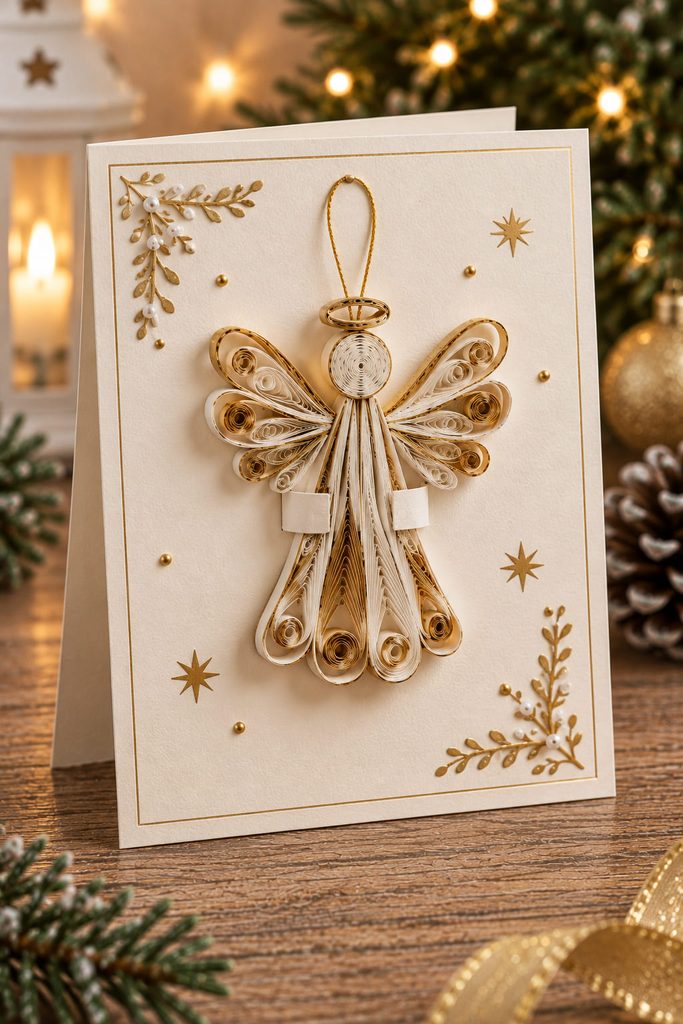
Turn the quilled focal piece into something the recipient can remove instead of permanently trapping it on the card. A small angel made from a rolled body, wing-shaped loops, and a closed halo coil can sit on the front as a temporary keepsake, then hang from a tree or gift hook after the card is opened.
Before attaching the angel, check that:

- the hanging loop belongs to the angel, not the card;
- two small paper tabs or slits hold it without glue on the quilled edges;
- the angel can lift free without bending its wings;
- the front still looks intentional after removal.
Avoid strong adhesive dots on delicate coils. The card acts as packaging and presentation, so the mounting method should release before the quilling does.
11. Accordion Christmas Village Card With Quilled Snow
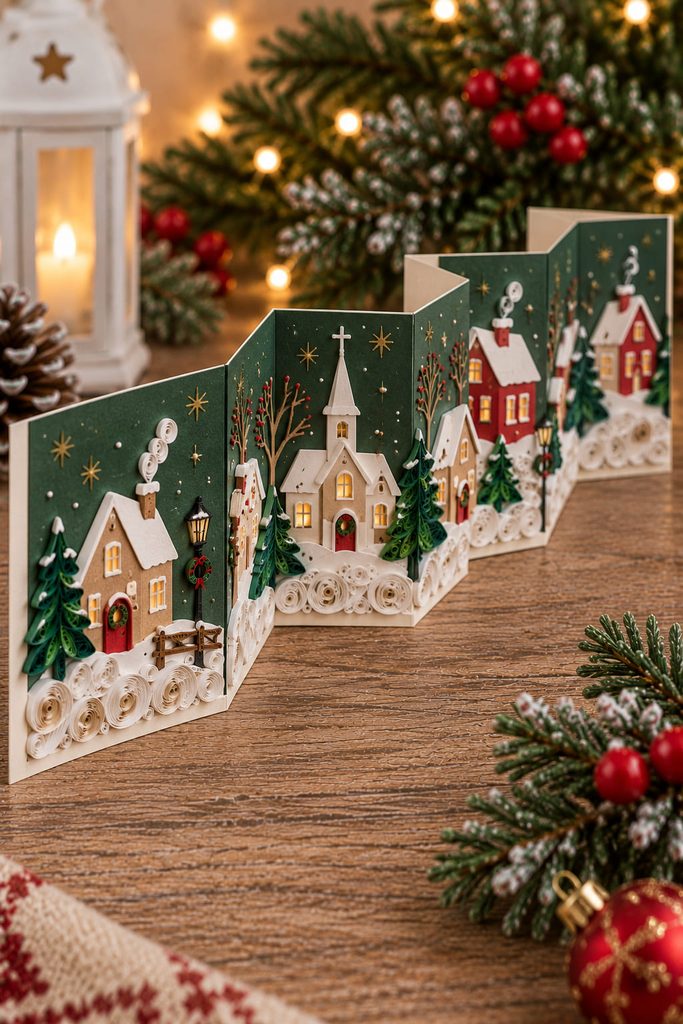
An accordion card turns a long strip of cardstock into a small panoramic village, which gives quilling a different role on each fold. Instead of building one large centerpiece, use low-profile coils as snowbanks, roof trim, tiny wreaths, or evergreen clusters that help the panels connect visually as the scene opens.
Plan the folds before cutting houses. Alternate mountain and valley creases, then place the tallest buildings away from the narrowest fold zones. Add the paper architecture first and reserve the quilling for surfaces that stay exposed in both the open and closed positions. Loose scrolls can make drifting snow, while small marquises form trees without adding much thickness.
The critical test is collapse, not appearance. Close the entire accordion from both ends and watch where one panel lands against the next. Any coil that sits directly under a roof edge or stacked cardstock layer will be compressed in storage, so shift it into a pocket of open space or replace it with a flatter unit. A slim paper belly band can hold the closed card without squeezing the quilled scene.
12. Recessed Nativity Card With Protected Quilled Figures
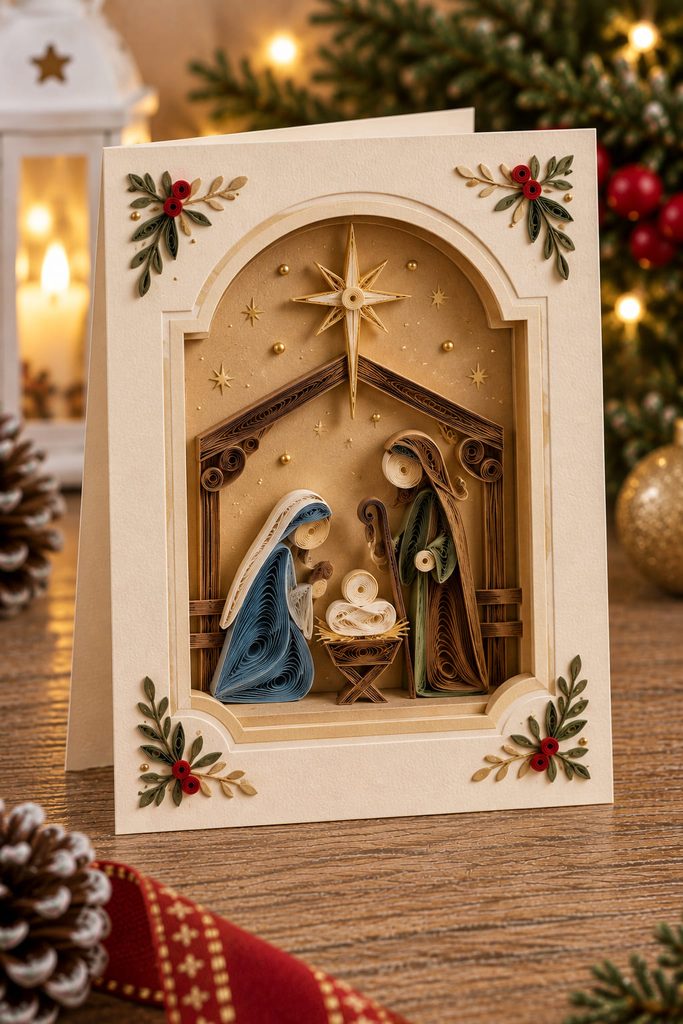
Delicate quilled figures are easiest to preserve when the card front gives them a shallow recess rather than pressing them under a flat cover. Build a simple frame from layered cardstock or a folded spacer around the perimeter, then place the nativity inside that protected zone. The recession creates real shadow and keeps the front surface from rubbing directly against halos, robes, or the star.
Use open coils and shaped strips to suggest the figures rather than trying to model every detail. A tapered teardrop can form a robe, a small closed coil can form a head, and a few curved strips can define the manger. Keep the silhouettes separated enough that each figure remains readable against the backing.
For a mail-ready version, keep the spacer shallow and use a rigid outer envelope or mailer appropriate to the thickness. For a hand-delivered card, a deeper frame allows more sculptural coils but also makes the piece behave more like a small display than a standard greeting.
More recession protects the quilling, but every extra layer increases bulk. Choose the frame depth before building the figures so the paper scene fits the protection you actually plan to use.
13. Slimline Candy Cane Card With Interlocking Scrolls
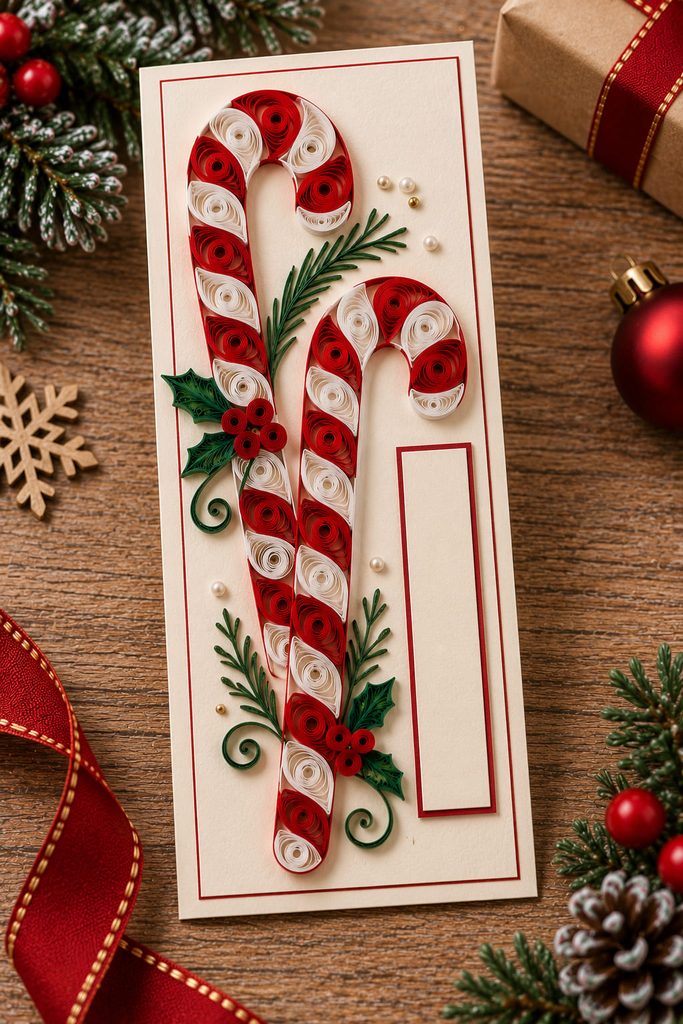
The tall, narrow proportions of a slimline card suit candy canes because the motif can run vertically without leaving a large empty field. Start with two gently curved on-edge paper spines, then alternate red and white loose scrolls along them so the color rhythm follows the bend. The spines carry the overall contour; the coils supply texture rather than having to support the entire shape.
Keep the outermost scrolls inside the card perimeter and leave a clean margin around the fold. Because the design is long, small alignment errors accumulate quickly: sight down the card from top to bottom before the glue sets and correct any section where the paired canes drift apart. A narrow sentiment strip can sit beside the quilling without competing with the vertical motion.
14. Rotating Star Wheel Card Framed With Quilling
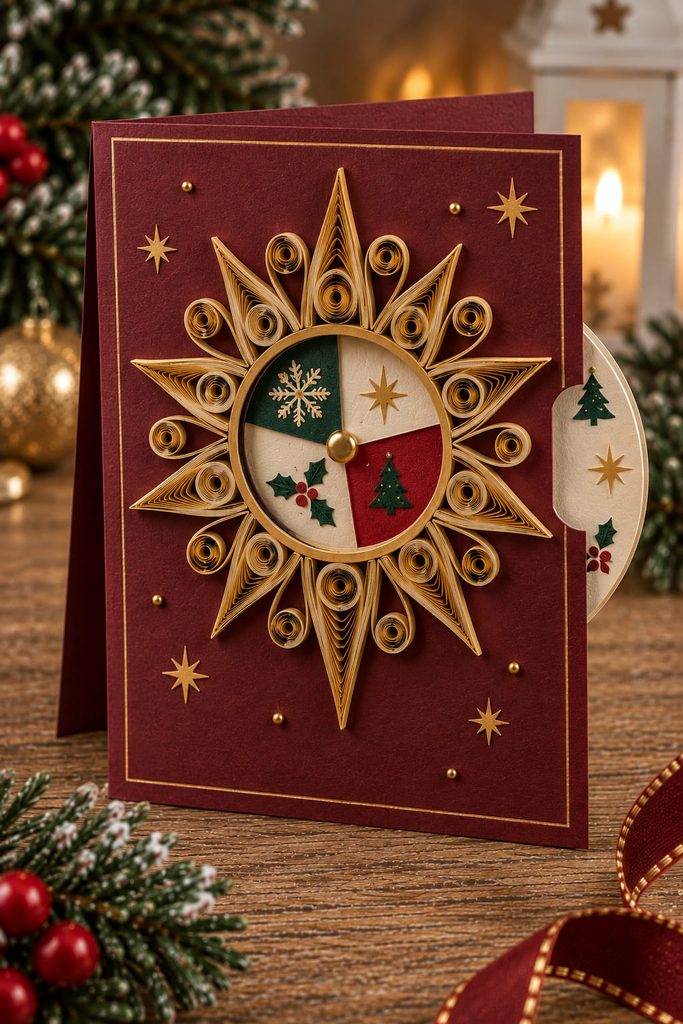
A rotating paper wheel adds interaction without asking the quilled pieces themselves to move. Mount a decorated cardstock disc behind the front panel on a small paper fastener, cut one or more viewing openings, and surround the main window with a quilled starburst. As the recipient turns the exposed edge of the disc, different colors or small paper details appear behind the stationary coils.
Centering the pivot matters. If the fastener is off center, the wheel can scrape the card edge or drift into the quilled frame. Dry-fit the disc, mark its full rotation path, and keep every coil outside that circle before gluing the starburst. A thin spacer layer around the wheel can reduce friction without making the card excessively bulky.
Wheel Clearance: Rotate the disc through a full turn while the card is lying flat. Nothing should lift the quilling, snag the window, or expose the wheel beyond the intended edge.
15. Freestanding Gift Box Card With a Quilled Paper Bow
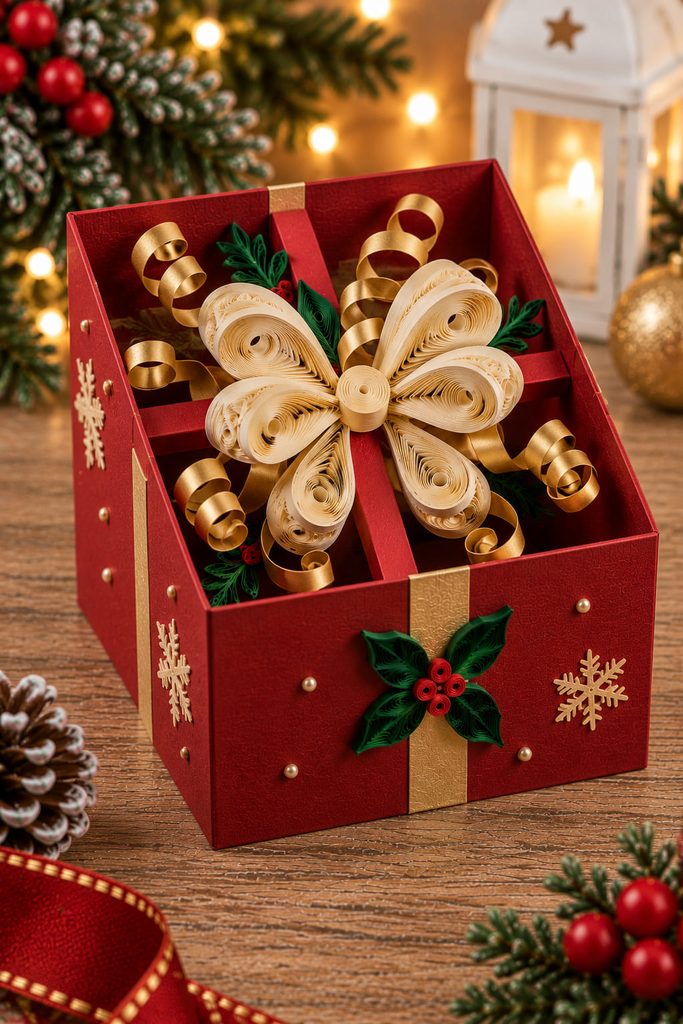
For a hand-delivered card that doubles as a small display, use a box-card base that stands open on its own and folds flat when the side panels collapse. The quilling can become the bow and curled ribbon rather than simply sitting on a flat greeting front.
- Score the box-card walls and glue the side tab so the base opens into a stable rectangle; make sure the bottom edges sit level on a table.
- Add one or two internal crossbars, then test the collapsing direction before decorating them.
- Build the bow from large paper loops anchored to a small cardstock center, and attach curled quilling strips or loose coils to the crossbars so they rise above the “gift.”
- Collapse the card slowly. Bow loops and curls must nest inside the footprint without catching the side walls.
A larger bow looks festive but also creates the main failure point. If the card will not fold flat, reduce the loop depth or move the bow toward the center rather than forcing the side panels around it.
How to Keep Quilling Christmas Cards Mail-Friendly
Quilled paper is light, but raised coils can snag, flatten, or transfer pressure marks if the card is packed too tightly. For mailed cards, keep the highest coils away from the outside edges, let liquid glue dry completely before closing the card, and use an envelope with enough room for the actual finished thickness. A rigid insert or outer mailer can help when the front includes a recessed frame or other dimensional structure.
Strip width also changes the feel of the finished card. Narrow strips produce finer scrollwork and lower profiles; wider strips create bolder edges but can make small motifs feel heavy. Use the same strip width across repeating elements such as snowflake arms or holly leaves unless the size change is intentional.
For batch-making, prepare repeated components first—berries, leaf units, small loops—then assemble complete cards one at a time. That keeps color and scale consistent without leaving multiple partly glued fronts exposed on the worktable.
Choose the Card Mechanism Before the Motif
If the card needs to travel through the mail, begin with the fir garland, snowflake, vellum window, or slimline candy cane designs and keep the quilling low-profile. For a card that will be hand-delivered and displayed, the easel, Z-fold, accordion, rotating-wheel, and box-card formats give the paper coils more room to become part of the structure.
The most useful next decision is not the Christmas motif but the interaction: flat, opening, moving, removable, or freestanding. Once that is clear, the quilled shapes can support the card instead of simply decorating it. If you want to carry the same technique into ornaments, place settings, garlands, and other holiday projects, continue with 15 Christmas Quilling Ideas Full of Festive Detail.