

This post contains affiliate links. As an Amazon Associate I earn from qualifying purchases, at no extra cost to you. Thank you for supporting Diynify!
Cardboard Christmas tree ideas can be as simple as a few layered corrugated triangles or as architectural as a freestanding ribbed sculpture. The material is especially useful when you let its stiffness, fluted edges, scored folds, and layered thickness become part of the design instead of trying to disguise them.
Most projects here use clean corrugated cardboard, a ruler, a cutting mat, a sharp craft knife or sturdy scissors, and paper-safe glue. Tighter folds work better with thin packaging board or paperboard; larger freestanding pieces benefit from stiffer corrugated sheets. A few ideas also need twine, removable wall-safe hanging hardware, vellum, or lightweight ornaments. Choose by function first: flat pieces are easiest to store, containers and displays need real access and support, and hanging designs need reinforced attachment points.

1. Layered Corrugated Triangle Tree
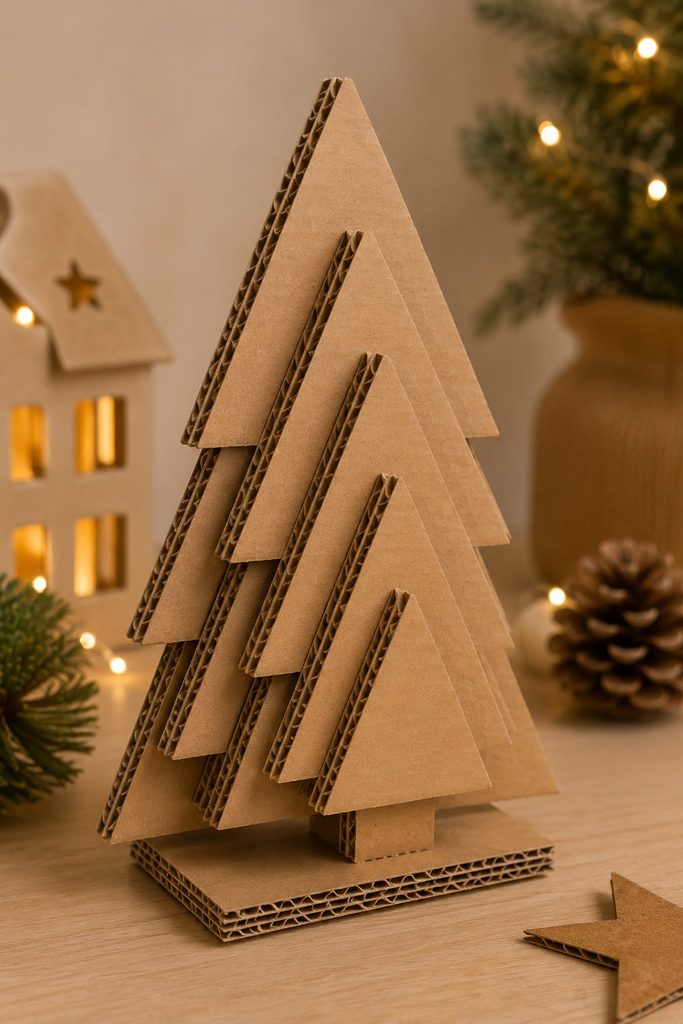
For a fast tabletop project, cut three to five simple tree triangles in decreasing sizes and laminate them with narrow cardboard spacers between the layers. Rotate the corrugation direction on one or two pieces so the exposed flutes create different edge shadows, then keep the trunk and base visually quiet. This works because the depth comes from actual cardboard thickness rather than tiny applied decorations; a small tree still reads clearly from across a room. Use a wide rectangular foot or glue the stack to a short folded base if the layered front makes it want to tip forward.

2. Folded Cardboard Tree Place Card
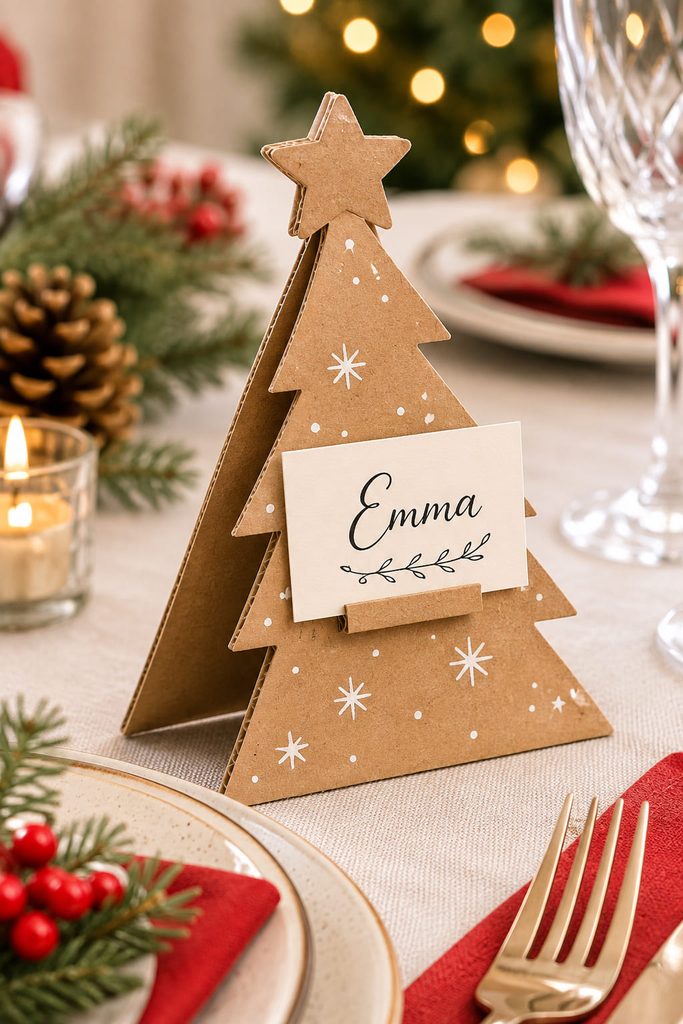
Fold a strip of thin packaging board into a stable inverted V, then cut the front panel into a clean Christmas-tree silhouette while leaving the fold intact at the top. A narrow slit or glued paper tab on the front can hold a name card without asking the decorative tree itself to carry much weight.
The useful part is the double duty: the folded body supplies the footprint, while the replaceable name card keeps the tree reusable for another dinner. Keep the back leg slightly shorter only if you want the face to lean toward seated guests; otherwise match both legs so the marker stands upright and does not crowd a plate setting.
3. Buttressed Floor-Standing Cardboard Tree
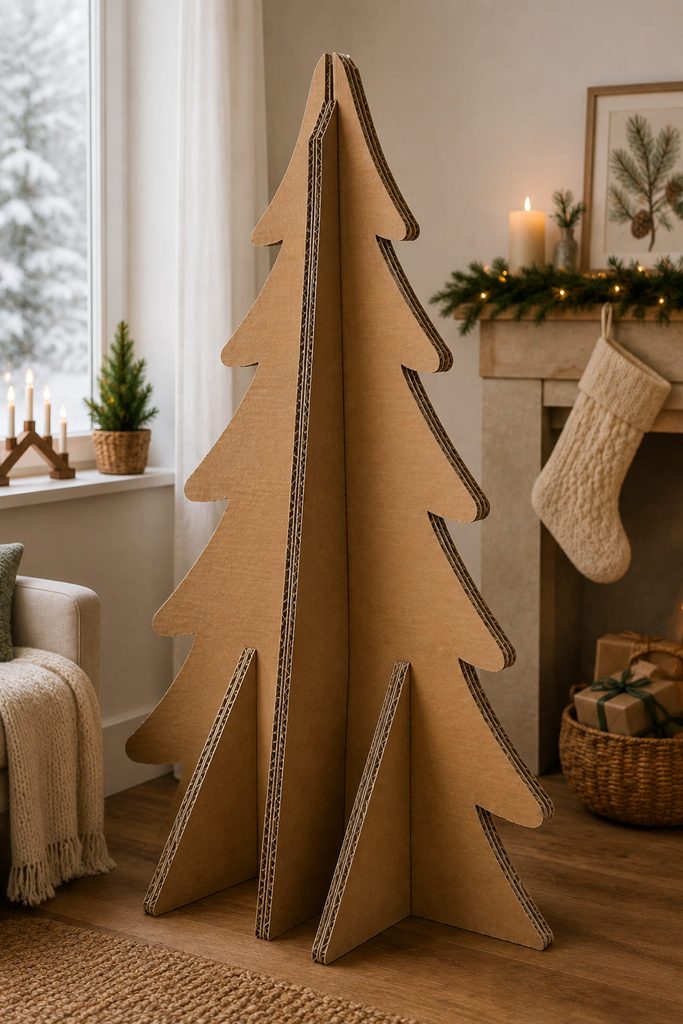
Once a cardboard tree reaches floor scale, the main problem is no longer the silhouette—it is preventing a broad flat panel from flexing or falling forward. Cut the tree front from sturdy corrugated board, laminate a second strip down the rear centerline, and add two folded triangular buttresses near the lower third. The rear braces turn a decorative cutout into a supported structure without using the cross-slot construction common in smaller paper trees.
Before decorating the face, check the structure:
- The bottom edge sits flat rather than rocking on one corner.
- Both buttresses contact the floor and the rear panel at full glue surfaces.
- The center reinforcement reaches into the widest, heaviest part of the tree.
- Lightweight ornaments do not pull the upper half noticeably forward.
Floor-Tree Stability Test: If the undecorated tree leans when gently nudged, widen the rear brace footprint or reduce upper-layer weight before adding more surface detail.
4. Stacked Corrugated Disk Tree
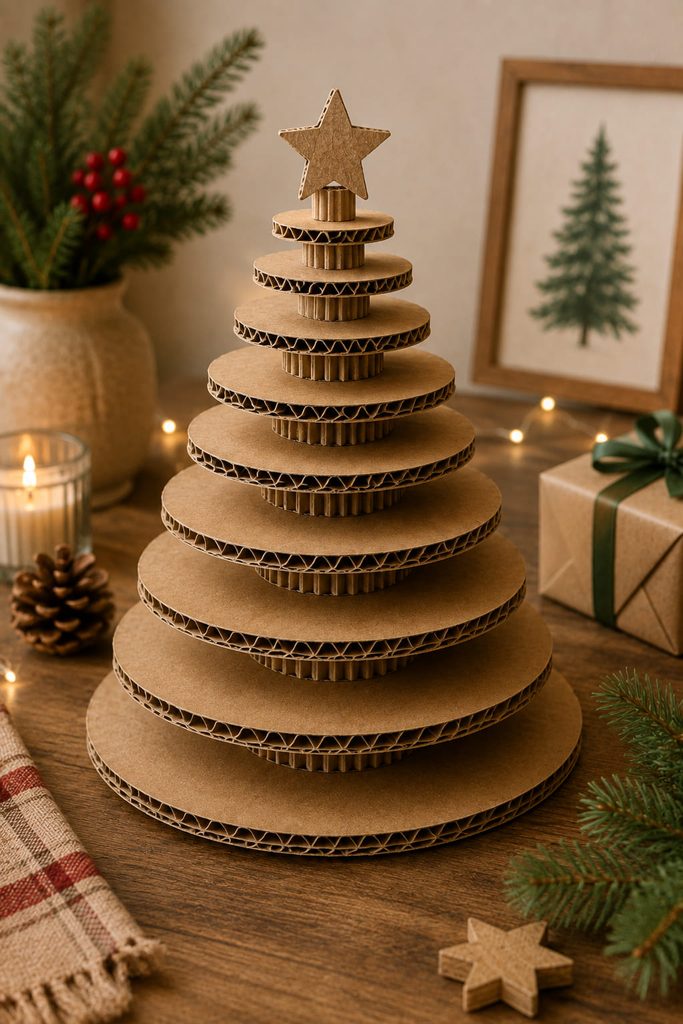
Stacking flat corrugated disks around a central cardboard sleeve creates a tree with strong horizontal shadow lines and almost no fussy cutting. Make a graduated set of circles, punch or cut the same centered opening in each one, and slide them onto a tightly rolled cardboard tube or laminated square spine. Small spacer rings between the disks keep the tiers from collapsing into one dense cone.
A reliable order is:
- Build and square the central sleeve first.
- Test the widest disk on the base before adding upper tiers.
- Add disks from largest to smallest, checking that each stays level.
- Finish with a lightweight star or pointed cap that does not bend the spine.
The result is easy to read from every side, which makes it more useful as a dining-table or island centerpiece than a flat-backed tree.
5. Scalloped Shingle Cardboard Wall Tree
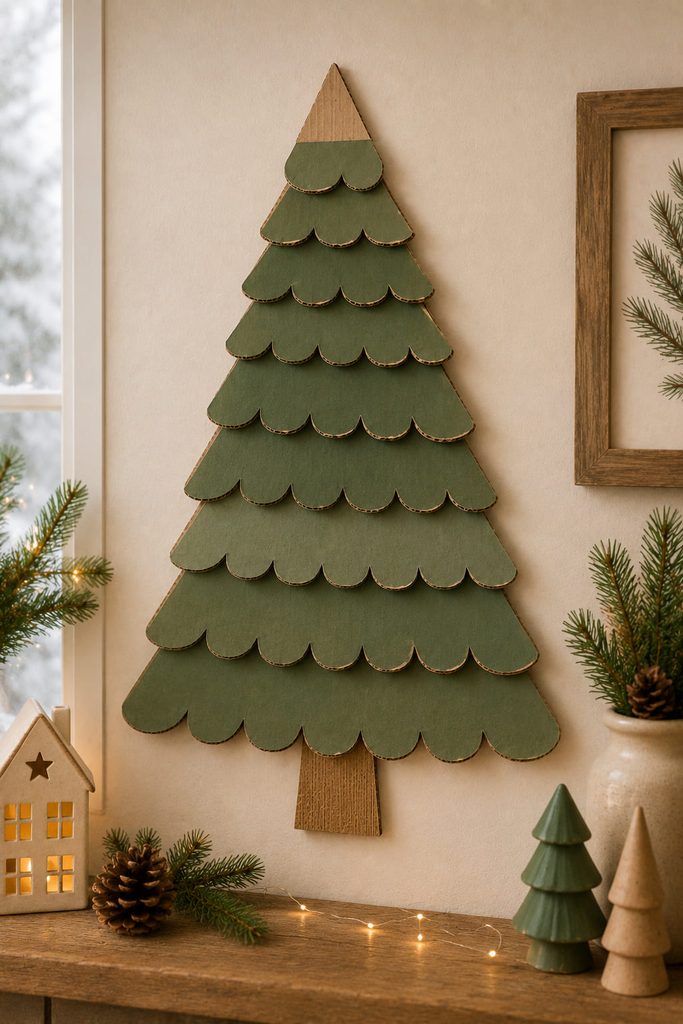
From across a room, repeated curved edges can suggest branches more effectively than dozens of individually cut needles. Start with a triangular backing and overlap rows of half-circle or shallow scalloped cardboard pieces from the bottom upward, leaving the lower edge of each row free so it casts a narrow shadow. Use exposed kraft board for a quiet graphic look or paint only the scallop faces while leaving the corrugated cut edges visible. Because the backing carries the load, the shingles can stay thin; hang the finished piece from the backing board rather than punching a hole through the top decorative row.

6. Faceted Cardboard Pyramid Tree
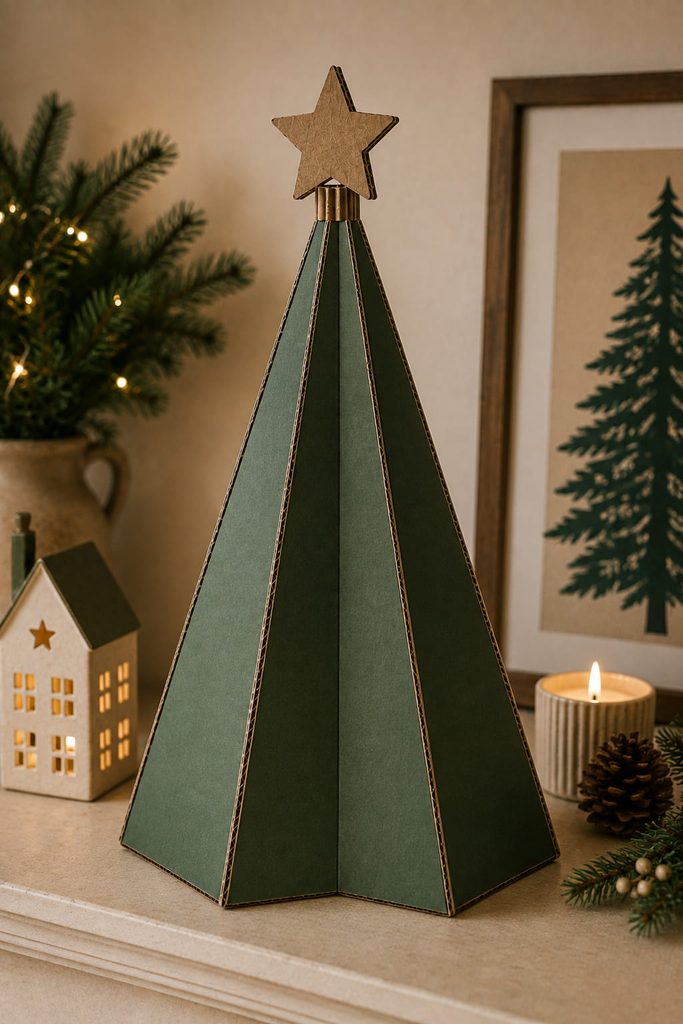
If you want a crisp geometric centerpiece, build the tree as a hollow tapered shell instead of forcing thick corrugated board into a smooth cone. Four or six long triangular panels joined along scored tabs create distinct planes that catch side light and give the cardboard a more finished architectural look.
Thin single-wall corrugated board can work if the flute direction follows the length of the panels, but tight fold lines are easier in dense paperboard. Pre-score every hinge, dry-fit the shell, and close the last seam only after the base edges meet evenly. A small opening underneath makes it easier to press tabs from inside during assembly.
The trade-off is storage. A fully glued shell is rigid and bulky; a tab-and-slot closing seam can let the piece open flatter after Christmas. If storage matters more than a perfectly seamless edge, make the final joint removable.
7. Cardboard Pocket Advent Tree
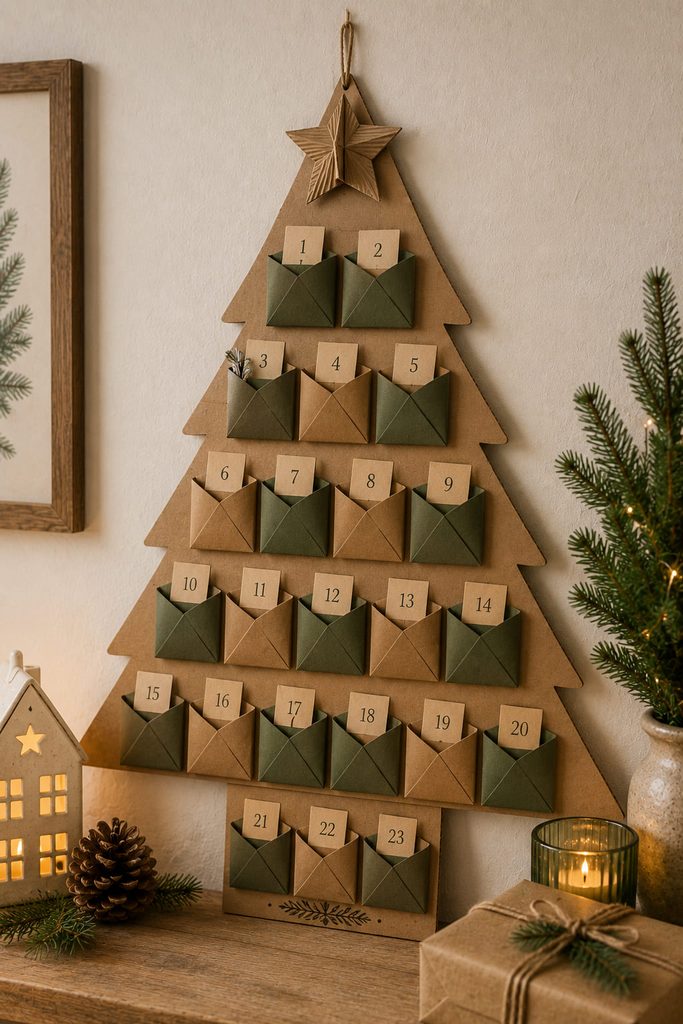
Treat the tree as a wall organizer: a large triangular backing carries rows of small folded pockets, each sized for a note, activity slip, or other very lightweight item. The pockets create the branch rhythm, so they should be attached from the bottom upward with enough vertical gap for fingers to reach the opening above. This is more functional than gluing envelopes onto a decorative silhouette because the pocket fold itself provides depth and retention.
For each pocket, fold side gussets or a shallow box shape, glue the closed edges to the backing, and leave the top edge completely free. Reinforce the backing where the hanging cord or wall hardware attaches; the load belongs in the board, not in the uppermost pocket.
Pocket Load Check: Fill several pockets before mounting the organizer. If the backing bows or a pocket mouth collapses, reduce the contents, increase the backing stiffness, or add a second support point. The tree should remain easy to access without needing to press against the wall to retrieve an item.
A narrow trunk-shaped label zone at the bottom can hold a family name or seasonal message, but the organizer still works without extra lettering—the stepped pocket layout is what makes the tree recognizable.
8. Open-Cubby Cardboard Tree Display
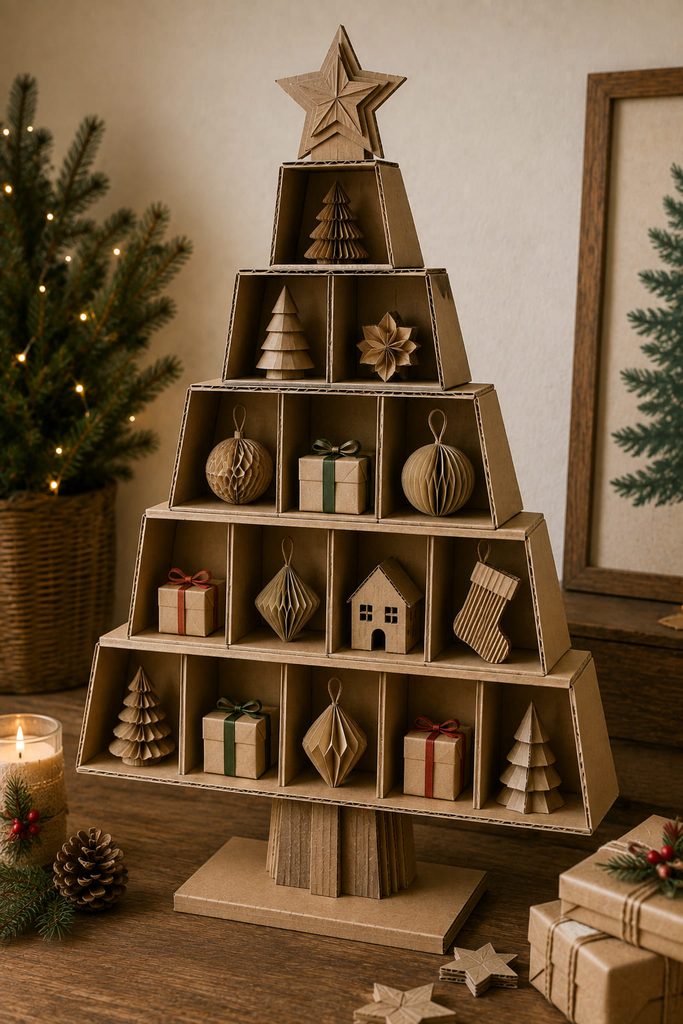
Instead of covering a tree with ornaments, make the tree from the display compartments themselves. Fold small open-front cardboard boxes in two or three graduated sizes, then stack them in a triangular arrangement on a broad base so every cubby remains accessible from the front.
Check the function before gluing the modules together:
- Lowest cubbies are the widest and carry most of the weight.
- Each box has a full back panel so it cannot rack sideways.
- The base extends far enough forward to resist tipping.
- Objects sit entirely inside the cubbies rather than projecting from the top row.
- The finished unit can be lifted from the base without the stack separating.
This format suits lightweight ornaments, rolled notes, or small wrapped favors; it is not a substitute for shelving intended to carry heavy objects.
9. Cross-Notched Lattice Window Tree
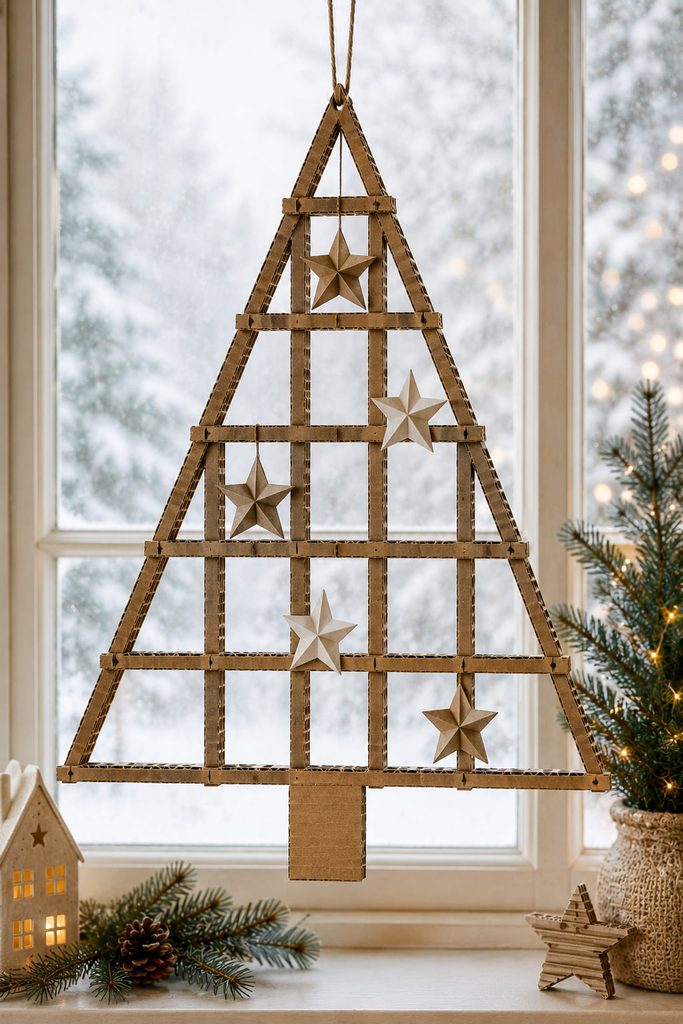
Light from a window can become part of the design when the tree is mostly open space. Cut a sturdy triangular frame, then fill it with vertical and horizontal cardboard strips joined through matching half-depth notches. The strips cross in one plane, creating a rigid lattice without pretending to be woven; the grid stays airy enough for daylight to pass through.
Use corrugated strips for a rustic structure or smoother paperboard for cleaner intersections. Add a reinforced hanger to the outer frame, not an interior crosspiece. A few lightweight paper stars can occupy selected openings, but leaving most cells empty preserves the silhouette against glass.

10. Peg-In Ornament Display Tree
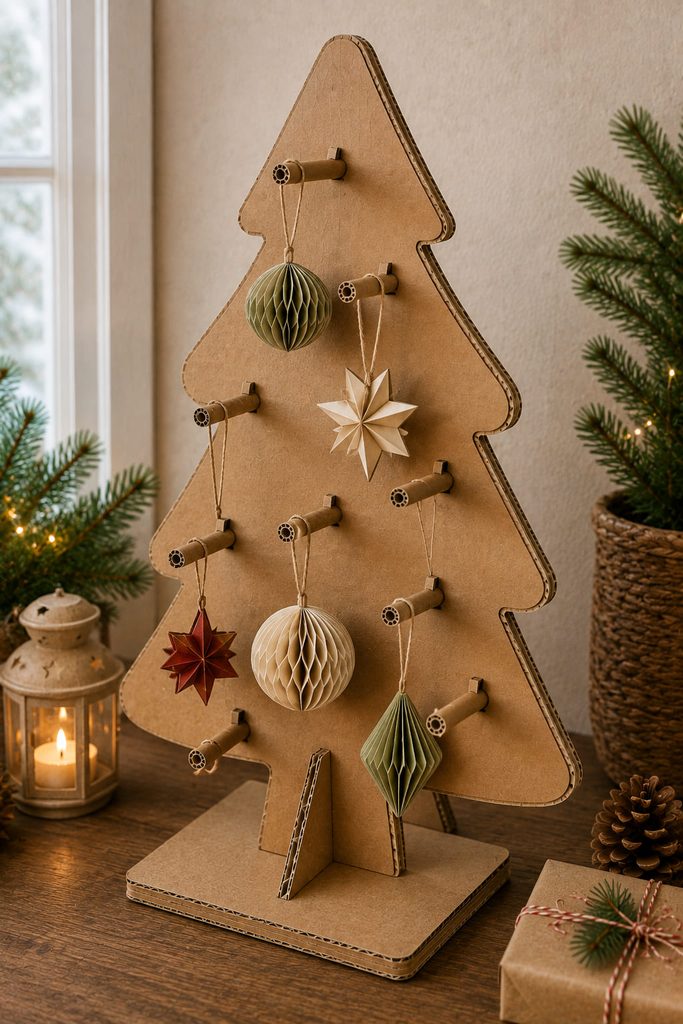
The ornaments become movable when a triangular cardboard panel carries removable rolled-cardboard pegs instead of permanently glued decorations. Laminate the main panel for stiffness, cut a pattern of snug horizontal slots, and roll narrow strips of thin cardboard into short tubes with flat tails that pass through the slots and fold sideways behind the panel.
Use this sequence:
- Build one peg and test its tab in a scrap slot.
- Adjust the slot so the tab passes through without tearing the face.
- Repeat the hole pattern only after the test peg holds a lightweight ornament.
- Add a rear foot or broad base that keeps the loaded panel upright.
- Leave enough space between pegs for ornaments to hang without colliding.
Peg Retention Check: A peg should resist a gentle outward tug before anything small is hung from it. If it slips, enlarge the rear tab rather than forcing a tighter slot that could split the panel.
11. Nested Gift-Box Christmas Tree Tower

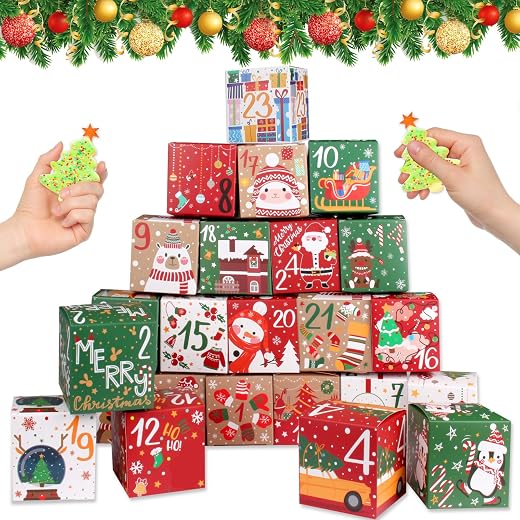
For presents that should become part of the decor, stack closed cardboard boxes in decreasing sizes and treat the tower as one tree-shaped gift display. Square boxes give the cleanest stepped silhouette; shallow rectangular boxes can create wider “branches” if their centers stay aligned.
Each box still needs to work as a container, so every level should separate cleanly. Decorate each box first, then connect the stack with removable paper bands or low-tack joining tabs that stop casual shifting without becoming permanent seams. The recipient can lift off upper boxes and open one lid without tearing the packaging apart. Keep the heaviest gift at the bottom and avoid making the top decorative star large enough to act like a lever.
12. Fold-Flat Hinged Cardboard Tree Screen
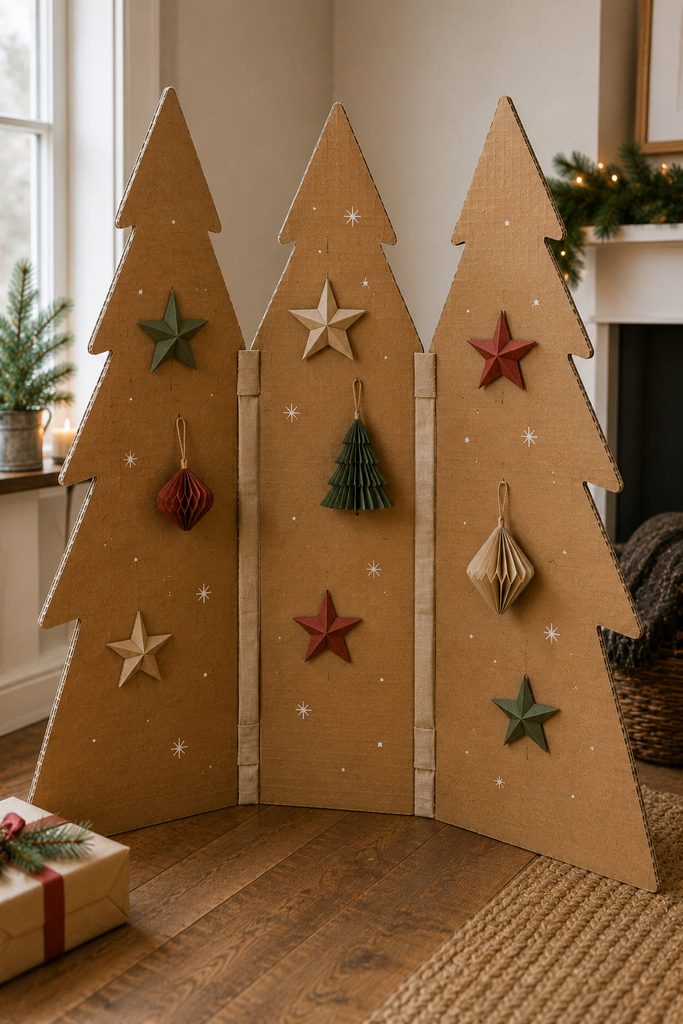
Storage is the reason to choose a hinged tree screen over a rigid floor sculpture. Cut three tall tree-shaped panels, connect their vertical edges with flexible paper or cloth hinge strips, and open them in a shallow zigzag so the folds create the footprint. The silhouette can stay simple because the changing panel angles supply the depth.
There are two useful hinge routes:
| Route | Best For | Trade-Off |
|---|---|---|
| Glued flexible hinge strips | A screen that opens and closes repeatedly | The hinge line remains visible |
| Interlocking cardboard hinge tabs | An all-cardboard build with no fabric strip | Tabs need more cutting clearance and can wear faster |
Closed-State Check: Fold the screen completely flat before adding ornaments, stars, or raised trim. Anything that collides across a hinge will prevent compact storage and should move inward from the fold line.
13. Suspended Tier Cardboard Tree Mobile

Hanging tiers need a controlled center of gravity more than they need a heavy frame. Cut three to five lightweight cardboard rings or broad triangular tiers in decreasing sizes, pierce each at the center, and suspend them on one cord with knots or short rolled-cardboard spacers between levels. When the tiers are level, the gaps create the tree silhouette in open air.
If the mobile tilts, diagnose the cause before trimming the shapes: a center hole may be off-axis, one decoration may be heavier than its opposite, or a spacer may be pressing against the tier at an angle. Correct the weight or suspension point first. Finish the cord with a reinforced loop and choose hanging hardware for the actual mounting surface. Keep the lowest tier clear of walls, doors, and nearby branches so it can rotate without striking anything.
14. Layered Contour Cardboard Shadow Tree
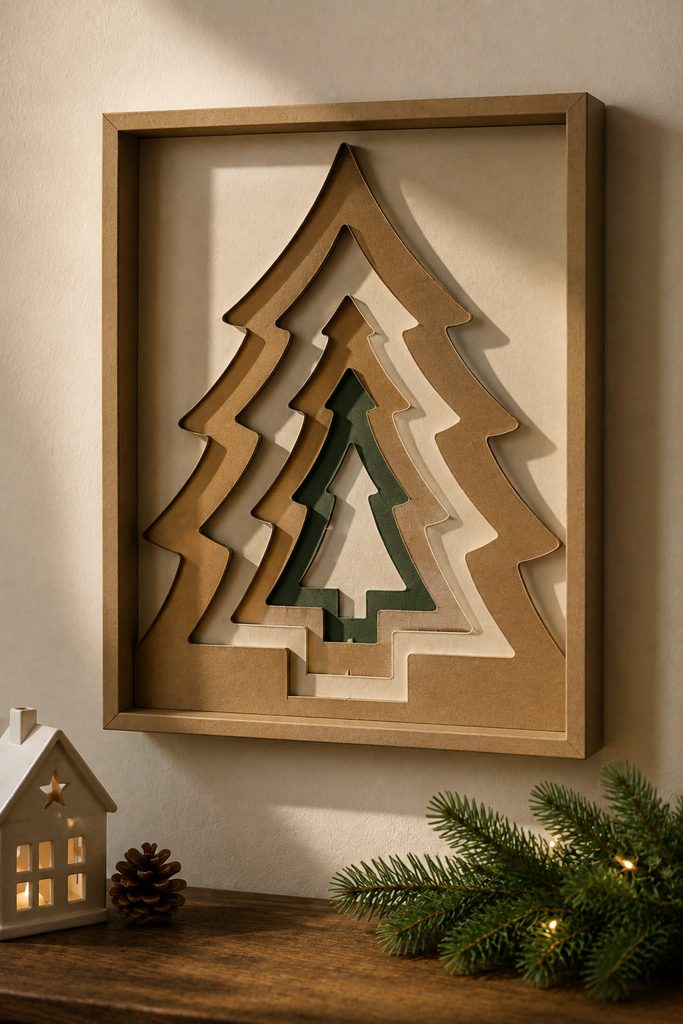
Depth without a bulky freestanding object comes from repeating the tree outline inside a shallow frame. Cut several nested tree silhouettes or contour bands from cardboard, then separate the layers with narrow spacer strips so each opening reveals the one behind it. A dark front layer with lighter kraft or cream layers behind it makes the recesses easy to read even without added ornaments.
Build from the back forward so every spacer stays hidden behind the layer it supports. The outermost backing should carry the hanging hardware and the frame, while the decorative contours remain unloaded. This approach works especially well when storage space is limited because the finished piece behaves like framed wall art rather than a seasonal sculpture that needs shelf depth.
15. Architectural Ribbed Cardboard Christmas Tree
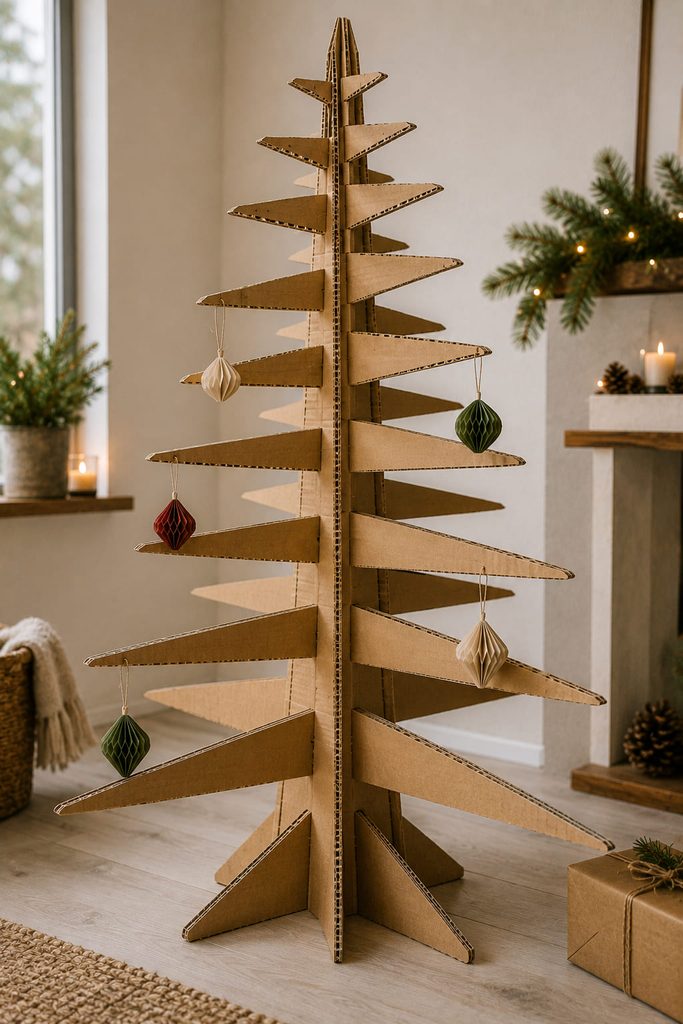
The most sculptural option uses a central vertical spine with a sequence of horizontal branch ribs, each one slotted onto the spine at a different height. Unlike a stacked-disk tree, the ribs can be elongated diamonds, shallow chevrons, or asymmetric branch shapes, leaving generous air between levels and producing a tree that changes noticeably as you walk around it.
Start with the spine because every rib depends on it being straight and stiff. Laminate two corrugated strips with their flute directions crossed, mark all slot positions, and cut matching slots into the ribs. The slot width should fit the actual cardboard thickness rather than a nominal measurement; coatings, crushed flutes, and laminated layers can change the fit.
Assemble the lower ribs first and watch the footprint. If long upper ribs make the tree sway, shorten them or widen the base before adding more layers. Decoration should stay secondary to the structure—small hanging pieces near the rib tips add movement, while heavy ornaments would increase leverage on the slots.
Rib Alignment Test: View the tree from the side before the glue sets. Ribs that rise or dip usually indicate an uneven slot, not a crooked decorative edge; correct the joint while it is still accessible.
16. Folded-Prism Cardboard Tree Wall Sculpture
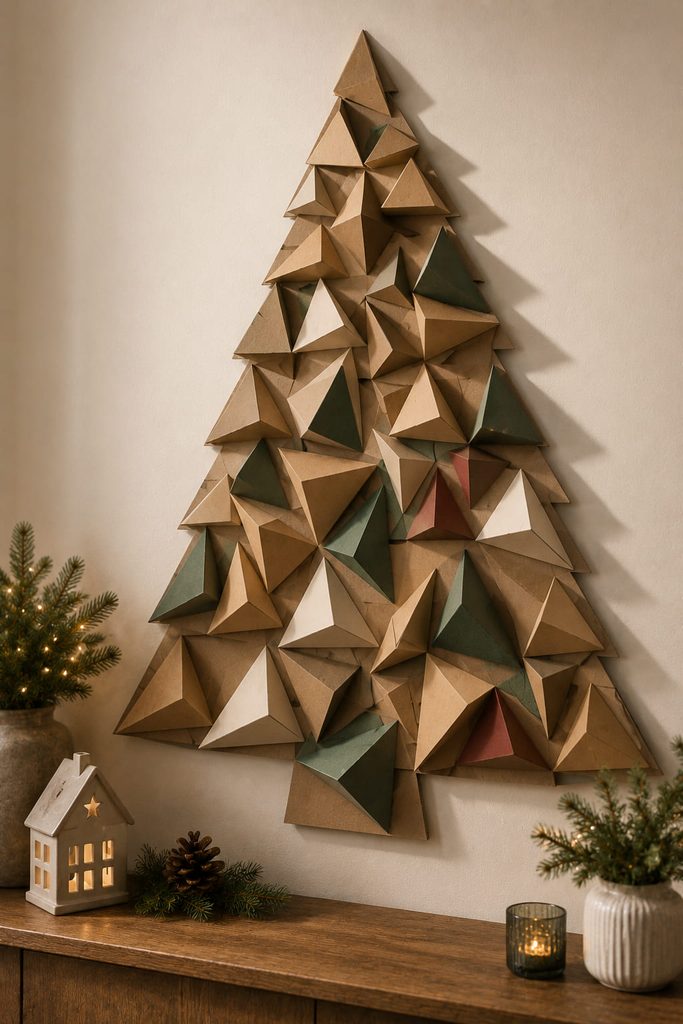
Turn a flat wall tree into a faceted relief by folding small triangular cardboard prisms and arranging them inside one large tree outline. Each prism projects from the backing at a different angle, so directional light creates a patchwork of highlights and shadows without requiring glitter, dense ornamentation, or painted branch detail.
Keep the construction controlled rather than random. Make two or three prism depths, dry-arrange the largest forms near the lower center, and use shallower pieces near the perimeter so the silhouette remains crisp. Glue each prism to a rigid backing through a full rear face; do not rely on one folded edge as the attachment point. Mount from the backing with hardware suited to the wall and finished weight, so the decorative modules carry no hanging load. Leave occasional gaps between modules so the backing becomes intentional negative space instead of looking like unfinished coverage.
For a polished final check, view the piece both straight on and from the side. Straight on, the outer tree shape should read instantly; from the side, no prism should project far enough to sag or peel away from the backing. This is the strongest choice when you want cardboard to look deliberately architectural rather than rustic.
How to Choose Among Cardboard Christmas Tree Ideas
Start with where the finished tree has to live. For a small table, the layered triangle, stacked disk tree, or faceted shell gives dimension without a large footprint. For walls, the shingle tree, advent organizer, lattice, contour piece, and folded-prism relief keep floor space open. Floor-scale projects need more structural planning, so the buttressed tree, hinged screen, and ribbed sculpture are better choices when you have stiff corrugated sheets and room to store or fold the result.
Material thickness should follow the mechanism. Thin paperboard handles tight folds, tabs, and small pockets more cleanly; corrugated board is better when an edge, spine, base, or brace must resist bending. Before adding paint or ornaments, test the part that makes the project function—base stability, pocket access, peg retention, hanging balance, hinge closure, or slot fit. Fixing that mechanism first usually matters more than adding another decorative layer.
Pick a Tree That Uses the Material Well
The easiest starting point is the project that turns a limitation of your cardboard into an advantage. Flat scraps are useful for layered and wall-mounted trees, clean box panels can become shells or screens, and stiff corrugated sheets are worth saving for bases, ribs, braces, and functional displays. Once the structure works, the raw kraft surface, exposed flutes, paint, paper accents, or a restrained set of ornaments can set the final style.
If you want to keep working with the same recycled-box material but move beyond tree shapes, continue with 16 Cardboard Christmas Decorations That Look Surprisingly Good.








