
This post contains affiliate links. As an Amazon Associate I earn from qualifying purchases, at no extra cost to you. Thank you for supporting Diynify!
Christian Christmas cards can do more than add a nativity silhouette to a standard holiday design. A handmade card can use the construction itself to support the message: a star that guides the eye toward a manger, a pocket that holds a written blessing, a fold-out scene that opens from darkness into light, or a removable dove that becomes a small keepsake. The strongest ideas stay visually clear enough to mail or display while giving one faith-centered detail a real job.
Most of these cards use folded cardstock, decorative paper, scissors or a craft knife, a ruler, a scoring tool, and paper-safe adhesive. Several call for vellum or tissue paper, and a few need embroidery thread, narrow quilling strips, or thin hanging cord. If you want to add Scripture, a short handwritten verse reference inside the card usually keeps the front calmer than trying to fit a full passage into the design.
1. Layered Nativity Aperture Card With Quiet Depth
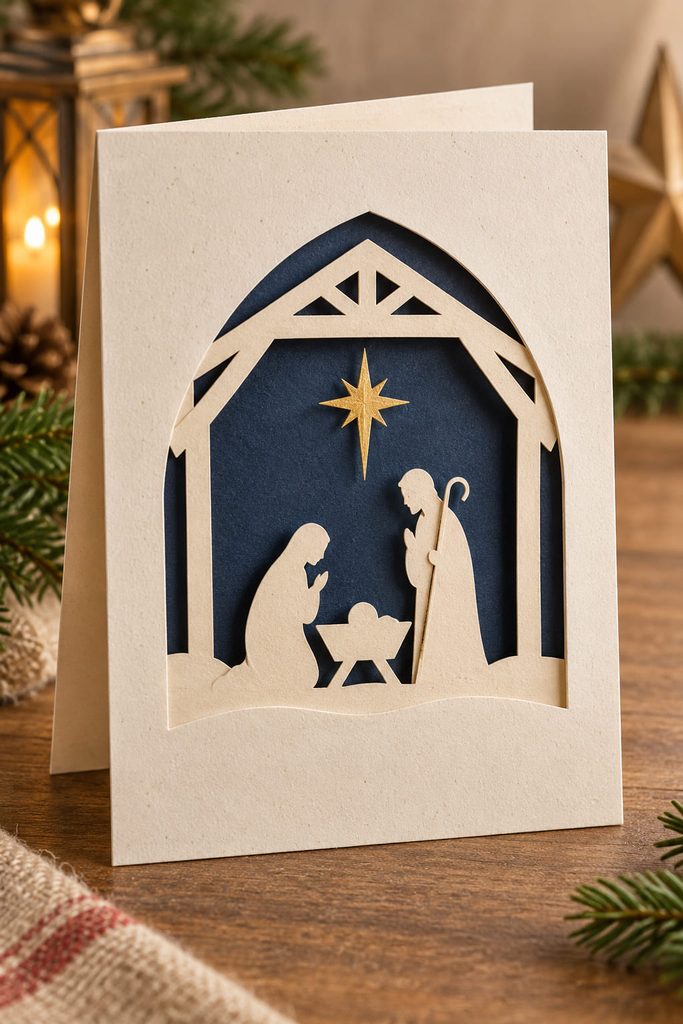
Frame the nativity rather than filling the whole card front. Cut a broad arch or stable-shaped opening in the top panel, then place a simple Holy Family silhouette on a recessed layer behind it. A second backing layer in midnight blue or warm cream can carry a single star shape high above the figures. The gap between the front aperture and the silhouette creates a shallow shadow line, so the scene reads as dimensional without becoming a bulky tunnel card. Keep at least one clear border of untouched cardstock around the opening; that negative space separates the sacred scene from the outer decoration and prevents a small card from feeling crowded.
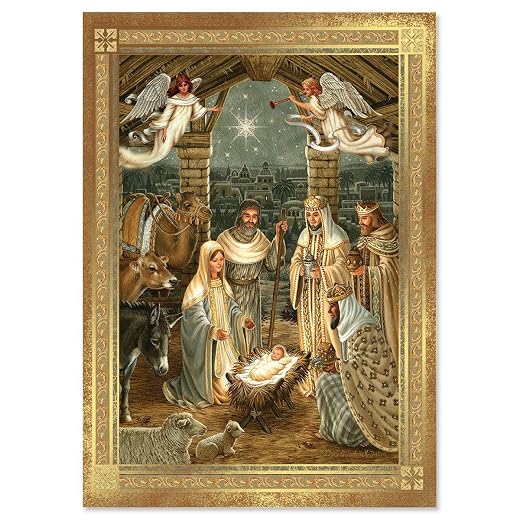
Keep the figures connected to one backing strip instead of gluing several tiny feet independently; that makes alignment easier and keeps the lowest edge visually calm. A few stacked-cardstock spacers at the corners are enough to create depth, and they should sit where they cannot be seen through the aperture. Before closing the card, look through the opening from slightly above and below. If the star or faces disappear behind the frame, enlarge the aperture or move the recessed layer forward rather than adding more detail. The card is finished when the scene remains recognizable even before any written greeting is added.
2. Folded Star of Bethlehem Rosette Card
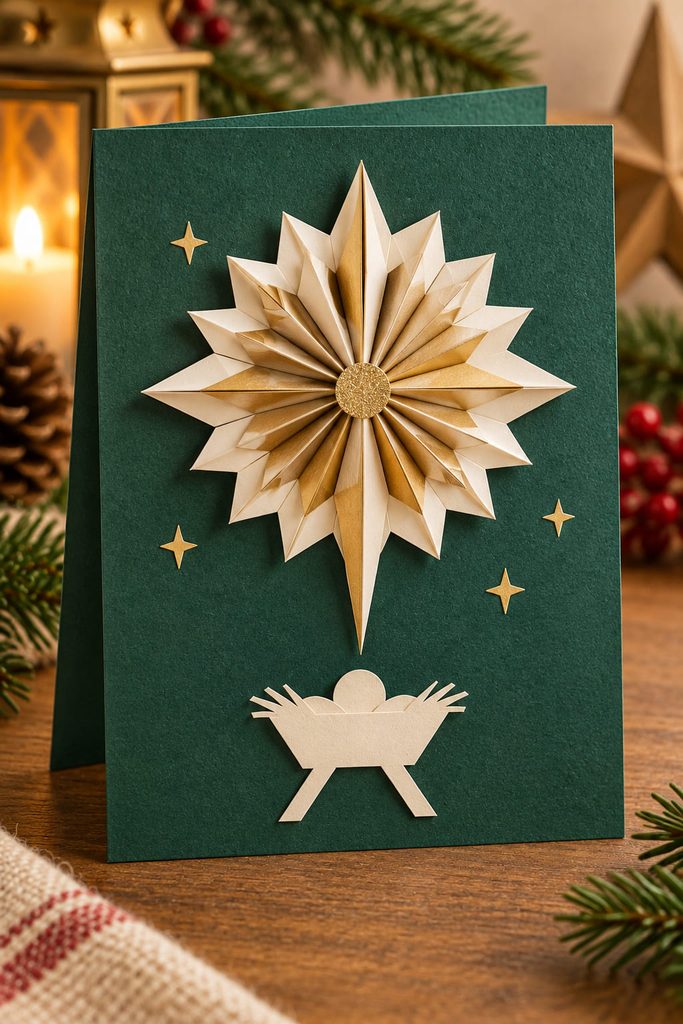
Let the star carry both the symbolism and the structure. An accordion-folded strip can become a flat rosette starburst when its outer edge is shaped before the ring is closed. Use lighter paper for the folded star and sturdier cardstock underneath so the front does not sag.

- Score and fold narrow, even pleats, then trim the stacked outer edge into repeating points while the strip is still open.
- Join the strip into a loop, press the pleats inward, and secure the center with a small paper circle on the back.
- Add one long lower point or a thin vertical paper beam so the star leads the eye toward a tiny manger silhouette below.
A broad, shallow rosette is easier to envelope than a tightly raised one. If the folds spring open after gluing, the center circle is too small or the pleats are fighting each other; flatten the star under a clean book before attaching it to the card base.
3. Manger Pocket Card With a Removable Blessing Note
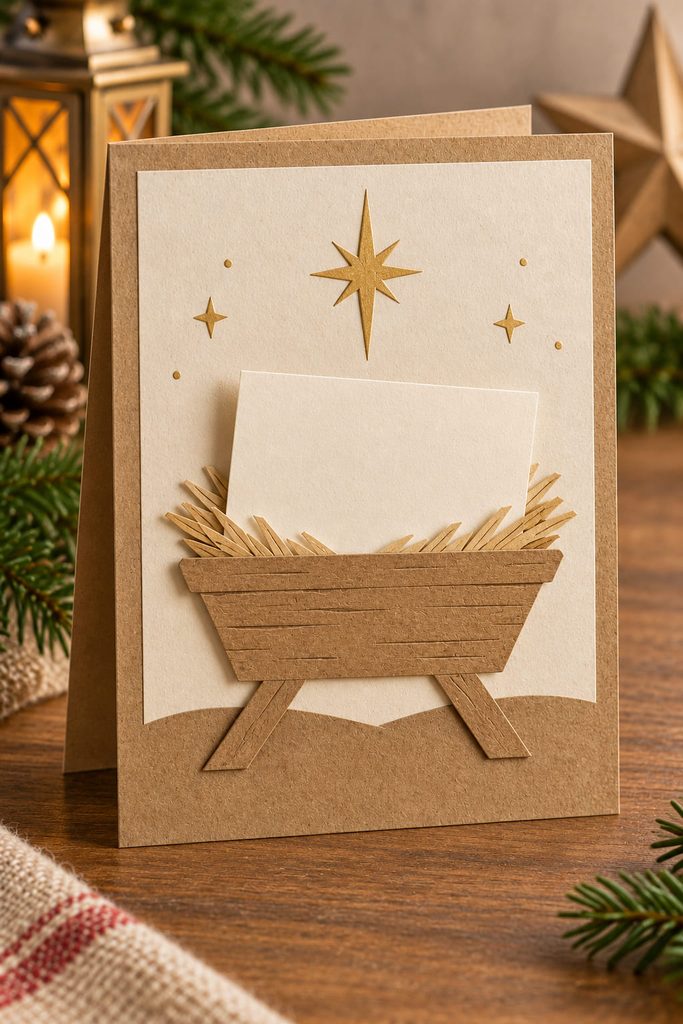
A removable blessing note gives the manger shape a real purpose. Build a shallow pocket on the front from a kraft-paper manger silhouette with two side tabs and a bottom tab, leaving the top edge open. A small cream insert can slide into that pocket and carry a prayer, family message, or a handwritten verse reference. The recipient gets the visual nativity cue first, then a second private message when the insert is lifted out. Reinforce the pocket behind the manger with a plain rectangle of cardstock if the decorative silhouette has narrow legs or cutouts; the pocket needs a continuous back so the note cannot snag.

Pocket Fit Check: The insert should rise high enough to grasp without covering the manger silhouette. Test it before sealing the side tabs; if the card bows or the note catches, widen the pocket slightly instead of forcing a tighter fit. Leave a small amount of side clearance so handwriting or a slightly curved paper edge does not jam during removal.
This works especially well when the rest of the front stays spare. One small star above the pocket is enough to establish the Christmas setting, while the removable note becomes the meaningful detail rather than another decorative layer. For batch-making, cut all pocket backs first, then match the decorative manger fronts afterward; that separates the structural job from the visual one and makes inconsistent pocket widths easier to catch.
4. Vellum Candle Card With a Soft Light Effect
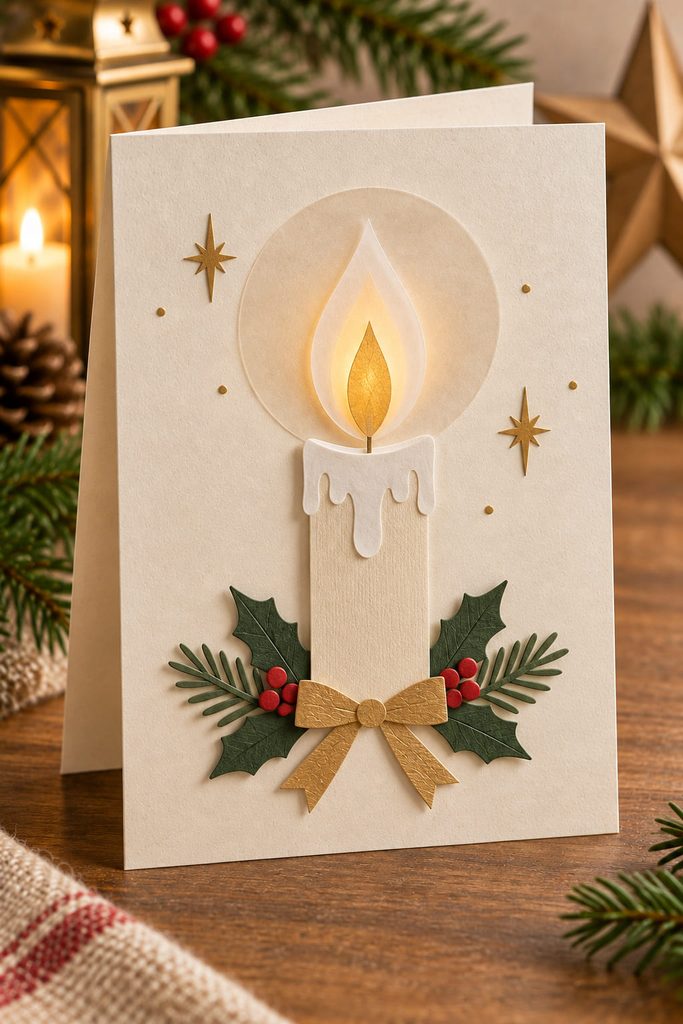
Instead of drawing a glowing candle, let translucent paper create the softness. Cut a simple cream cardstock candle and place a vellum flame over a smaller warm-gold paper shape; the color shows through as a diffused center rather than a hard outline. Keep the candle body flat so the flame remains the only softened detail. If the inside message connects the symbol to faith, a short reference such as John 8:12 can carry that meaning without making the front dependent on readable text.
5. Shepherds’ Fold-Out Night-Sky Panorama
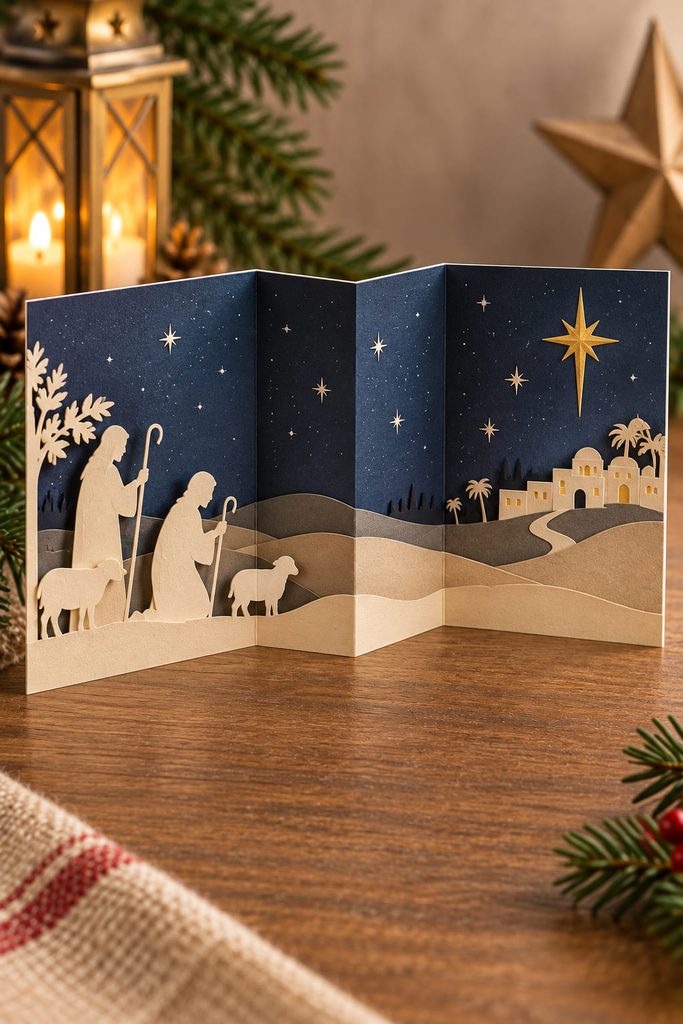
Open the card and the scene should widen, not merely get thicker. Use two or three connected accordion panels to create a horizontal night-sky panorama: shepherd silhouettes on the first section, low hills across the middle, and a bright star or distant Bethlehem shape near the final fold. The changing width lets the recipient follow the scene from one panel to the next, which suits a narrative subject better than stacking everything on a single front.

Score every vertical fold before adding scenery, then keep tall silhouettes away from the creases so they do not buckle when the card closes. A continuous horizon line helps the separate panels feel like one landscape. For the deepest section, add only one raised layer—perhaps a star halo or stable roof—so the card still compresses cleanly.
Closed-State Test: Fold the panorama completely before the glue sets. If one panel pushes the card open, trim the projecting scenery or reduce the thickness of that layer. The final fold should close without forcing the cardstock.
6. Angel Messenger Card With a Hidden Inside Reveal
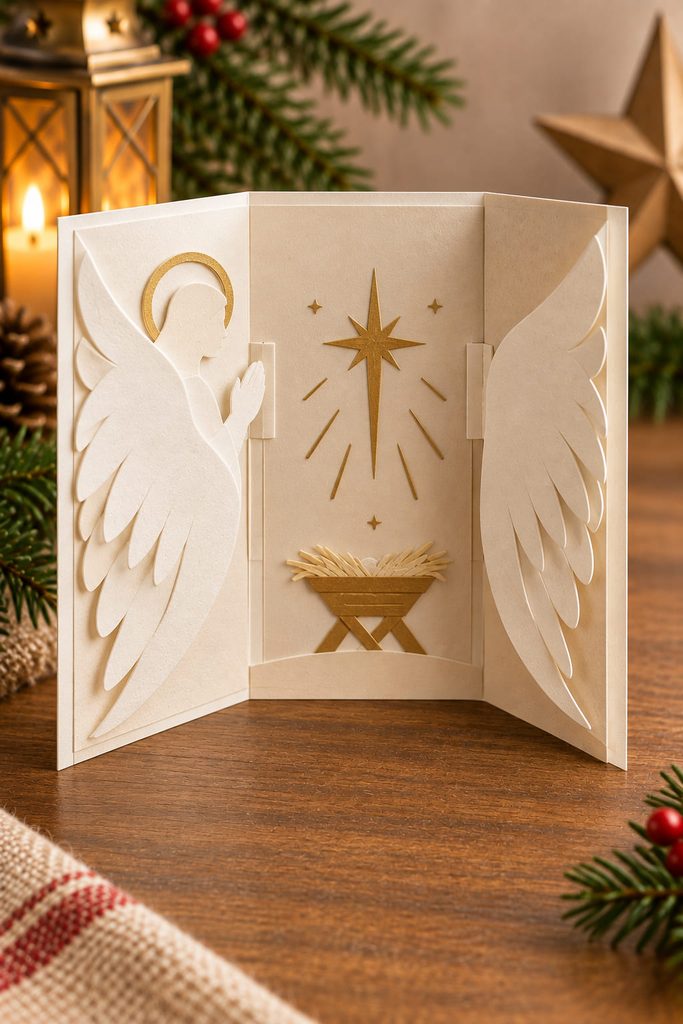
The message arrives twice in this design. On the front, use a quiet angel silhouette with wings folded inward so the figure reads clearly at first glance. Inside, repeat the wing shape as two flat side panels that open away from a small central star or manger icon when the card itself is opened. The outside stays restrained while the inside provides the surprise.
Make the inner wing panels from lightweight paper and hinge them with narrow scored tabs rather than thick foam tape. Their edges need clearance from the center fold, especially if the wings are long and tapered. A verse reference from Luke 2 can sit below the reveal after the mechanism is working; the paper movement should still make sense even before any words are added.

7. Woven Paper Cross Card Framed With Evergreen
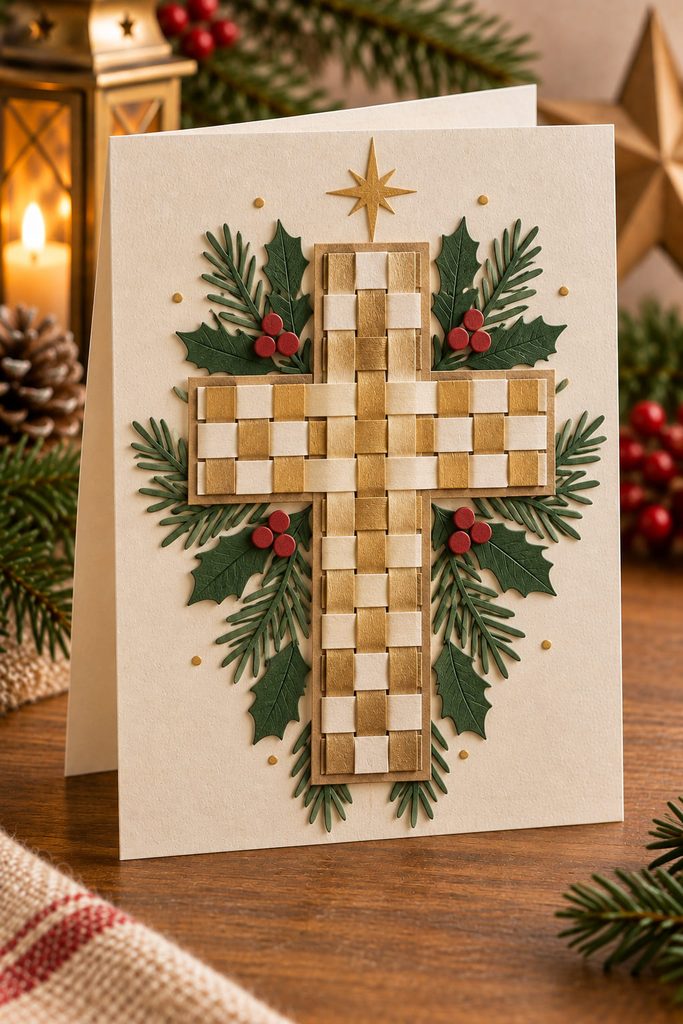
For a card that should feel explicitly Christian without becoming text-heavy, a woven paper cross gives the central symbol visible handwork. Cut narrow strips in two compatible tones and weave them over and under around a slim rectangular paper frame, then trim the woven section into a cross silhouette. Real interlacing matters here: alternating the path creates a surface that catches light differently from a flat printed plaid.
| Route | Best Result | Trade-Off |
|---|---|---|
| Thin paper strips | Flatter, easier-to-mail cross | Softer edges and less relief |
| Narrow cardstock strips | Stronger woven texture | More thickness at each crossing |
Keep any evergreen sprigs or small star accents outside the cross silhouette so they frame rather than interrupt the over-under pattern. If the weave begins to distort, secure the center crossing first and square the arms before gluing the remaining ends.
8. Crown-and-Manger Split-Scene Card
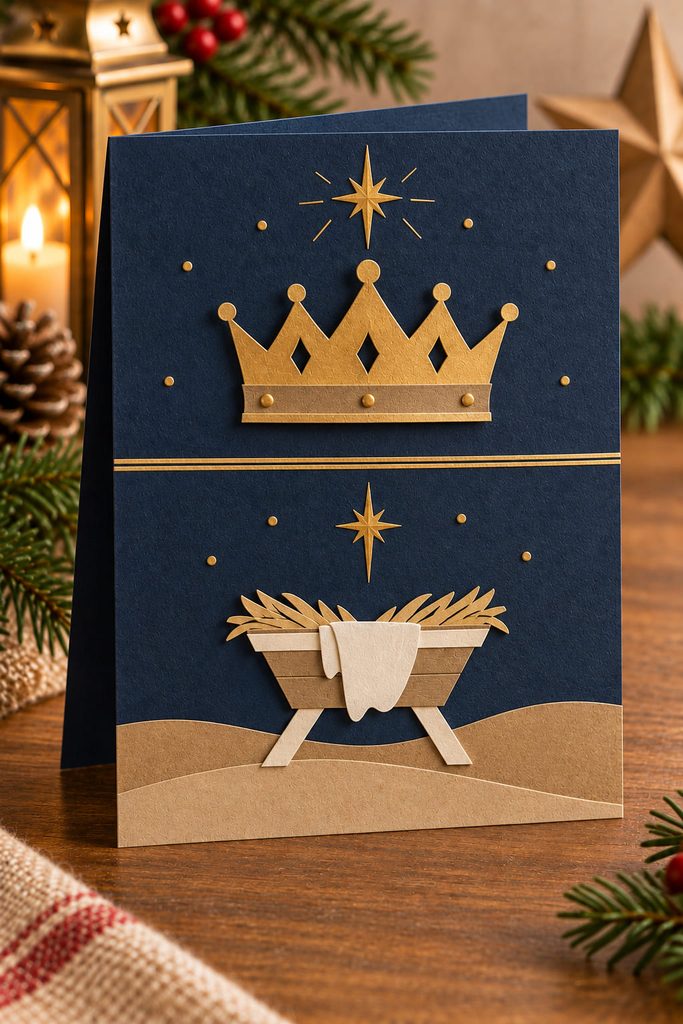
Pair two symbols instead of building one crowded nativity. Divide the front into an upper and lower field with a narrow band of open cardstock between them. The top can hold a simple paper crown built from three or five points, while the lower section carries a low manger silhouette with one star above it. The gap becomes part of the composition, preventing the two ideas from collapsing into one decorative cluster. Use the same paper color for one small detail in both halves—perhaps a gold star above the manger and a gold inset on the crown—to connect the scene without filling the empty space. This is a strong option when you want the card to feel reflective and graphic rather than illustrated.
9. Traveling Magi Slider Card
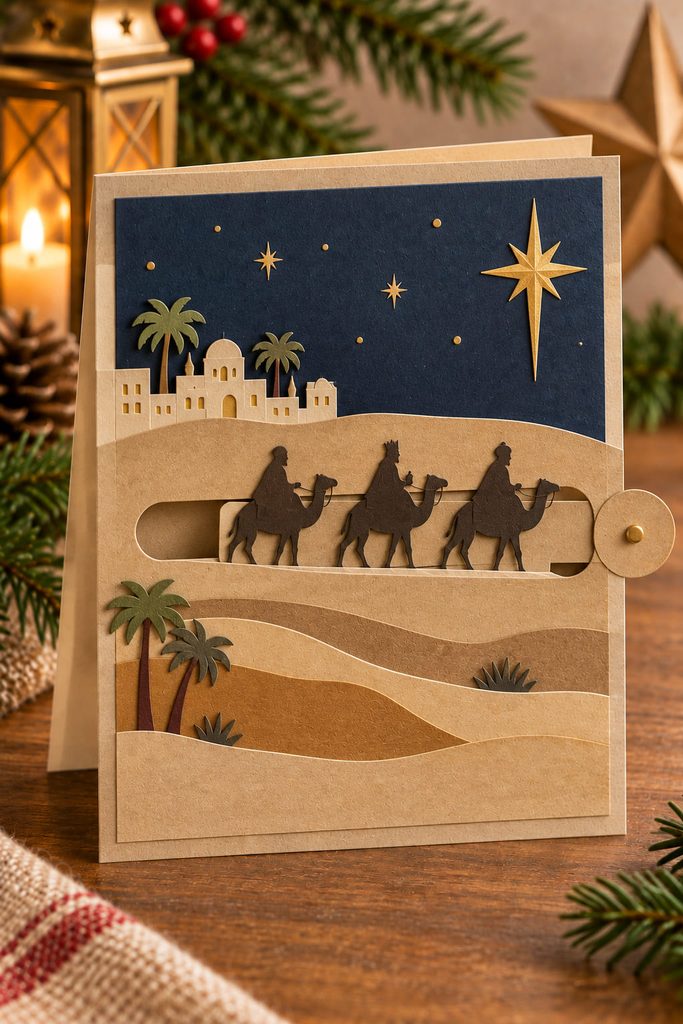
Movement can turn the journey of the Magi into the card’s main interaction. Cut a horizontal slot across a desert-toned front panel, place a small procession silhouette on a paper slider behind it, and keep the star fixed near the far end of the route. Make the hidden slider strip wider than the slot and add a small stop tab behind the far end so the moving piece cannot pull free. Pulling the visible tab then moves the travelers toward the star while the mechanism stays captured behind the front panel.
| Symptom | Likely Cause | Correction |
|---|---|---|
| Slider tilts in the slot | Pull tab is too narrow or off-center | Widen the hidden slider strip and recenter the procession |
| Figures catch on the opening | Silhouette projects too far above the slot | Shorten the lowest points or widen the slot slightly |
| Card front buckles | Track is too close to the fold | Move the mechanism farther from the spine and reinforce the front panel |
Test the full travel distance before adding decorative hills. The figures need enough clearance to move from the starting point to the star without disappearing behind scenery or colliding with the card edge.
10. Stable-Shaped Easel Card for Christmas Display
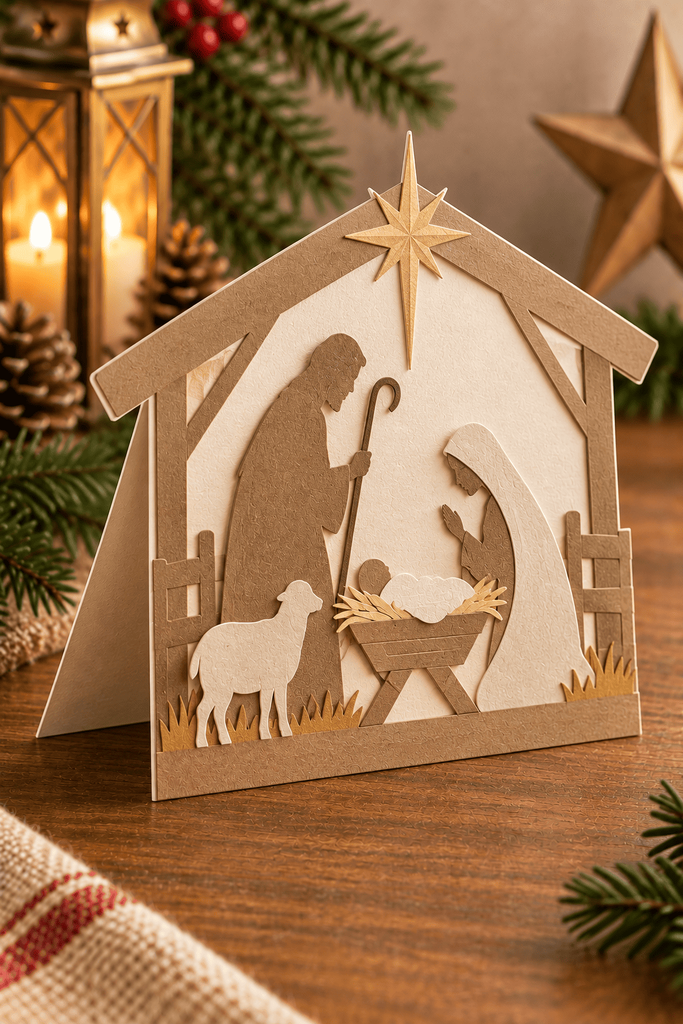
If the recipient likes to display cards on a shelf, let the stable become the support. Cut the outer card so the top edge forms a simple roofline, then add an internal easel strip or folded triangular brace that holds the front panel upright at a comfortable viewing angle. The Holy Family scene can remain nearly flat on the face; the structural interest comes from the card standing as a small stable silhouette rather than from deep layered decoration.
The footprint matters more than the roof detail. A brace that opens too narrowly makes the card tip backward, while one that opens too far lowers the scene until it looks almost flat. Set the finished card on a hard surface before decorating and adjust the brace until the center of weight stays over the base.
For mailing, score the brace so it folds fully inside the card and does not cross the outer edges. If the stable shape catches on the envelope, simplify the roofline instead of shrinking the standing base. A display card only works if it can survive both states: folded for delivery and open for viewing.
11. Torn-Paper Holy Family Silhouette Card
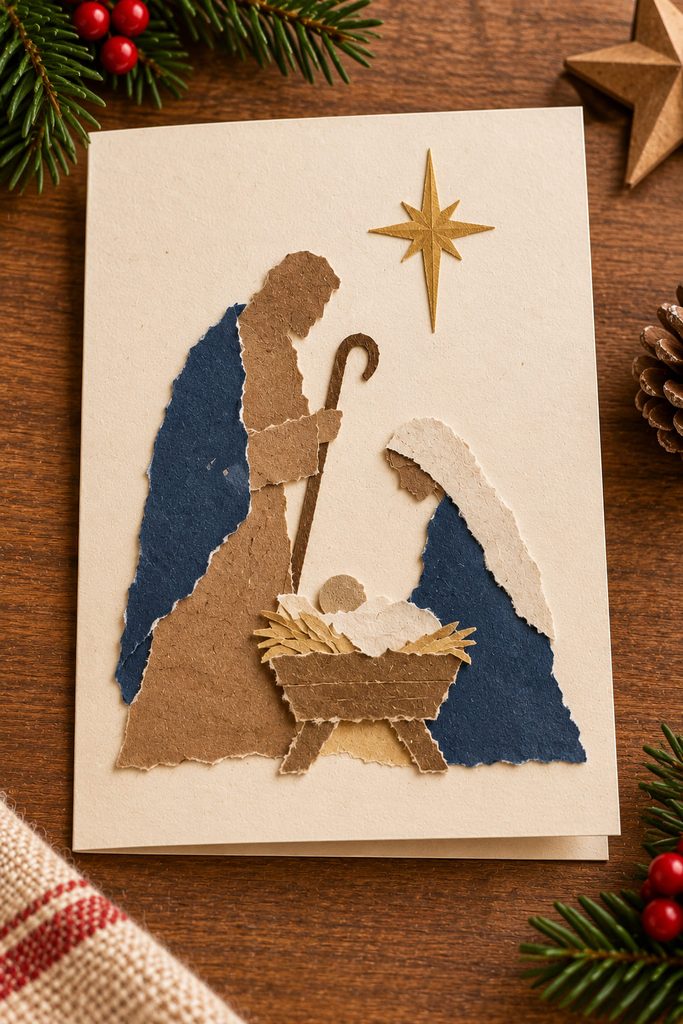
Torn edges suit a nativity card when the composition depends on shape rather than tiny facial detail. Tear or hand-cut three broad paper forms for Mary, Joseph, and the manger, then overlap them against a plain background with a single star above. The irregular edges make the scene feel tactile, while the restrained number of pieces keeps the figures readable. Choose papers with enough value contrast that the silhouettes still separate from one another at arm’s length. If the scene only becomes understandable after adding eyes, faces, or many tiny accents, simplify the overlapping shapes first; the Holy Family should read from posture and proportion before detail.
12. Quilled Starburst Nativity Card
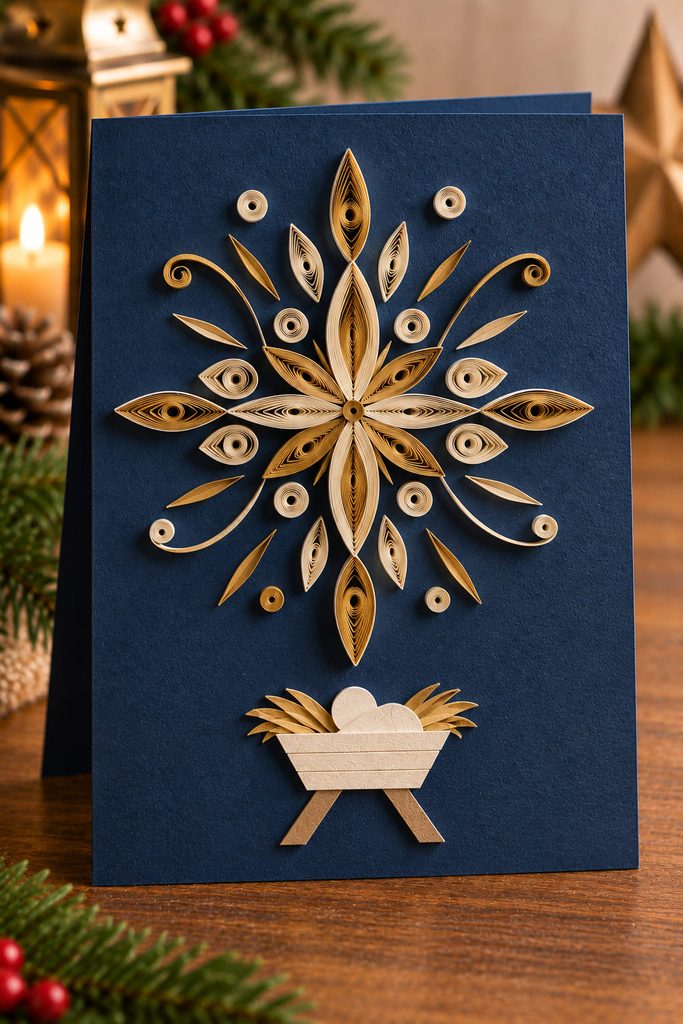
Quilling works best here as a frame for the focal point, not as a way to fill every inch. Place a small, flat manger silhouette near the lower center, then build a starburst above it from loose teardrop coils, marquise coils, and short curved strips. The coils create directional lines that naturally pull attention inward toward the star and then down toward the nativity.
Use narrow paper strips and keep the outer coils larger than the inner ones so the burst feels open rather than knotted. Glue each coil only where it actually touches the backing; excessive adhesive can flatten the curled edges and erase the shadow that makes quilling visible. For mailing, keep the coils shallow and protect the front with a loose sheet of tissue inside the envelope.
A restrained palette helps the paper geometry do the work. Cream, muted gold, and deep blue can separate the starburst from the figures without making the card look like a generic ornament design.
13. Stitched Star of Bethlehem Card
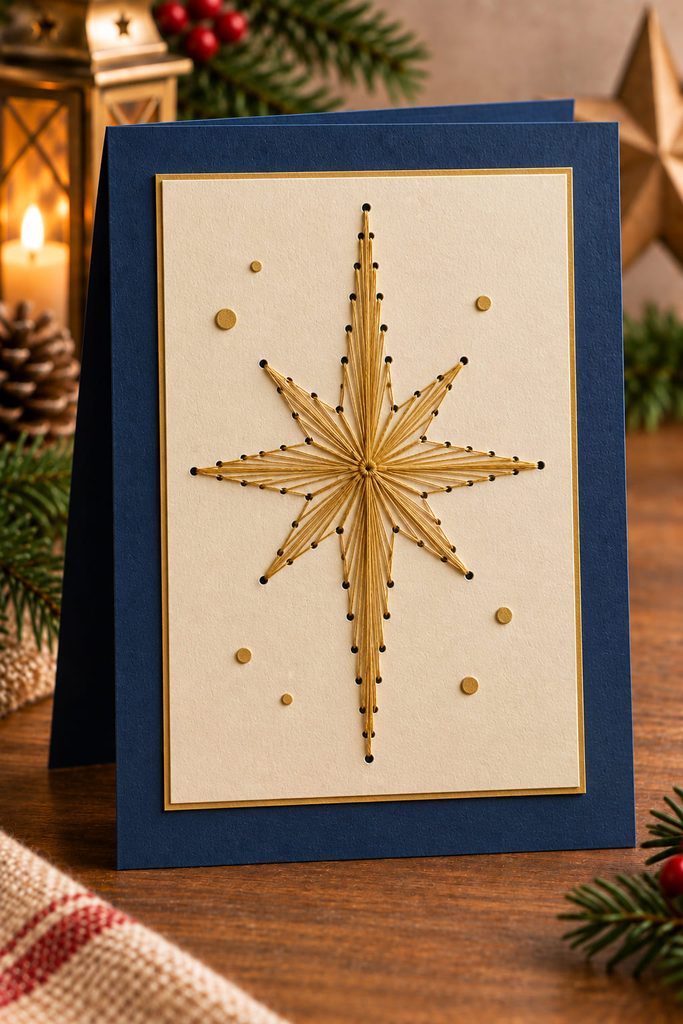
Piercing the star first changes the whole making order. Draw a simple eight-point or elongated star on the front panel, mark evenly spaced holes along the lines, and pierce them before the panel is attached to the folded card base. Embroidery thread can then travel between the holes to create a taut geometric star without leaving knots or loose ends visible inside the finished greeting.
Back the stitched panel with a second sheet of cardstock after the thread is secured. That layer hides the reverse stitching and keeps the inside writing surface smooth. If the paper begins to tear between holes, the spacing is too tight for its weight; stop and widen the pattern rather than adding more thread tension.
14. Stained-Glass Tissue Angel Window Card
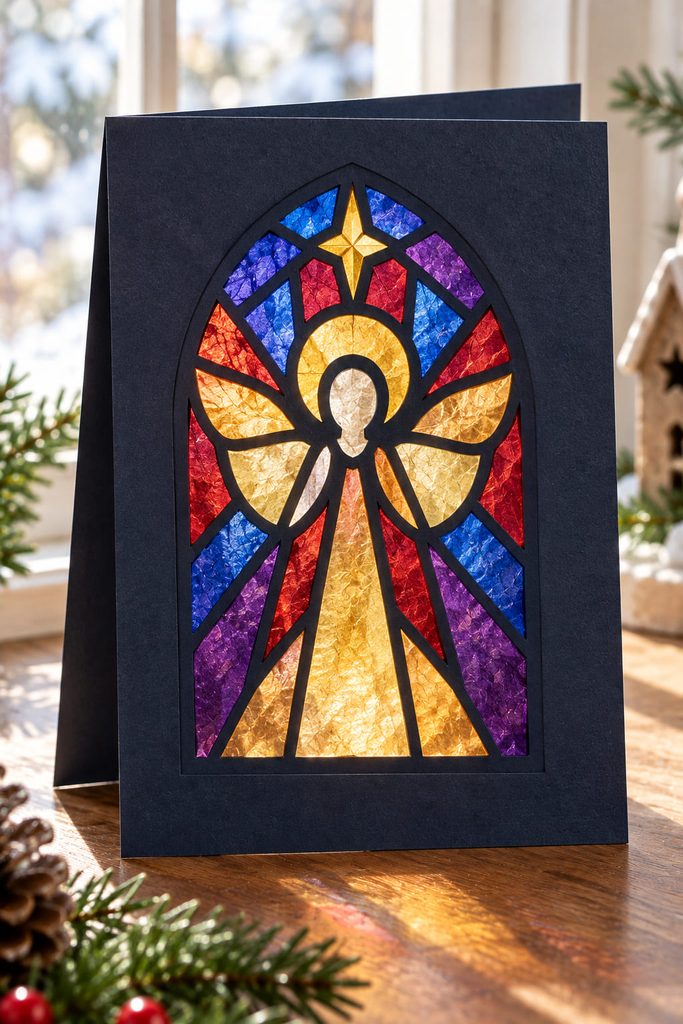
Stained-glass color works best when light can actually pass through part of the card. Cut a simple angel outline or arched church-window shape from the front panel, then bridge the opening from behind with overlapping pieces of translucent tissue paper. A dark cardstock outline can separate the color areas and make the angel readable without printed lines.
| Material | What It Does |
|---|---|
| Lightweight tissue paper | Creates translucent color with minimal thickness |
| Thin black or navy cardstock | Defines the window framework |
| Clear-drying paper glue | Secures overlaps without a heavy opaque border |
| Second inner frame | Covers raw tissue edges and protects the window |
Hold the finished panel near a bright window before mounting it to the card base. If large areas look muddy, reduce the overlap between tissue colors; if the framework disappears, strengthen the dark border rather than adding more colored pieces.
15. Accordion Scripture Scroll Card With a Central Manger
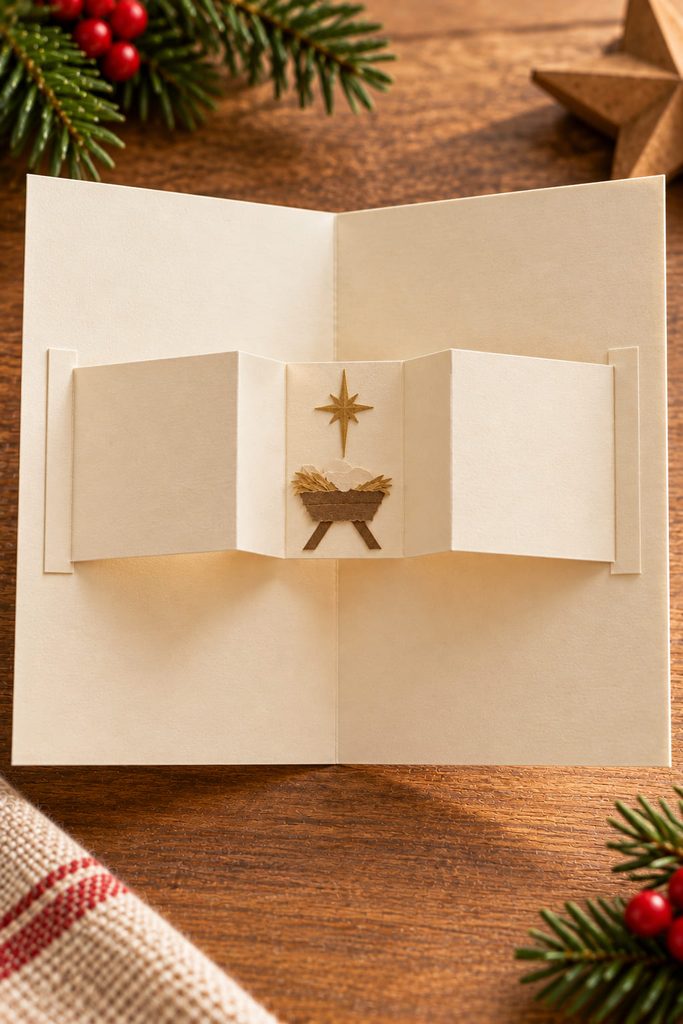
When the inside message matters as much as the cover, give it a structure that unfolds deliberately. Cut a long narrow paper strip, score it into three or four accordion sections, and attach only the two end panels inside the card. The center section can carry a small manger or star motif, while the remaining panels leave room for a handwritten prayer, verse reference, or family blessing. Opening the card releases the strip into a shallow scroll-like sequence instead of presenting all the text at once.
Keep the accordion depth modest so the strip nests between the covers. Before writing anything, close the card and check that each fold collapses in the intended direction; one reversed crease can make the insert buckle. If the center motif touches the spine, shorten that panel or shift the attachment points outward. The construction is most successful when the message unfolds smoothly without needing the recipient to tug or straighten it.
16. Detachable Dove Ornament Christmas Card
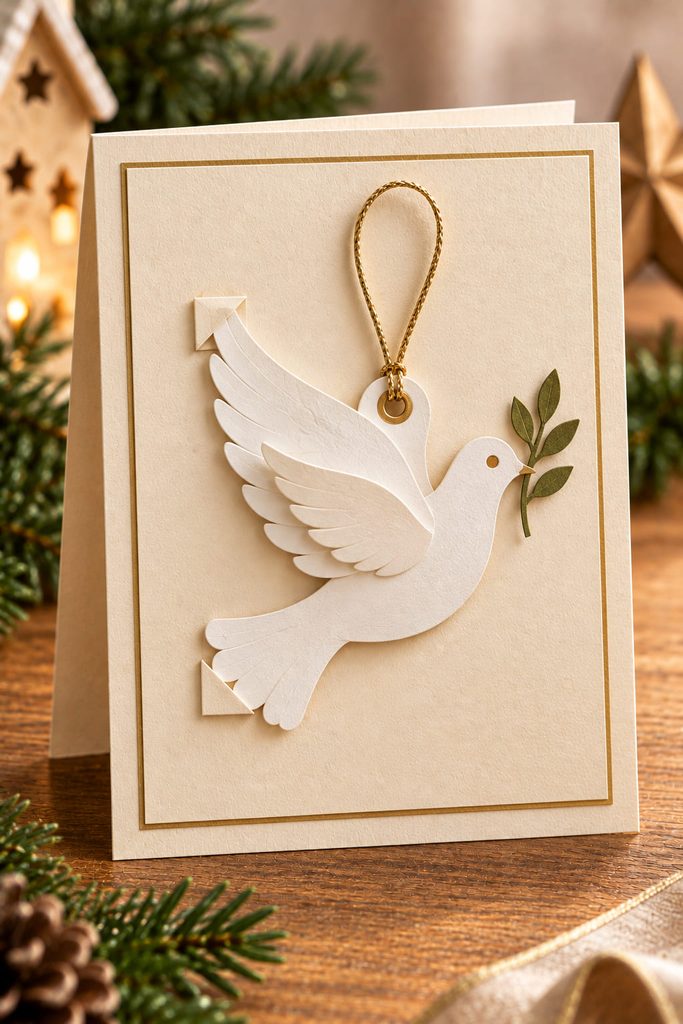
The keepsake earns its place by doing something after the greeting is read. Cut a symmetrical paper dove from sturdy cardstock, add a small folded wing for shallow dimension, and attach a thin hanging loop through a reinforced hole near the upper body. Mount the dove to the card with two tiny paper corners or a removable belly band instead of permanent glue. Once lifted free, it can hang on a tree branch, knob, or small hook as a lightweight ornament. Keep the ornament flatter than a freestanding paper sculpture and place the hanging loop so the dove stays close to level. A badly positioned hole makes the bird rotate beak-down; test the balance with scrap thread before finishing the card front.
How to Keep Christian Christmas Cards Meaningful Without Overcrowding Them
Choose one faith-centered detail to lead each design, then let the rest of the card support it. A manger pocket already carries the message through interaction, so it does not also need a large cross, several stars, a long quotation, and heavy floral decoration. A stitched star has visible labor and direction built into it; a quiet lower silhouette may be enough.
Think about where meaning lives in the card. It can be in the subject, as with the nativity; in the motion, as with the Magi slider; in the way a message is revealed; or in what the recipient can keep afterward. If you add Scripture, a short reference inside the card often gives you more visual freedom than putting a full verse on the front. The result can still feel unmistakably Christian while remaining calm enough to mail, display, and read.
Start With the Detail That Carries the Message
For a first project, choose a construction where the meaning and the making are already connected: the manger pocket for a personal blessing, the stitched star for a quiet handmade surface, or the detachable dove when you want the card to become a keepsake. Save the slider, easel, and fold-out panorama for recipients who will enjoy a more interactive card.
If you want to continue with mechanisms that open, stand, and move, 15 Pop Up Christmas Cards That Feel Extra Special is the closest next step on Diynify.








