

This post contains affiliate links. As an Amazon Associate I earn from qualifying purchases, at no extra cost to you. Thank you for supporting Diynify!
Toilet paper roll snowflakes can look far more polished than the material suggests when the cardboard is treated as a structural strip instead of a tube to decorate. Flattened rings become pointed petals, opened tubes can be cut into curling strips, and stacked pieces create crisp shadows that make recycled cardboard feel closer to lightweight paper sculpture.
Most of these ideas use clean, dry cardboard tubes, sharp scissors or a craft knife, a ruler, and tacky craft glue. A few need cardstock backing, vellum, thread, ribbon, a small dowel or hoop, or a simple slot-fit base. Choose by where the finished snowflake will live: tree ornaments can stay light, wall pieces can spread wider, window designs benefit from open space, and standing pieces need more attention to balance.
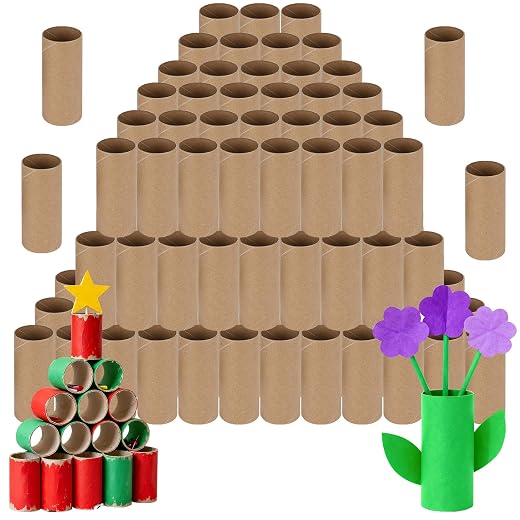
1. Classic Six-Point Loop Snowflake Ornament
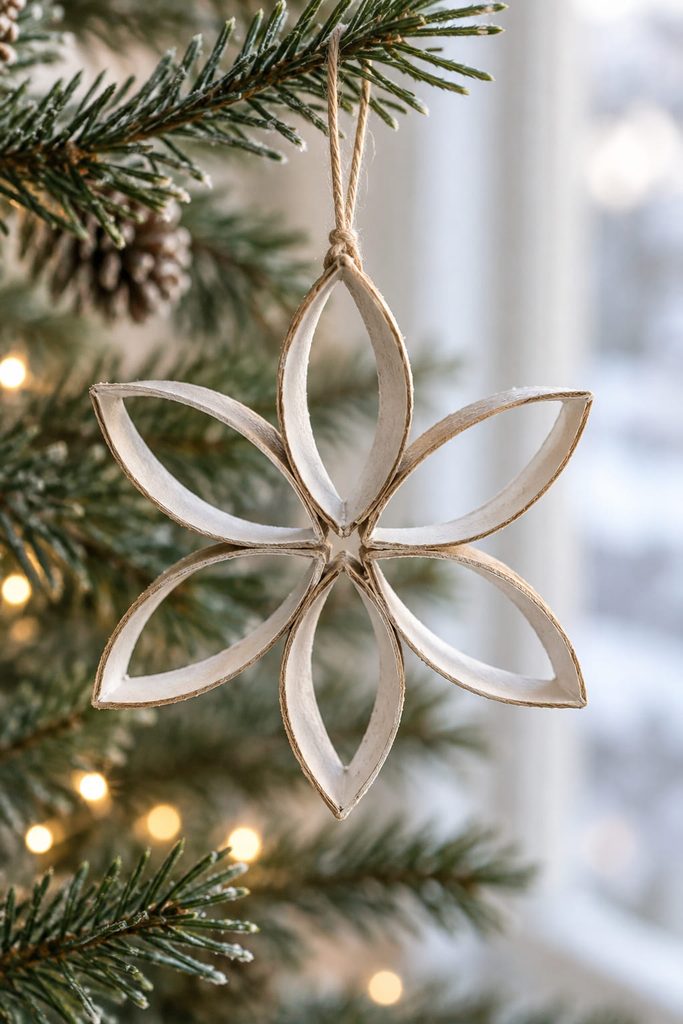
Flatten a cardboard tube firmly, then slice it crosswise into narrow rings. Each ring springs open into a pointed oval, which is why this is the cleanest place to start: the crease already supplies two sharp tips without extra folding. Six matching rings make a spare, symmetrical snowflake that is light enough for a tree branch.
- Cut six equal-width rings and dry-fit them around a small center gap.
- Glue neighboring sides together near the inner tips rather than along the whole ring.
- Let the center cure flat before adding a thread or narrow ribbon hanger.
- Lift the ornament from the actual hanger point and rotate the loop if the snowflake tilts.
Center Alignment Check: the six outer points should land on an even circle when the piece lies flat. If one point sits noticeably farther out, shorten that ring slightly or reset the joint before the glue fully hardens.

2. Nested Diamond Window Snowflake
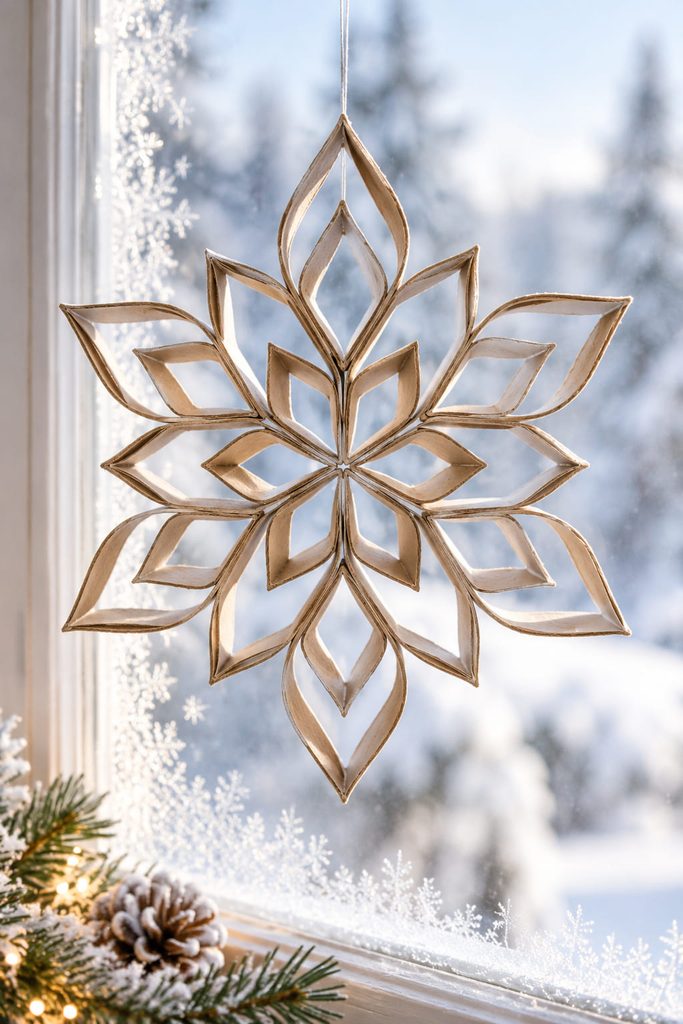
For a sharper geometric look, pinch each flattened ring a second time so the oval becomes a narrow diamond. Build a large six-point frame first, then tuck smaller folded diamonds between the inner arms. The second ring of shapes gives the center more visual weight while leaving enough open space for daylight to pass through.
This version reads especially well in a window because the silhouette does most of the work. Keep the inner diamonds slightly shorter than the outer ones instead of filling every gap to the edge; that stepped scale creates a clear center-to-tip rhythm. A tiny clear thread loop can sit behind one upper joint so the hanging point does not interrupt the geometry.
3. Curled Scroll Snowflake With Open Centers
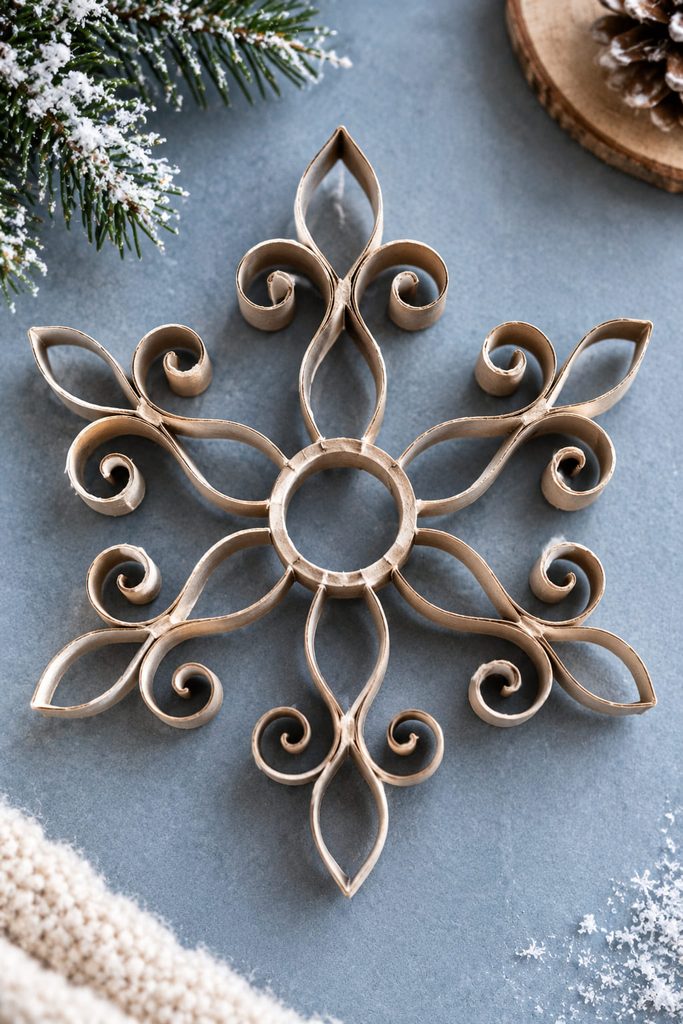
If a tube-ring snowflake starts to look heavy, the fix is not always fewer pieces. Open one tube lengthwise, cut it into slim strips, and curl the ends around a pencil or skewer to make paired scrolls. Arrange those curls around a small cardboard ring so each arm contains more negative space than solid material.
When the shape feels uneven, diagnose the curl before trimming the arm:

- One side opens wider: the two scrolls were wrapped at different diameters; recurl the larger one around the same tool.
- The center twists: one strip is glued higher than its opposite; reset the joint on a flat surface.
- The tips droop: the strips are too long for their stiffness; shorten them rather than adding more glue.
The result is lighter and more filigree-like than a snowflake made only from closed oval rings.
4. Layered Shadowbox Snowflake
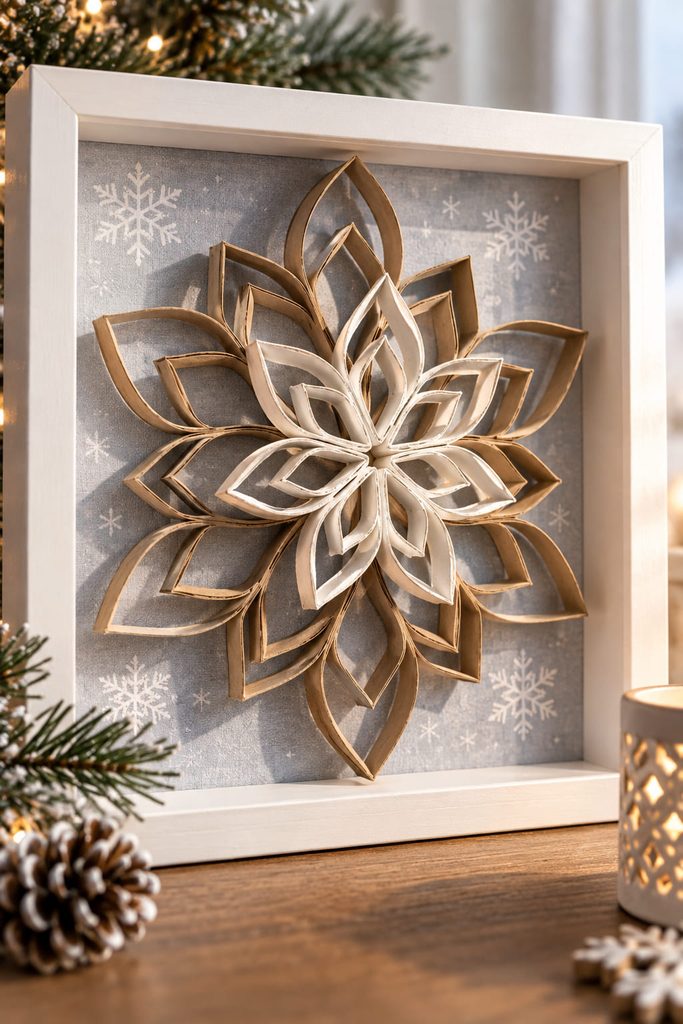
Depth reads cleanly only when the raised layer has something stable to sit on. Start with a flat snowflake made from pinched tube rings and attach it to sturdy cardstock only at a few hidden contact points. Add a second, smaller snowflake above it on tiny folded-cardboard spacers so the two layers cast separate shadows.

The important design choice is rotation. Turning the upper layer halfway between the lower arms creates more visible depth than stacking matching points directly on top of one another. It also keeps the center from becoming a dense lump of glue and cardboard.
Use a frame with a little breathing room around the outer tips. The snowflake should not touch the glass or front edge; a narrow gap allows side light to reveal the raised layer. For a quieter look, leave the tubes unpainted and let the warm kraft edge contrast with a pale backing.
5. Branched Snowflake Wall Medallion
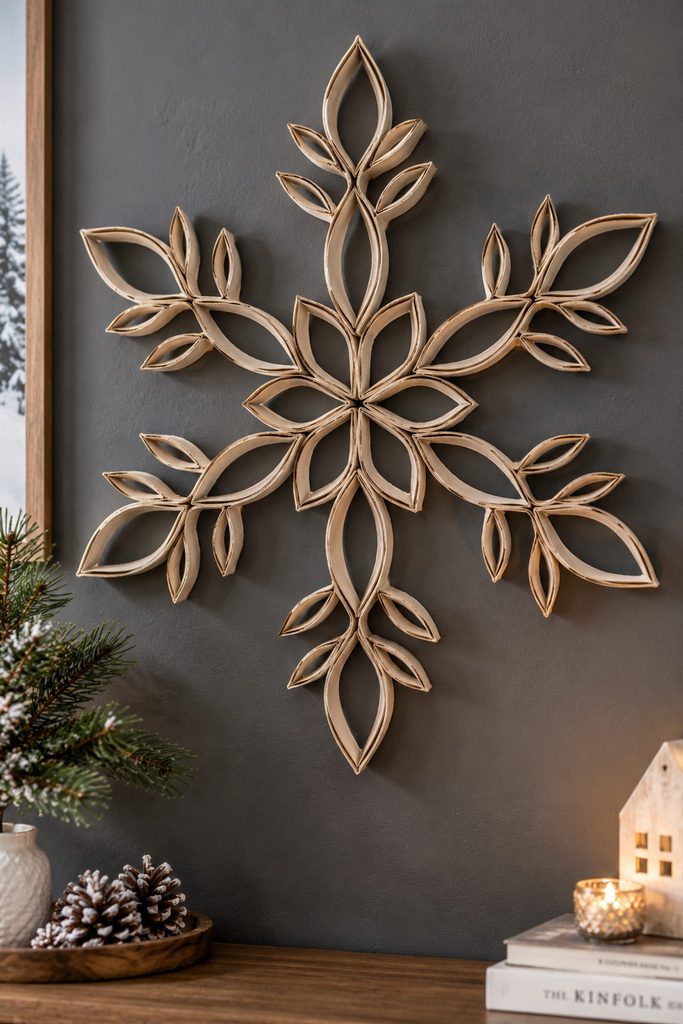
When the snowflake is going on a wall rather than a tree, longer arms have room to read clearly. Build six main spokes from elongated pinched rings, then add short half-rings to both sides of each spoke for forked branches. Make one finished arm first and use it as a spacing guide for the other five; repeating branch position keeps the whole medallion balanced. A thin hidden cardstock disk behind the center can reinforce the joins without changing the front silhouette.
6. Sculpted Petal Snowflake With Raised Tips
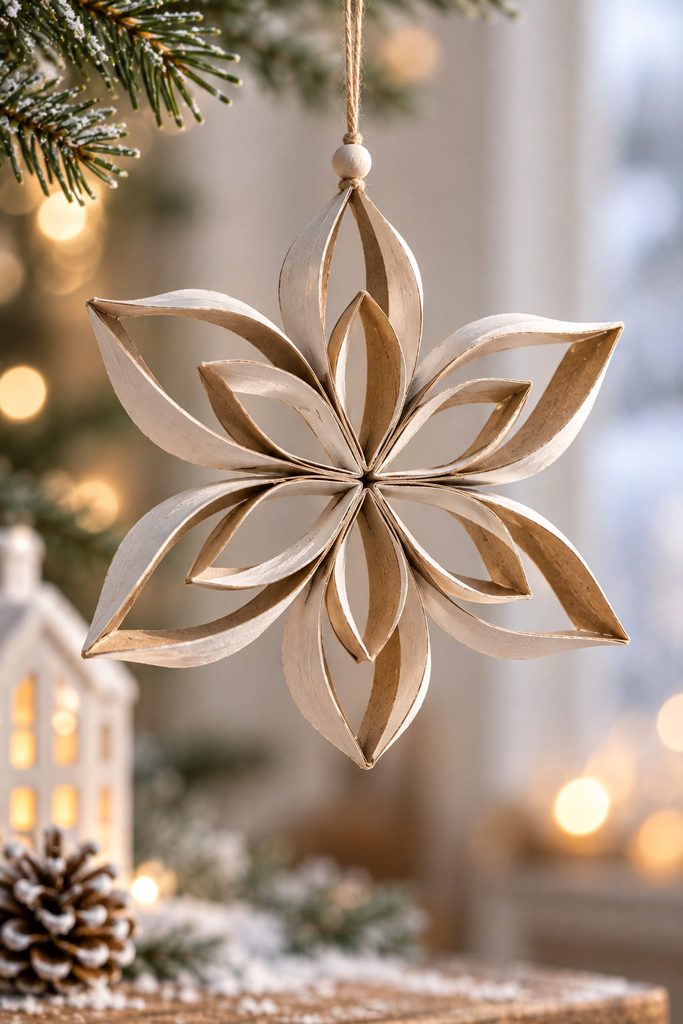
A flat snowflake looks crisp against a window or gift box; a sculpted one catches side light better when it hangs freely. To make the dimensional version, shape the same flattened tube rings into petals, but twist each outer tip slightly forward while keeping the glued center flat.

There are two useful routes:
- Gentle curve: bend only the final half-inch of each petal. The snowflake stays shallow and stores easily between sheets of tissue.
- Deep curve: bow the entire ring before gluing. The shadows are stronger, but the ornament needs more clearance from a wall and can be crushed in a crowded storage box.
Whichever route you use, shape opposite arms as pairs. Random curves can make the piece look warped; matched opposing curves make the depth feel intentional.
7. Mini Snowflake Gift Topper
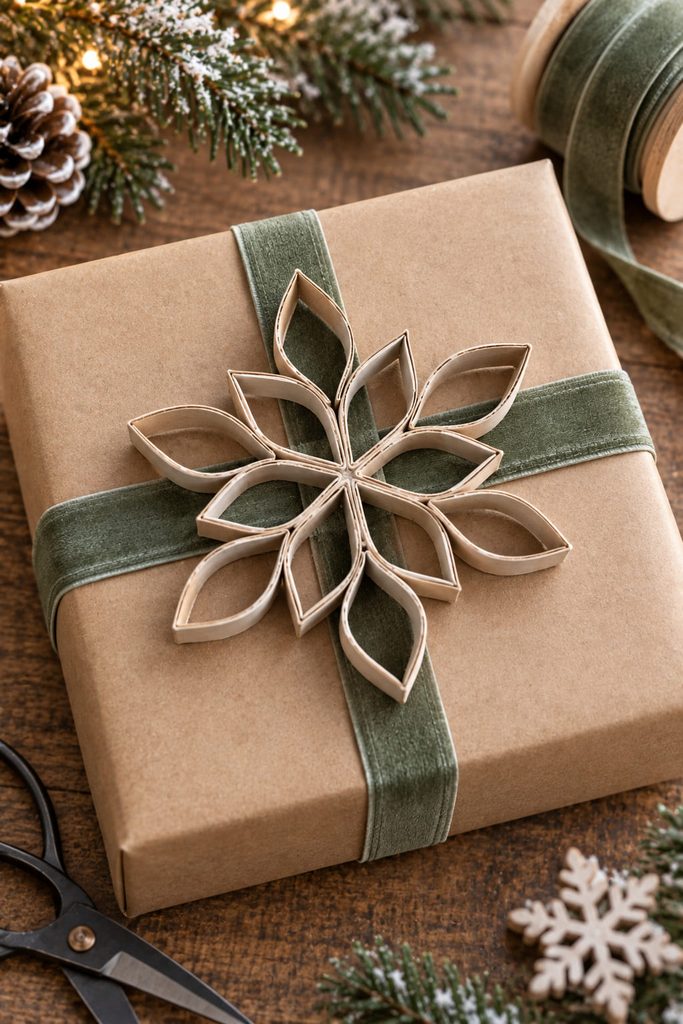
A small cardboard snowflake works best as a gift topper when it stays flatter than a hanging ornament. Cut narrow rings from a well-flattened tube, pinch them into six tiny points, and glue them to a hidden cardstock disk.
Before attaching it, check:
- the outer tips stay inside the box edges;
- the backing catches every arm;
- ribbon can slide underneath without lifting the joints.
Thin tube slices are useful here because the backing carries the structure.
8. Vellum-Center Window Snowflake
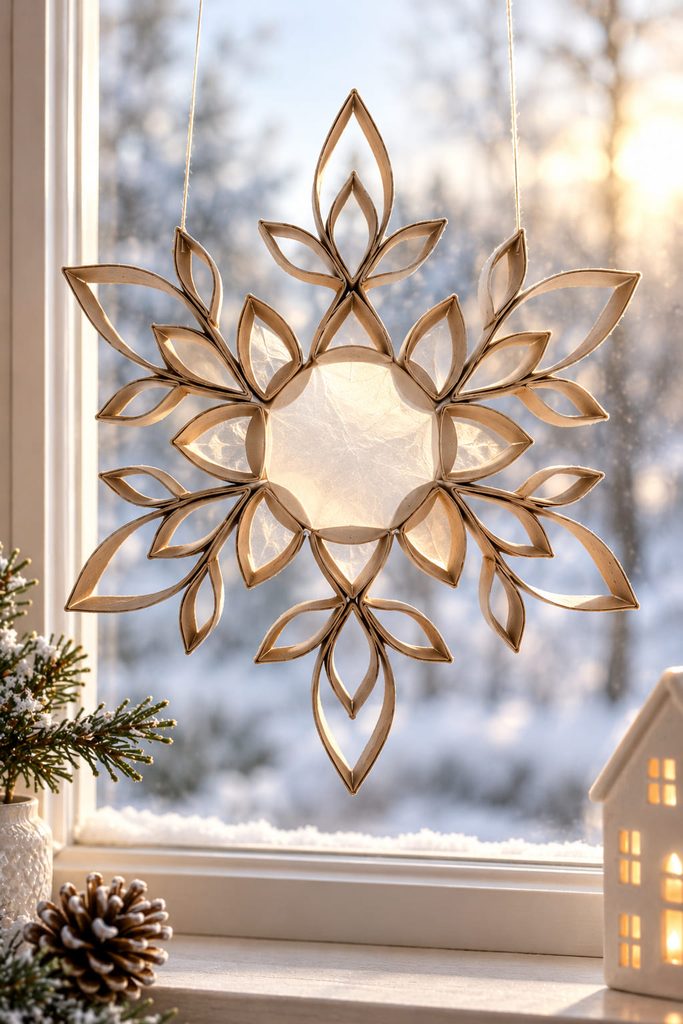
Against daylight, open space matters more than extra cardboard. For a window snowflake, build an open six- or eight-point cardboard frame from pinched tube rings, but leave a generous circular opening in the center. Cover that opening from the back with a single piece of vellum or translucent tissue so the center glows softly while the cardboard arms stay opaque.
Cut the translucent insert after the cardboard frame is complete. Trace the real opening, add a narrow overlap for glue, and keep adhesive only on the hidden cardboard rim; glue smeared onto the vellum becomes much more visible when sunlight hits it. A second thin ring of cardboard on the back can sandwich the vellum edge and keep it from buckling.
Keep the Light Area Clear: decorative pieces should stop before they cross the translucent center. The contrast between the bright middle and the darker ring structure is what gives this version its elegant look. If the vellum puckers after gluing, do not pull it tighter while the adhesive is wet; let the frame dry, then trim the backing ring and replace the insert with a slightly larger piece that can lie flat without tension.
Hang the finished snowflake from two points rather than one if it is wide. Two fine threads keep the vellum face parallel to the window and reduce spinning when air moves nearby. Test the piece against the glass before tying the final knots: the translucent center should read as one calm light field rather than a wrinkled patch.
9. Linked Snowflake Garland
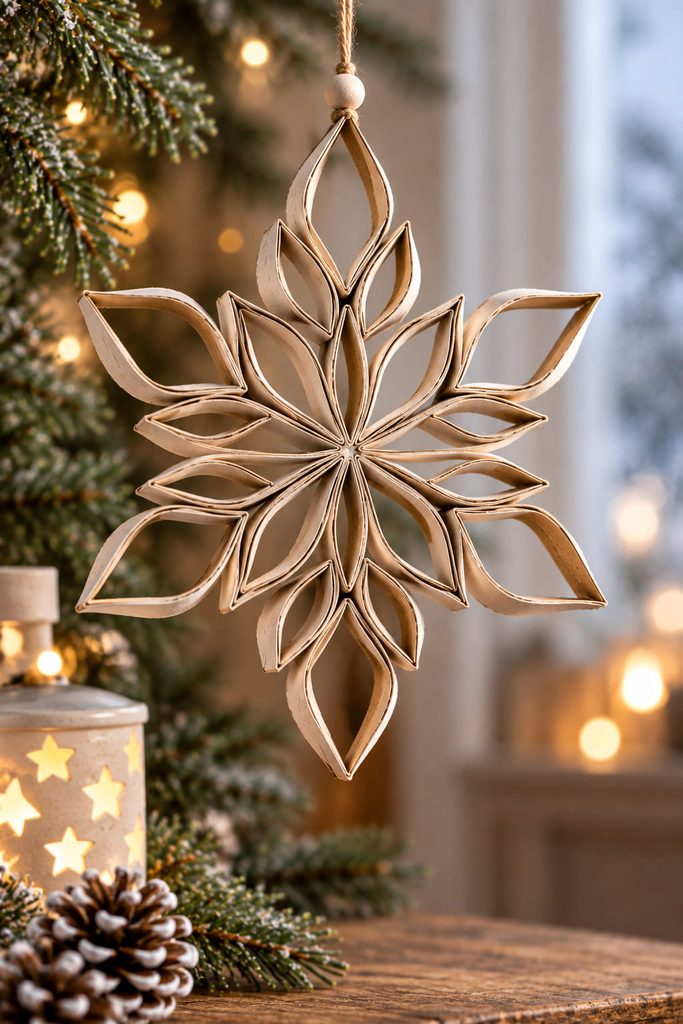
A garland is easier to arrange when each snowflake is small enough to repeat without becoming visually dense. Make a set of compact six-point motifs from identical tube slices, then connect them with thread through reinforced upper joints instead of gluing the snowflakes directly to one another.
Spacing matters more than elaborate decoration. Leave a clear gap between motifs so each silhouette can be seen, and alternate two sizes if a perfectly uniform row feels too mechanical. For a mantel or doorway, thread the garland through the top third of each snowflake rather than dead center; that lets the motifs hang face-forward instead of rotating edge-on.
10. Wreath Made From Mini Tube Snowflakes
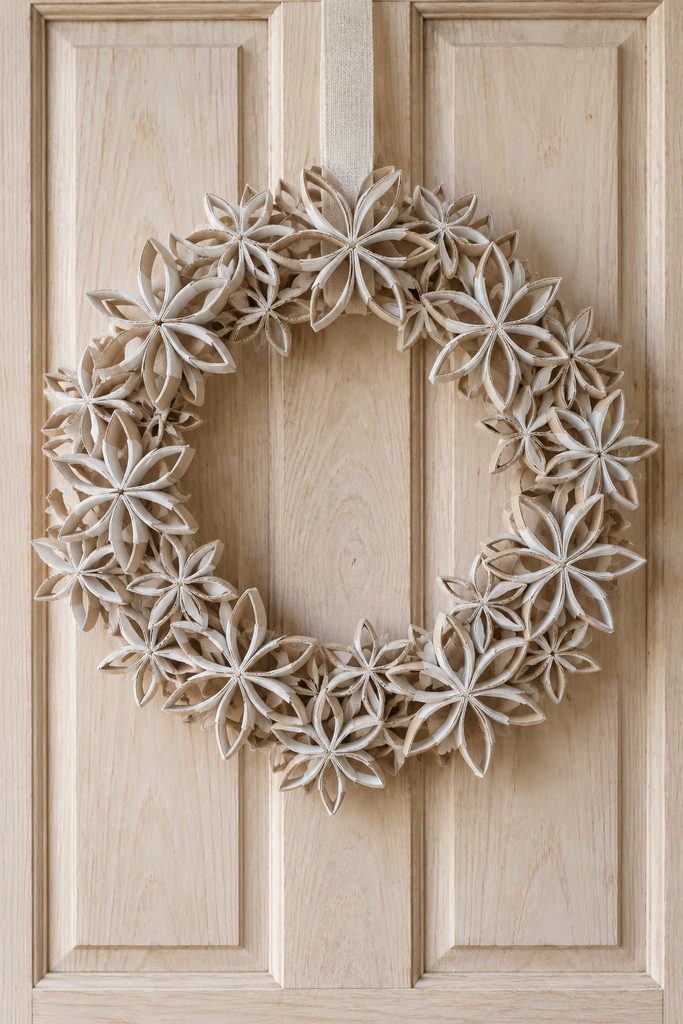
Instead of making one oversized snowflake, repeat several small ones around a flat cardstock or chipboard ring. This turns the snowflake motif into a wreath while keeping every unit light enough to hold with ordinary craft glue.
- Make one complete mini snowflake and use it as the size reference for the batch.
- Lay the motifs around the ring without glue, leaving small overlaps so the backing disappears.
- Rotate neighboring snowflakes slightly so their points interlock visually rather than forming straight rows.
- Glue only after the full circle closes without a large gap.
- Add a ribbon hanger to the backing ring, not to one delicate snowflake arm.
Batch-cutting all tube rings first makes the finished wreath more consistent, but assemble the snowflakes one at a time so small sizing errors do not multiply across the whole circle.
11. Slot-Base Standing Snowflake
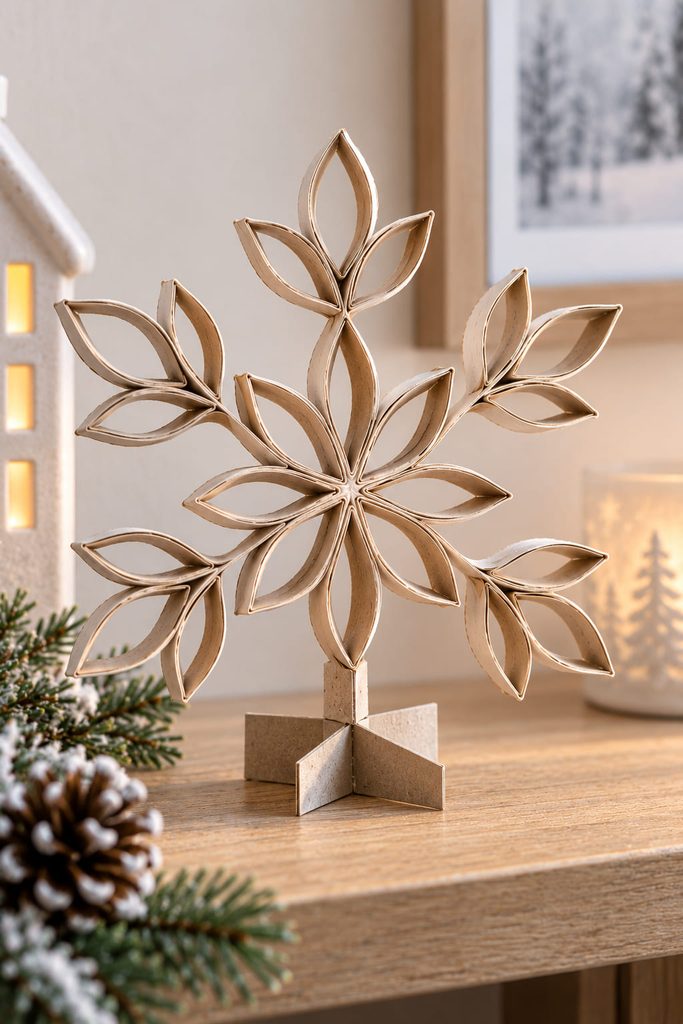
Once the snowflake has to stand on a shelf, the base becomes part of the design. Reinforce a medium flat snowflake at the center, add a short vertical cardstock tab at the bottom, and slide that tab into a crossed two-piece base made from sturdy card. Keep the base visually narrow from the front but deep enough to resist tipping. If added paint or embellishment makes the top heavy, widen the footprint instead of stiffening the arms.
12. Balanced Snowflake Mobile
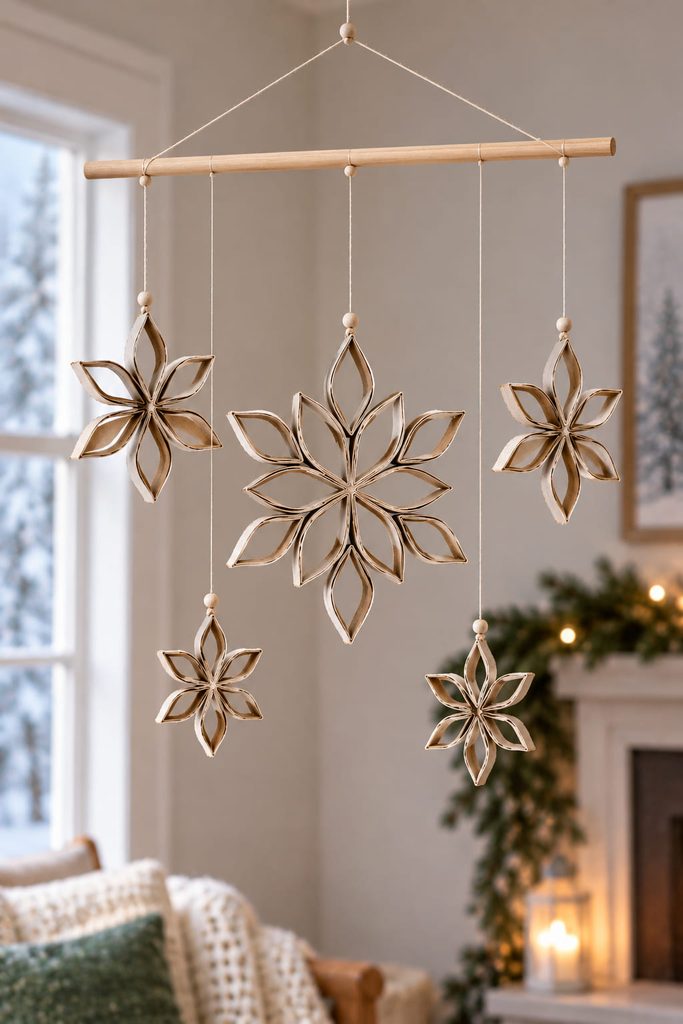
To keep a snowflake mobile visually calm, solve the suspension points before tying the final knots. Use a lightweight dowel, twig, or small hoop as the carrier and hang each snowflake from a reinforced joint with fine thread. Start with the largest motif near the carrier’s center and place lighter pieces farther out so the whole arrangement does not depend on one extreme counterweight.
If the mobile leans, work from the carrier outward:
- The whole bar tips: slide the top suspension point toward the heavier side.
- One snowflake hangs edge-on: move its thread to the next joint or use two attachment points.
- Two motifs collide: shorten one thread or increase the spacing on the carrier.
- The mobile barely moves: reduce weight rather than lengthening every thread.
Set the mobile down between adjustments and retie only after the carrier returns to level. Keep the snowflakes thin and relatively open; the goal is gentle rotation and changing silhouettes, not a cluster dense enough to behave like one heavy ornament.
13. Cross-Slot 3D Snowflake
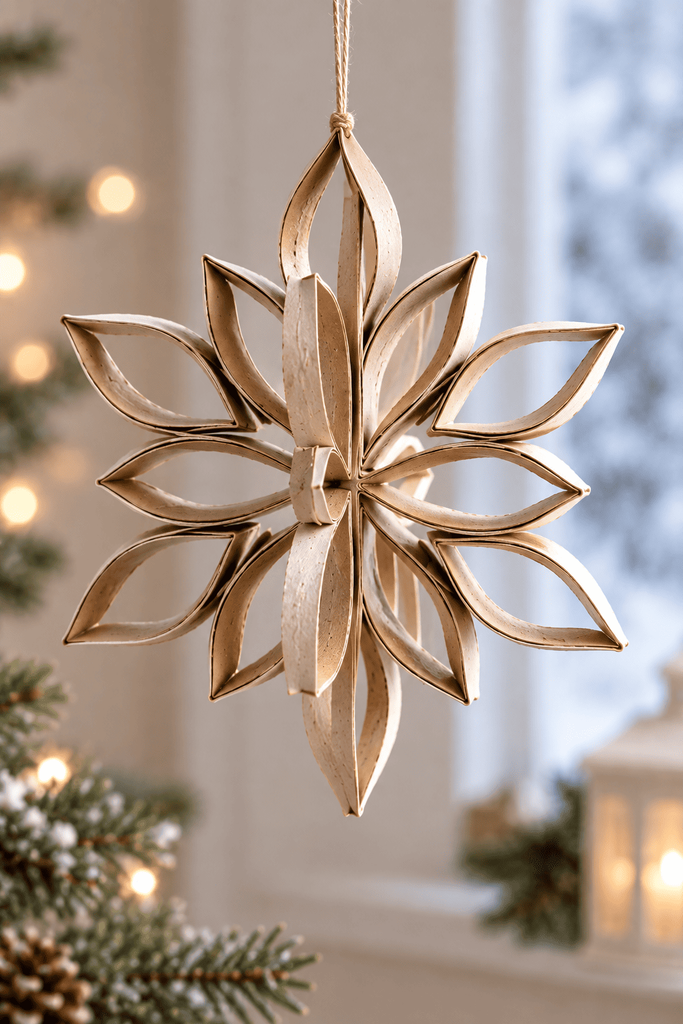
For real volume without stacked spacers, make two matching flat snowflakes and join them at right angles through center slots. Each half begins as its own rigid six-point unit; the 3D effect comes from the intersection, not from bending every arm.
Cut a straight slot from the center of the first snowflake toward one side and a matching slot from the opposite edge toward the center of the second. Both slots should be just wide enough for the combined cardboard thickness. Slide the pieces together slowly until their centers meet. If the fit is loose, a tiny paper shim hidden inside the slot is cleaner than flooding the joint with glue.
Slot Fit Test: the assembled snowflake should stand in an X-shaped cross section without forcing either half to bow. If one half curls, widen the slot slightly and test again.
For hanging, run the thread through the intersection or through two opposite upper joints so the snowflake keeps its three-dimensional orientation. Before adding glue, rotate the assembled piece through a full turn and check that the two planes stay centered; a slot that stops short of the midpoint can leave one half visibly higher than the other.
Storage is the trade-off. The crossed form gives strong depth from nearly every viewing angle, but it needs more clearance than a flat ornament. If flat storage matters, leave the center unglued and use a snug friction fit so the two halves can be separated after the season.
14. Woven-Center Snowflake
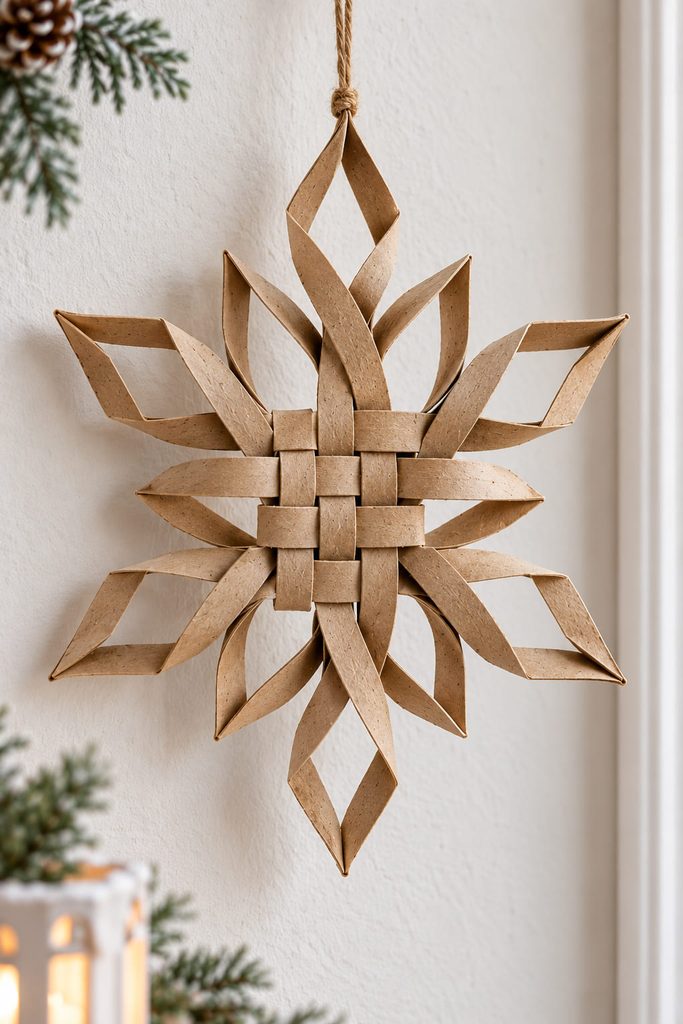
Cut an opened tube into long, narrow cardboard strips and use the middle section for a true over-under weave. Three strips running one direction and three crossing them make a compact lattice; the free ends then become the beginning of the snowflake arms.
Choose the center by how the finished snowflake will be used:
| Center | Best For | Trade-Off |
|---|---|---|
| Tight weave | Hanging ornament | Sturdier, but visually denser |
| Looser weave | Wall display | More negative space, but benefits from small hidden glue dots at selected crossings |
In either version, keep the over-under order consistent across each row; simply stacking strips on top of one another does not create the same locked center. Finish the free ends by pinching pairs into points or curling them outward, and leave enough of the woven core visible for the construction to read.
15. Snowflake Gift Tag Frame
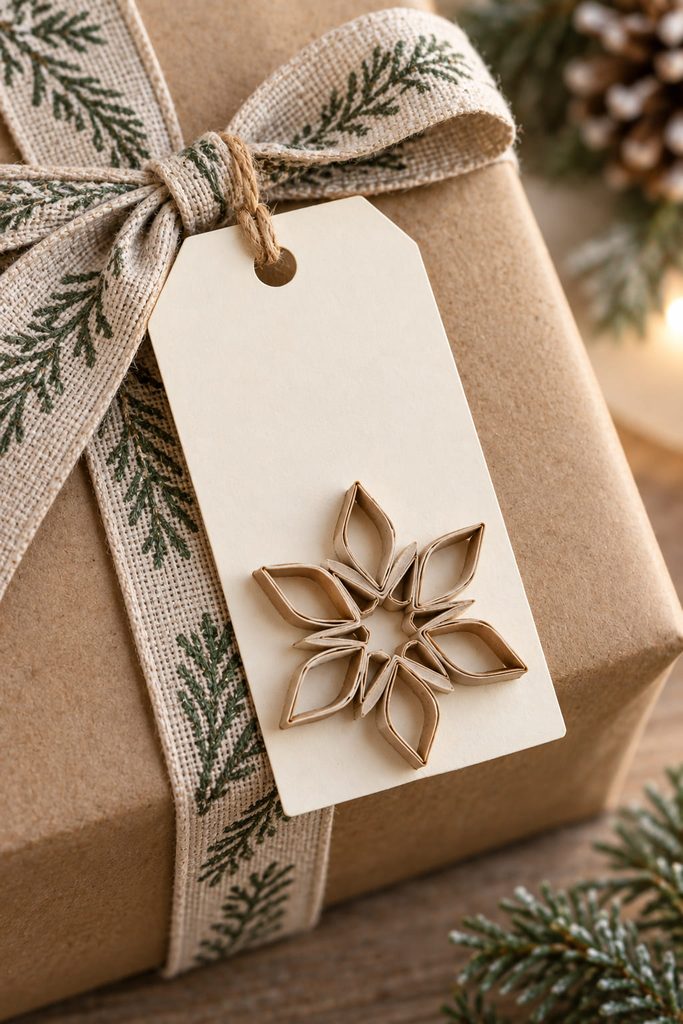
A gift tag can carry the snowflake without becoming a bulky topper. Punch the ribbon hole in a sturdy cardstock tag first, then make a miniature six-point tube-ring snowflake that fits below the writing area.
- Keep the widest points inside the tag edges.
- Leave the snowflake center open for a lighter look.
- Glue it low enough that the ribbon hole stays clear.
- Write the name before tying the tag to the gift.
Short leftover tube slices are ideal for this small-scale version.
16. Oversized Clustered Snowflake Backdrop
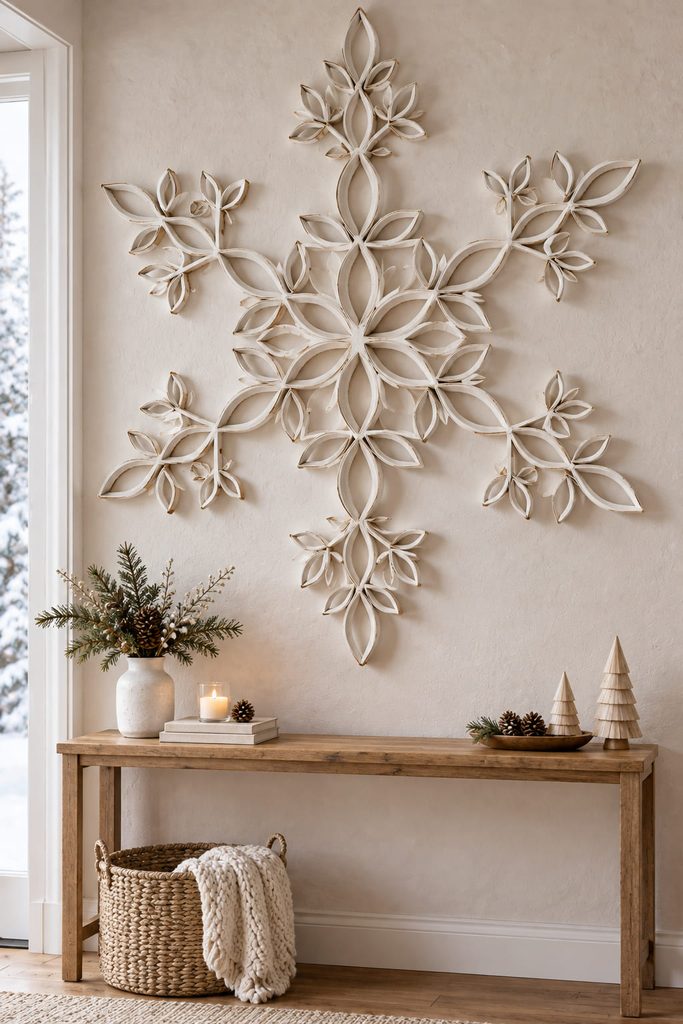
For a statement wall piece, scale comes from repeating modules rather than forcing one tube to make a longer arm. Build each of six main arms as a chain of pinched rings, then branch smaller loops off the sides. A hidden cardstock or thin corrugated-cardboard center plate gives every arm a broad attachment area and keeps the load away from one glue joint.
Lay the full snowflake on the floor or a large table before committing to the center. Check the outer diameter, the spacing between arms, and whether the branches stay clear enough for the wall color to show through. If the silhouette starts to look like a solid rosette, remove pieces from the inner third of the arms rather than from the tips; preserved negative space makes the snowflake read from across the room.
For mounting, support the center plate with removable wall-safe hooks or another method appropriate to the wall surface and the finished weight. Do not hang a large clustered piece from a single decorative loop at one arm—the center is the part designed to carry the structure.
How to Prep Tubes for Toilet Paper Roll Snowflakes
Use only clean, completely dry cardboard tubes. Flatten each tube along two opposite sides with a ruler or bone folder, then mark cut widths before slicing; equal ring widths make radial designs much easier to align. A sharp craft knife gives the cleanest edge on dense cardboard, while sturdy scissors are usually enough for thinner tubes.
For a natural kraft finish, brush away loose paper fibers and leave the edges visible. If you paint the pieces, a light coat before assembly is easier than trying to reach into finished loops. Let painted cardboard dry fully before gluing because moisture can soften the creases and make matching rings spring open at different widths.
When a project needs many identical pieces, cut one test ring first and build a partial arm. That small check tells you whether the tube wall is stiff enough, whether the chosen width looks proportional, and how many rings the finished snowflake will actually require.
Choose the Snowflake by Where It Will Live
Start with the classic six-point ornament if you want the simplest introduction to the material. Choose the vellum-center design for a bright window, the cross-slot version when visible depth matters, or the standing snowflake when the piece needs to work on a shelf without a hanger. For a larger seasonal display, the mini-snowflake wreath and clustered backdrop make better use of a whole stack of saved tubes.
If you want to keep working with the same recycled material after the snowflakes are finished, continue with 14 Toilet Paper Roll Christmas Crafts Worth Saving Tubes For for ornaments, holders, table details, and other cardboard-tube structures.








