This post contains affiliate links. As an Amazon Associate I earn from qualifying purchases, at no extra cost to you. Thank you for supporting Diynify!
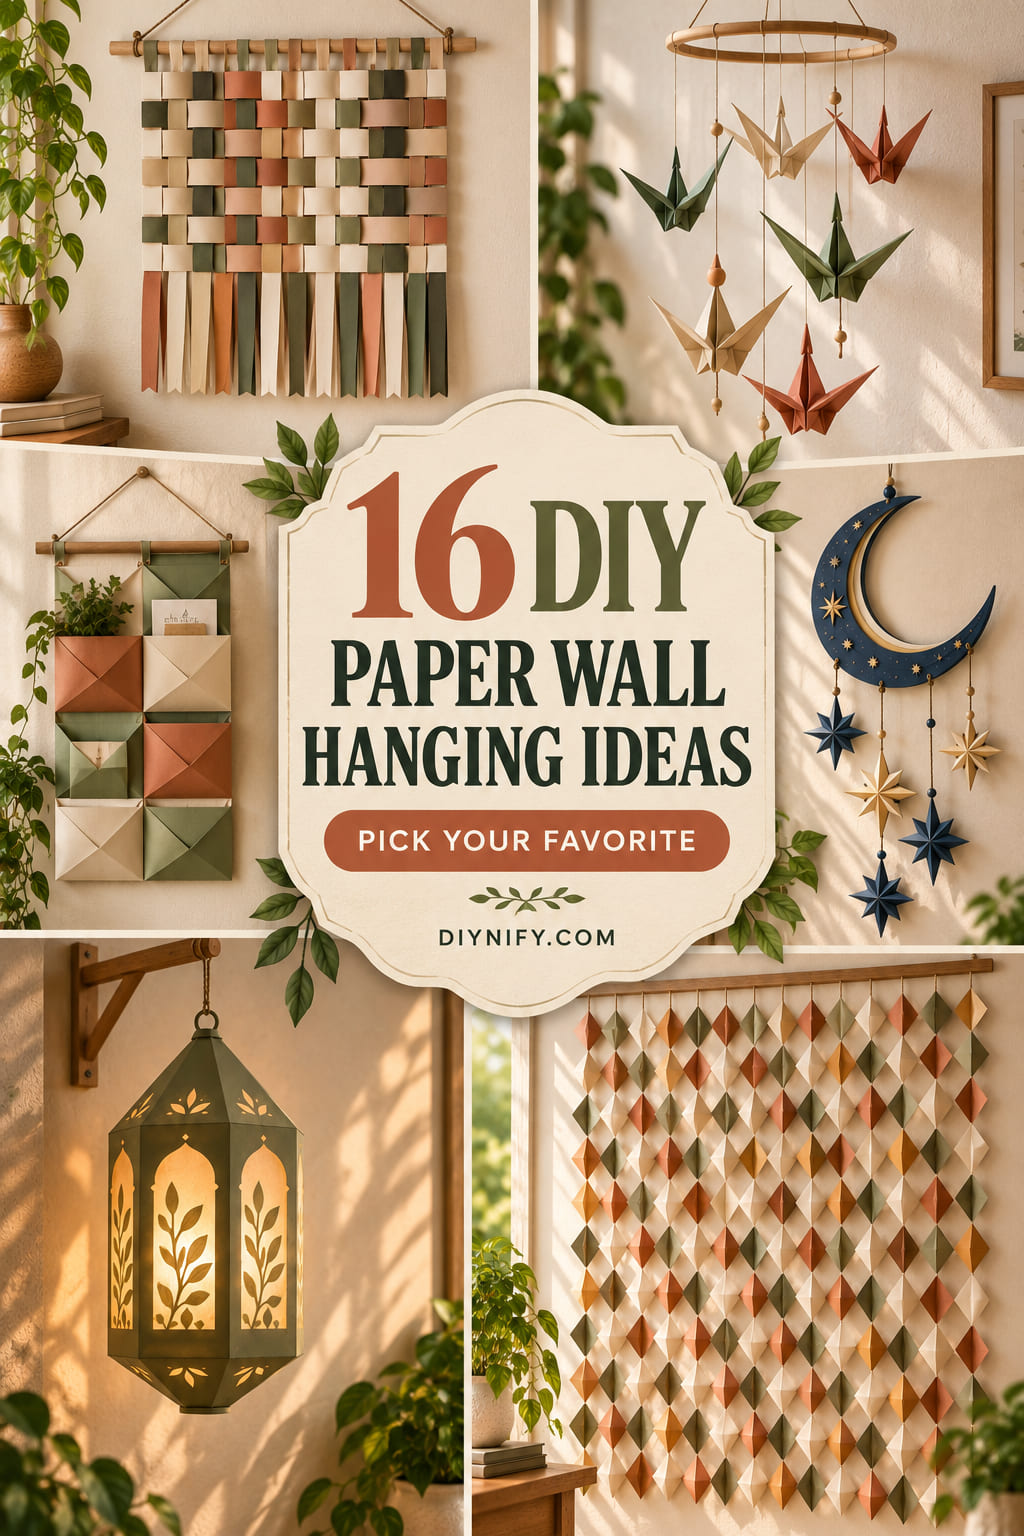
Wall hanging DIY paper ideas can add movement, texture, and color without turning a room into a gallery of flat paper cutouts. The most interesting designs use the way paper folds, curls, links, overlaps, or hangs under its own weight, so the suspension system becomes part of the finished decor.
Most projects below use cardstock or decorative paper, scissors or a craft knife, paper-safe glue, and a ruler or scoring tool. Several also need thread, cord, a narrow wooden dowel, a hoop, or lightweight hanging hardware. Choose by the effect you want: woven pieces create dense texture, suspended shapes leave more negative space, and long vertical hangings work especially well above a console, beside a bed, or on a narrow wall.
1. Cascading Paper Leaf Dowel Hanging
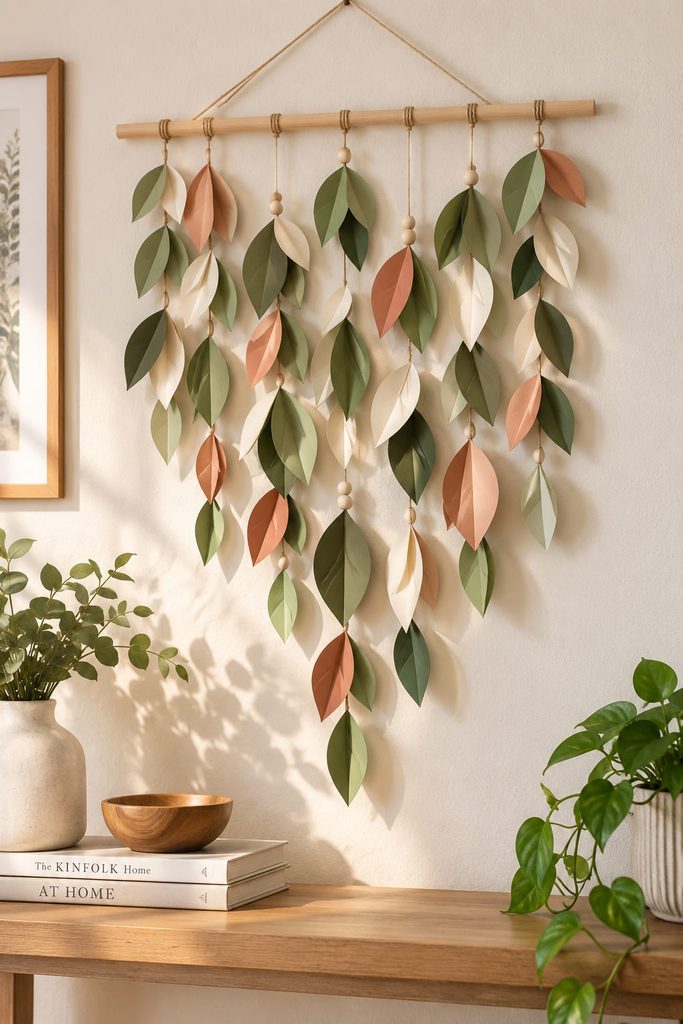
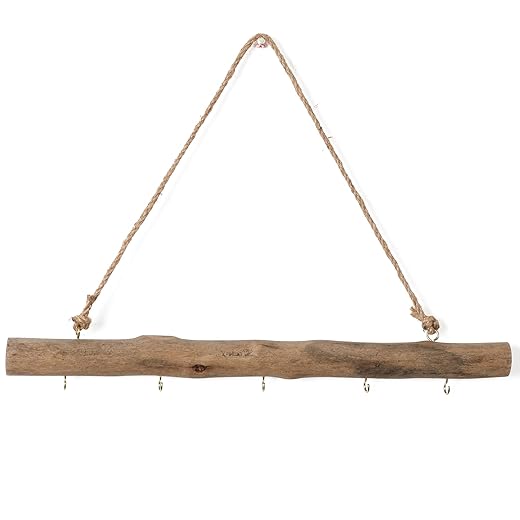
A slim dowel gives a paper leaf arrangement enough structure to span the wall without requiring a solid backing. Instead of making one heavy branch, suspend several cords at uneven intervals and attach folded leaves in pairs along each line. A shallow center crease makes every leaf catch side light, while the gaps between strands keep the overall piece airy.

Vary strand length rather than simply changing leaf color. A broad, low cascade works above furniture; a narrow composition with longer center strands can fill an awkward vertical space. Reinforce the top of every cord with a wrap or secure knot around the dowel instead of relying on a small glued paper tab to carry the full hanging load.
Drape Check: Lift the finished dowel from its actual hanging points before mounting it. If one side drops, redistribute a few leaves or shift the suspension loop rather than trying to disguise the imbalance on the wall.
2. Woven Paper Strip Tapestry
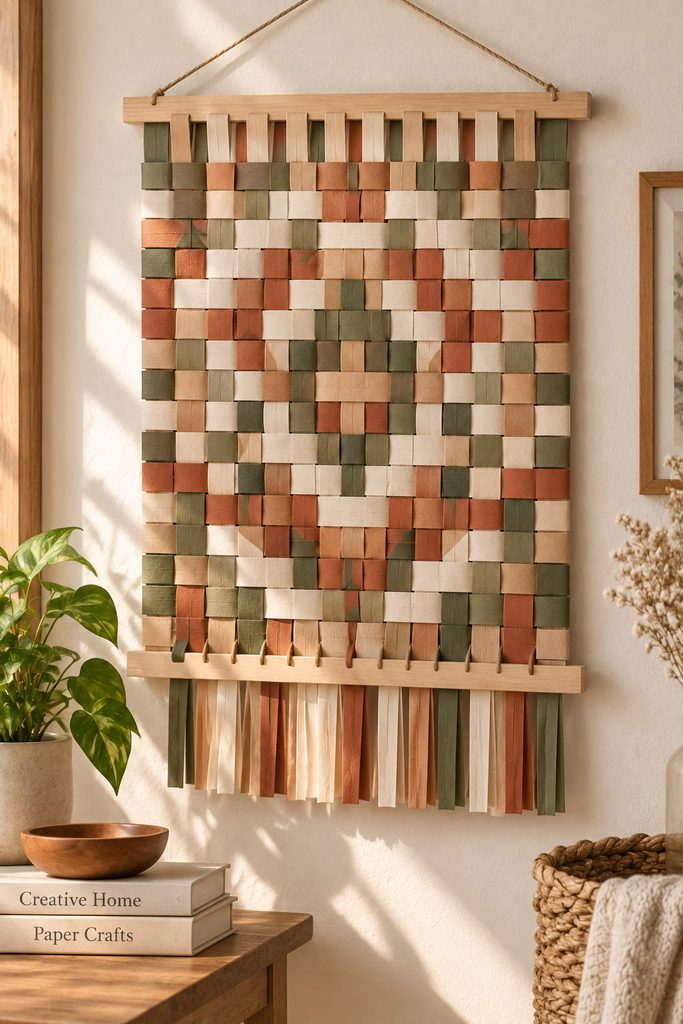
Real weaving gives a paper wall hanging a different surface from layered strips because every weft strip must physically pass over and under the warp. Start with a lightweight cardstock frame or a pair of sturdy horizontal rails, then stretch vertical paper strips between them. The frame carries the tension; the woven paper creates the visible pattern.
A reliable sequence is:
- Anchor the vertical warp strips with even spacing and modest tension.
- Pass the first horizontal strip over one warp and under the next.
- Reverse the over-under order on the following row.
- Push completed rows together gently rather than crushing them into a dense block.
- Secure the ends where they meet the frame before trimming excess paper.
- Attach the hanging cord to the frame, never to an individual woven strip.
Paper that is too thin can buckle as the rows tighten, while very stiff cardstock becomes difficult to pass through narrow gaps. If the center begins to bow, reduce the weaving tension before adding more rows.
The finished piece should hang flat enough that the frame does not twist, yet the weave should retain slight surface relief. That combination of controlled tension and visible interlacing is what separates a true paper tapestry from a striped collage.
3. Layered Cut-Paper Arch Hanging
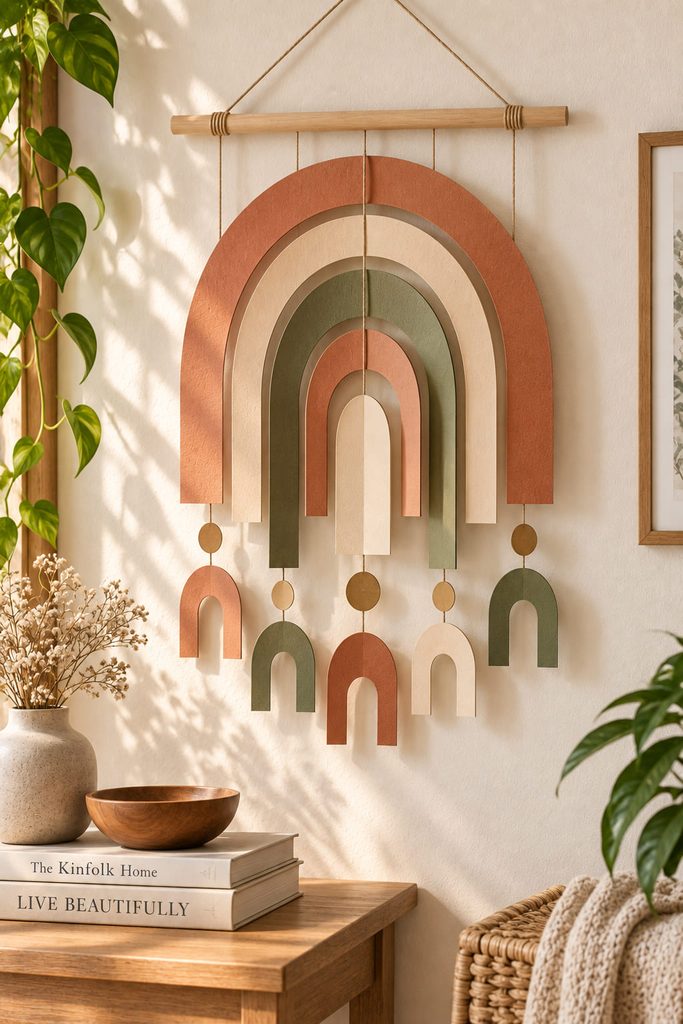
Nested arches can create surprising depth without a thick backing board. Cut several open arch shapes in gradually changing sizes, add narrow paper spacers between selected layers, and connect the stack only along the upper section. Suspending the finished assembly from a reinforced top rail lets the lower edges remain visually light.

The important design decision is how much wall stays visible through the openings. Too many closely spaced layers turn the center into a dense block; fewer, wider gaps make the negative space part of the composition. This works particularly well when the arch sits against a contrasting wall and receives light from one side, where even shallow spacers produce clear shadow lines.
4. Rolled Paper Bead Fringe Hanging
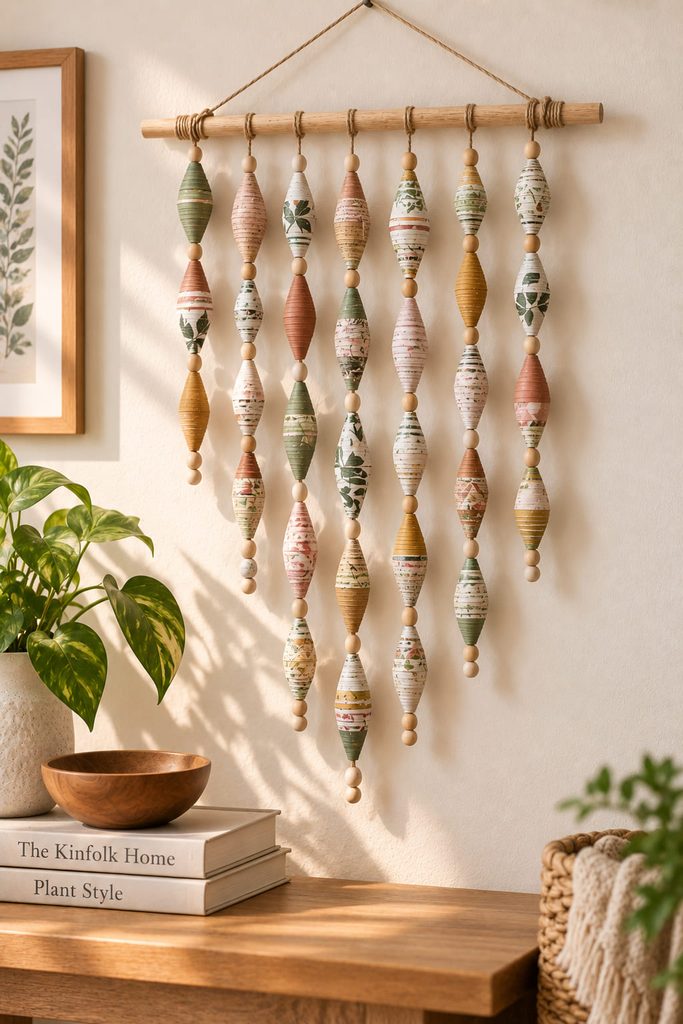
Long triangular paper strips roll naturally into tapered beads, making them useful for a wall hanging that needs small repeated units without the weight of ceramic or wood. Roll each triangle from its wide edge around a thin skewer, glue only the final tip, and keep the center channel open so the bead can be threaded after it dries.
Before building the full fringe, check four things:
- beads roll straight instead of curving like bananas;
- the center holes remain open;
- paper tips are fully secured;
- the top rail can support every finished strand.
Mix long and short beads with deliberate empty sections instead of filling every inch of cord. The eye reads the alternating paper cylinders and gaps as a rhythm, and the hanging stays light enough to move slightly without becoming tangled.
5. Accordion-Fan Cascade on a Narrow Rail
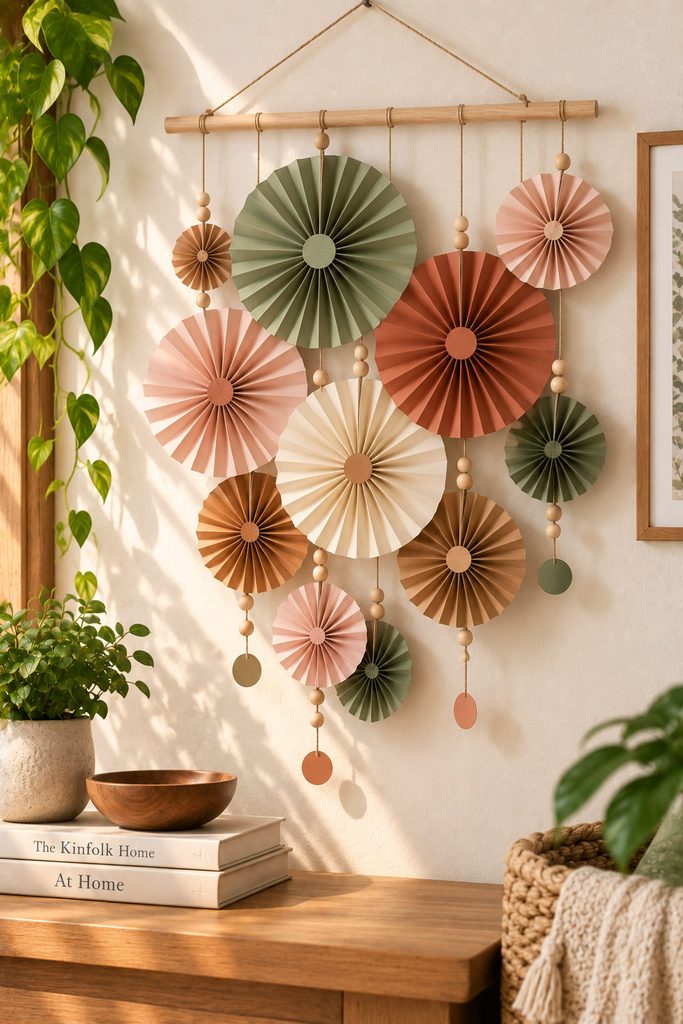
Accordion-folded circles usually become flat wall medallions, but suspending them changes how the pleats behave. Make several fans in different diameters, lock each center with small cardstock disks, and hang them below a narrow rail so the circles overlap only slightly rather than being glued directly to the wall.
Place the larger fans toward one side or near the middle, then let smaller pieces descend at different heights. Because each fan hangs independently, slight movement reveals the pleat depth that disappears when the same shape is pressed flat against a surface.
Use the reinforced center as the attachment point. A thread passed through one outer pleat concentrates the load on a weak fold and can tear the fan even when the paper itself feels sturdy.
6. Balanced Origami Crane Wall Mobile
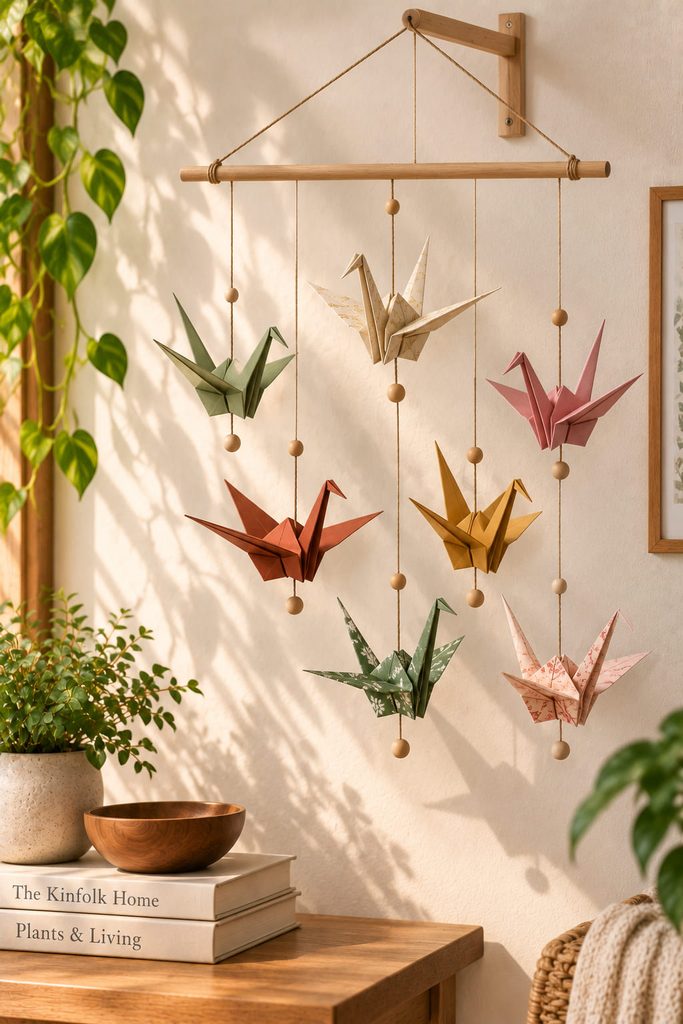
A crane mobile works because the folded birds are treated as suspended weights rather than identical ornaments. Hang several cranes from a lightweight horizontal arm, then support that arm from a point close to its actual center of mass. The shapes can be visually asymmetric as long as the finished mobile remains physically balanced.

Leave enough clearance between the birds and the wall for small air movements. A mobile mounted too close to the surface will scrape, turn sideways, or repeatedly catch one wing.
If the structure refuses to sit level, diagnose the cause before changing the decoration:
- One side always drops: move its cord inward or reduce weight on that side.
- The arm rotates toward the wall: increase wall clearance at the main hook.
- One crane hangs crooked: check its thread attachment before refolding the bird.
- Birds collide: shorten or separate neighboring suspension lines.
Balance the complete mobile from its final loop before mounting it. Symmetrical spacing does not guarantee symmetrical weight.
7. Interlinked Paper Loop Waterfall
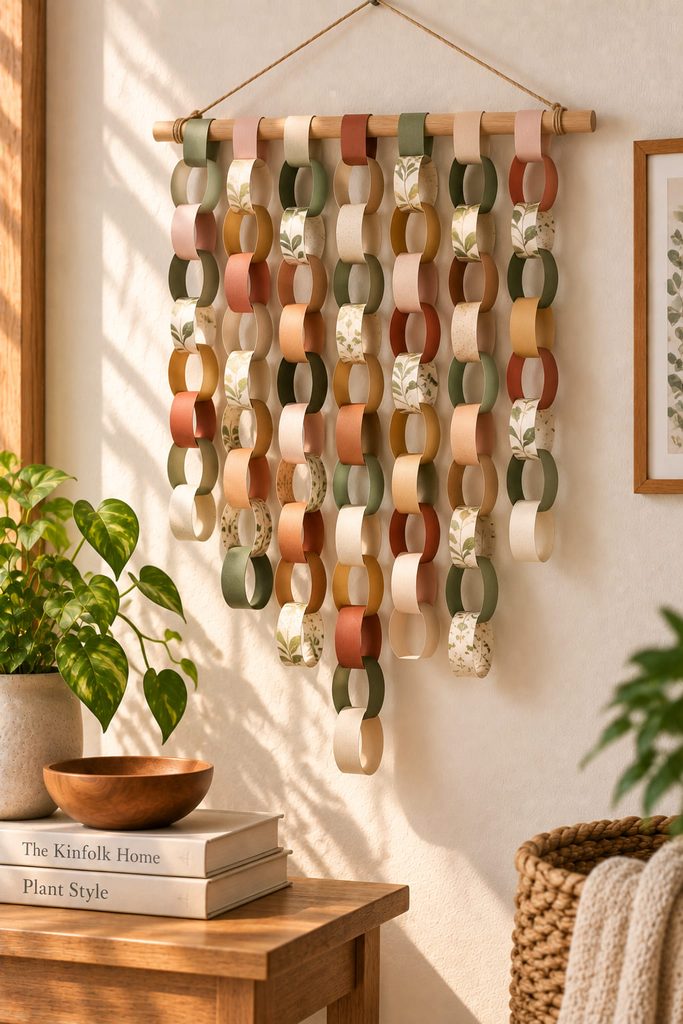
A chain becomes much more architectural when several strands descend from one dowel instead of forming a single party garland. Cut consistent paper strips, close the first into a ring, feed the next strip through it, and continue linking until each strand reaches its planned length.
For a waterfall silhouette:

- Build the longest chain first.
- Use it as the reference while shortening neighboring strands.
- Attach every top loop around or through a reinforced connection at the dowel.
- Hang the dowel temporarily and check the lower outline.
- Adjust strand length before adding any small finishing details.
Using different strip widths changes the apparent weight of the chains more effectively than simply adding more colors. Wide loops read as bold graphic elements; narrow loops produce a softer, denser surface.
8. Pleated Paper Pocket Organizer Hanging
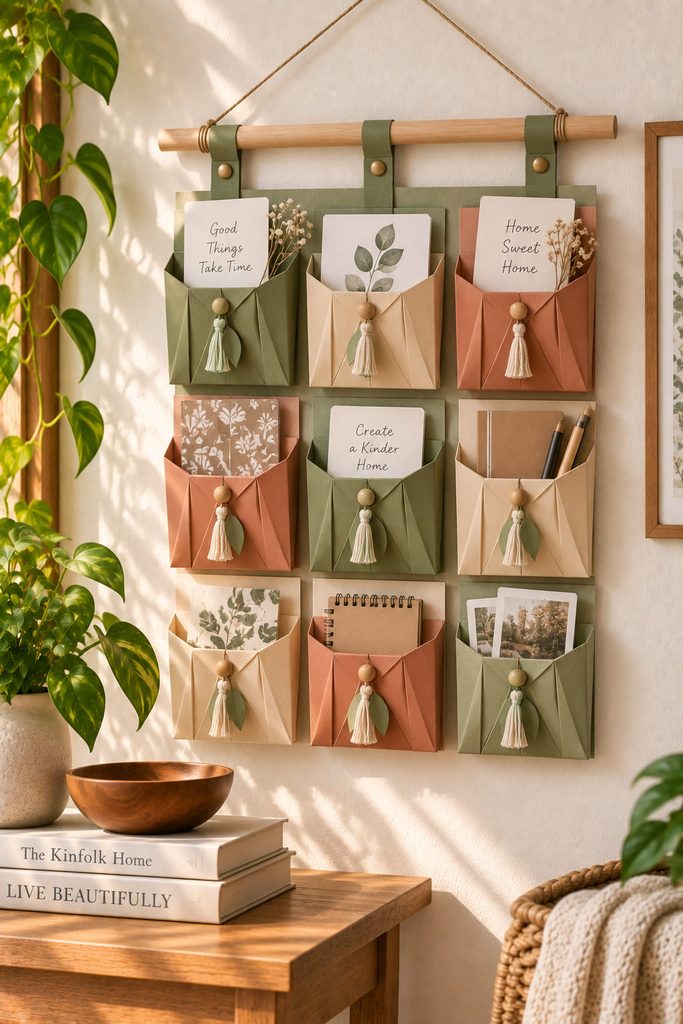
A decorative hanging can also earn wall space by holding lightweight notes, postcards, or paper swatches. Build a row of shallow pleated pockets from medium-weight cardstock and attach them to a strong folded paper carrier strip suspended from a dowel.
Each pocket needs four functional parts: a closed base, side folds that create capacity, a back panel that carries the load, and an opening wide enough for fingers to reach the contents. Before assembling several pockets, make one full-size test and insert the type of item you expect to store. A pocket that looks generous while flat may become surprisingly tight after the side pleats are glued.
Attach the carrier to the dowel at two or more reinforced points so the organizer hangs level when some pockets contain more paper than others. Keep the intended load light; this is suited to mail, cards, lightweight stationery, or small paper keepsakes rather than tools or bulky objects.
Load Test: Fill the center and outer pockets differently and lift the organizer by its final suspension points. If the carrier strip bows sharply, reinforce the back or reduce the pocket depth before mounting it.
This is one of the more construction-sensitive projects in the group because a successful version has to remain decorative while still allowing repeated loading and access.
9. Spiral-Cut Paper Curl Mobile
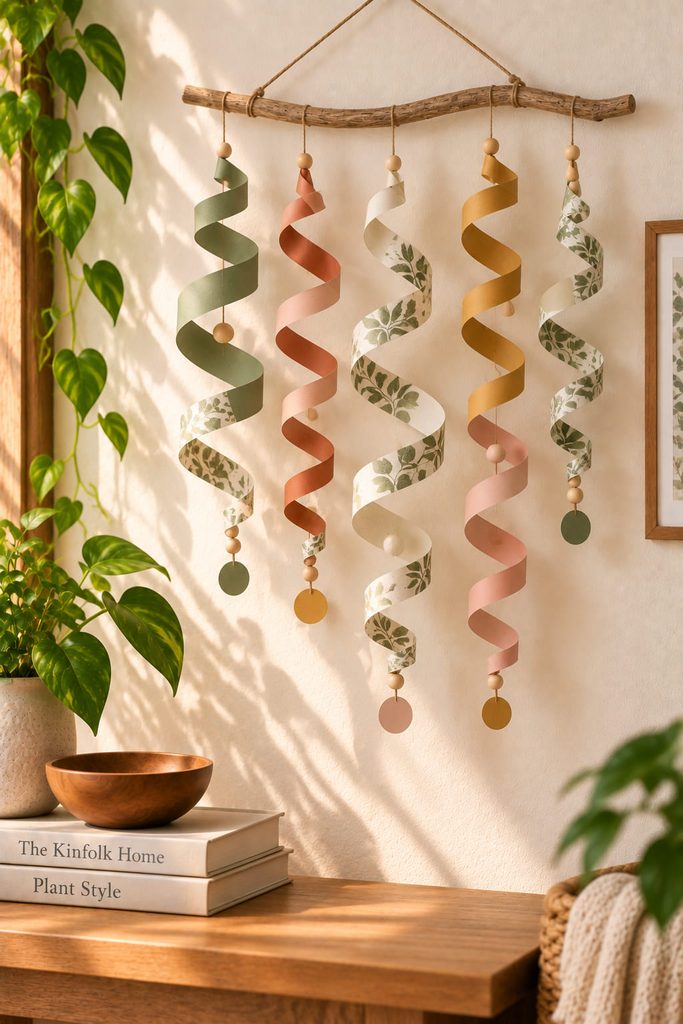
A flat paper circle can become a long suspended coil with one continuous spiral cut. Start near the outside edge and cut inward at a consistent spacing, stopping before the center disappears. When the center is lifted, gravity pulls the spiral open into a tapered helix.
Several spirals suspended from a shallow branch or narrow rail create movement without requiring complicated joints. Change diameter and cut spacing rather than adding extra layers: a wide spiral opens with fewer, broader turns, while tighter spacing creates a longer and more delicate curl.

Hang each spiral from its intact center and leave the lower end free. Gluing both ends in place removes the movement that makes the form interesting.
10. Folded Diamond Pendant Strand
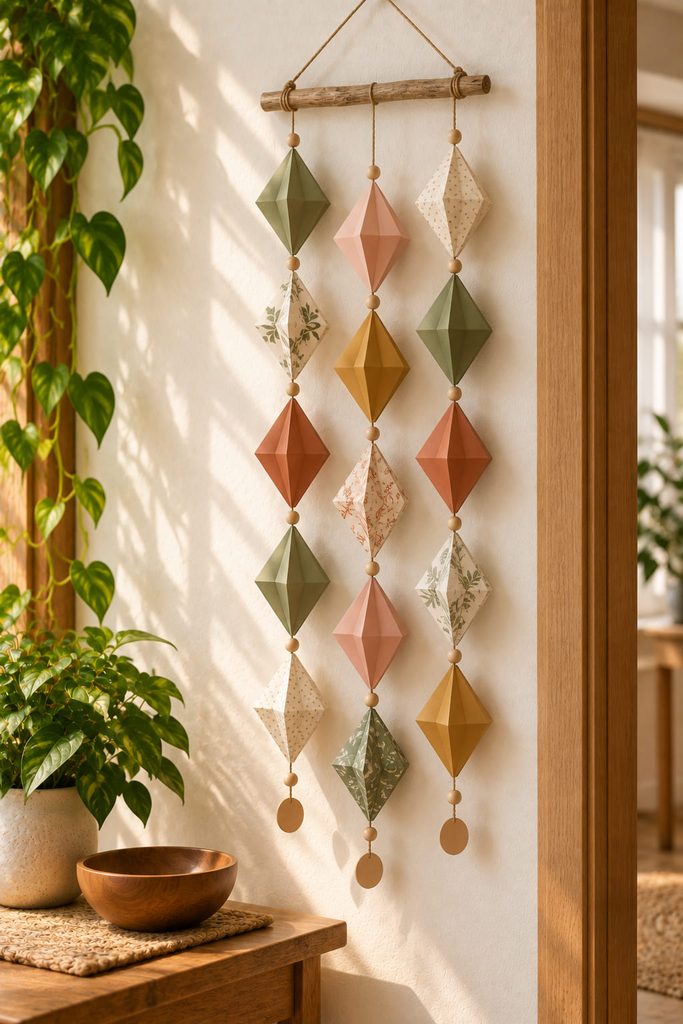
Repeated geometric pendants can fill a tall, narrow section of wall where a wide tapestry would feel crowded. Score a symmetrical paper net, fold the panels inward, and close the tabs to form a hollow diamond. Thread several finished diamonds onto a vertical cord with small gaps between them.
The challenge is keeping the strand on a clean centerline. If the cord exits one pendant off-center, the entire shape can twist and make the next one appear misaligned. Create the top and bottom thread openings before closing the final seam, then run the cord through the actual center of the form.
A small lightweight paper bead or folded stop at the bottom can add enough tension to keep the strand visually straight without turning it into a heavy plumb line.
11. Fringed Paper Feather Hanging
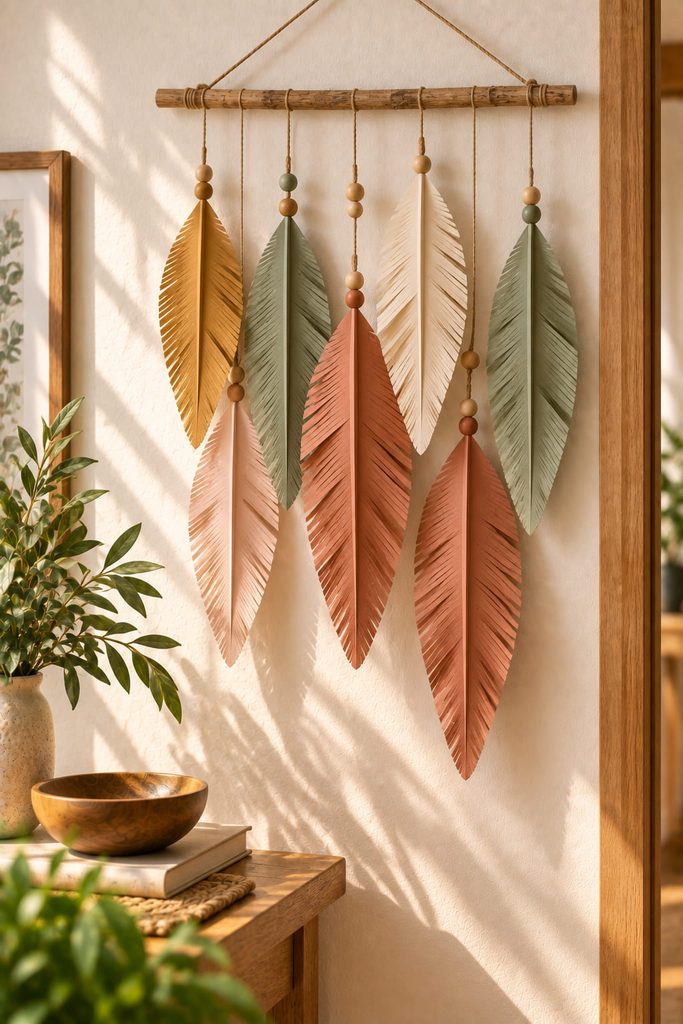
Feather shapes become more convincing when the fringe can lift away from the wall instead of being drawn onto a flat silhouette. Fold a long paper leaf shape gently along its centerline, then make narrow angled cuts toward the crease while leaving an uncut spine.
Before assembling the hanging, check:
- fringe cuts stop before reaching the center spine;
- neighboring cuts are not so narrow that they tear during handling;
- each feather has a reinforced top hole or folded attachment tab;
- the suspension cords leave enough space for the feather edges to move.
Hang the largest shapes higher and let narrower feathers extend below them. The central folds produce one level of depth; the cut fringe creates a second, finer layer of shadow.
12. Overlapping Paper Scale Panel
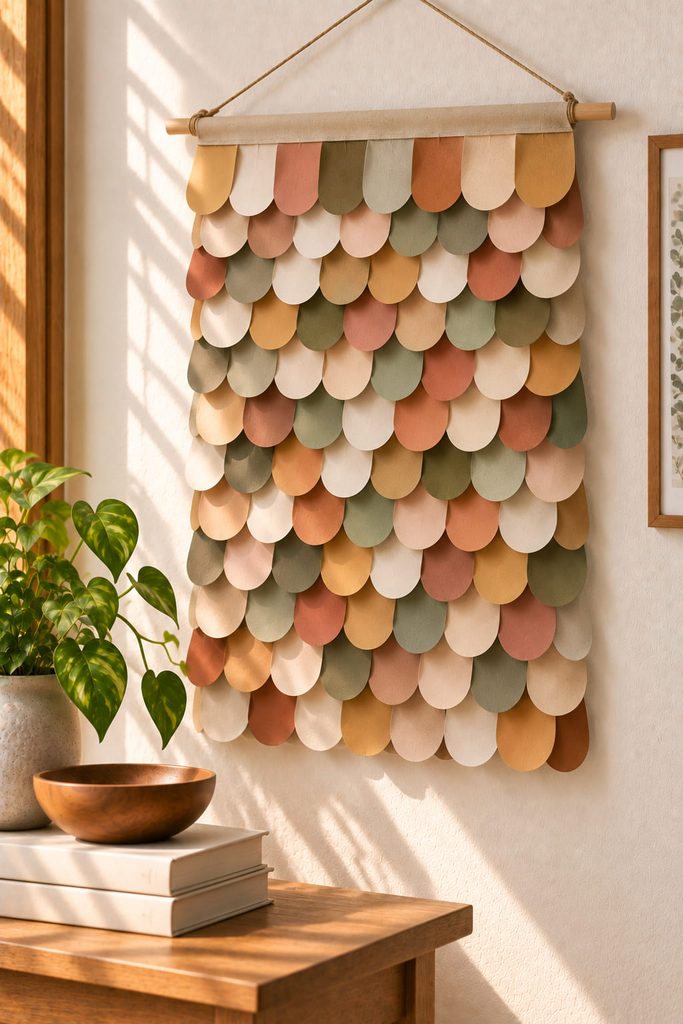
For a hanging that reads as one calm surface rather than many separate objects, cover a suspended carrier sheet with rows of paper scales. Each scale overlaps the one beneath it like a lightweight shingle, hiding attachment points while leaving the lower edge free.
Start at the bottom and work upward. That order matters: every new row should cover the glued or slotted top edges of the previous one. Slightly shifting alternate rows keeps the vertical seams from forming rigid columns.
The carrier should be stronger than the decorative scales because it holds the entire composition. Suspend it from a top rail or reinforced folded channel, then allow the lower edge to hang naturally rather than fastening it to the wall. Side light will make the overlapping edges much more visible than front-facing light.
13. Layered Paper Moon-and-Star Drop
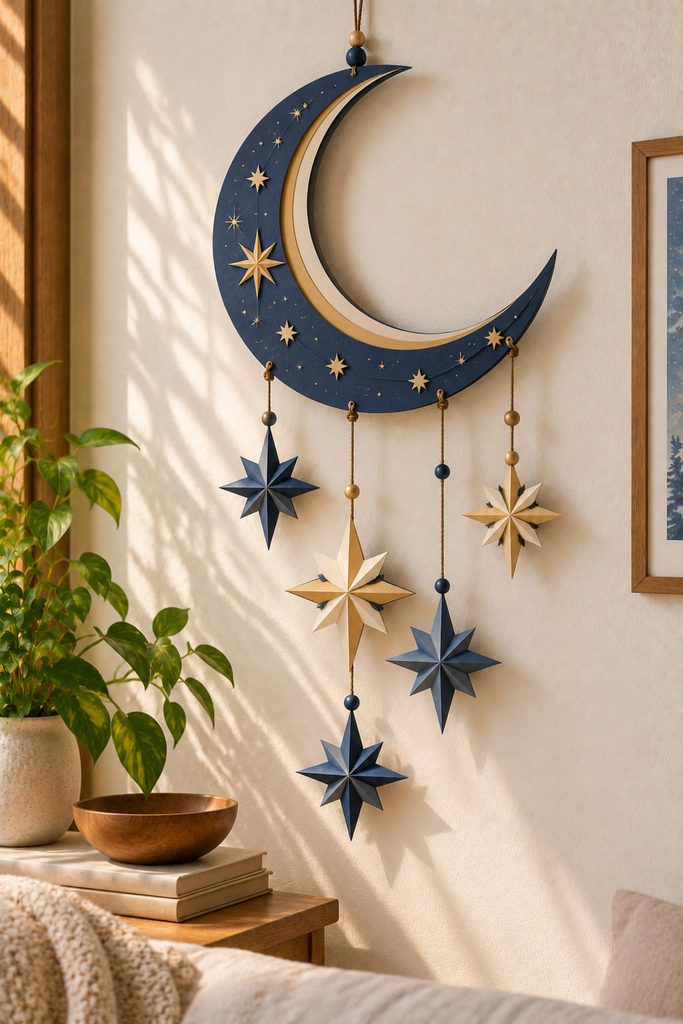
A crescent with descending stars can look delicate without depending on thread alone to define the composition. Laminate two crescent shapes around a small internal reinforcement near the top, then suspend individual layered stars from the lower curve at different lengths.
Build it in this order:
- Cut the crescent faces and the star components.
- Mark all lower suspension points before laminating the crescent.
- Trap reinforcement tabs or short cord anchors between the crescent layers.
- Assemble the stars separately.
- Add them one at a time while checking the crescent’s balance.
- Install the main hanging loop only at a reinforced upper point.
The crescent is the load-carrying member, so decorative star cords should not share one unreinforced punched hole. A few well-spaced drops usually read more clearly than a dense curtain of tiny stars.
14. Vellum-Window Paper Lantern Wall Hanging
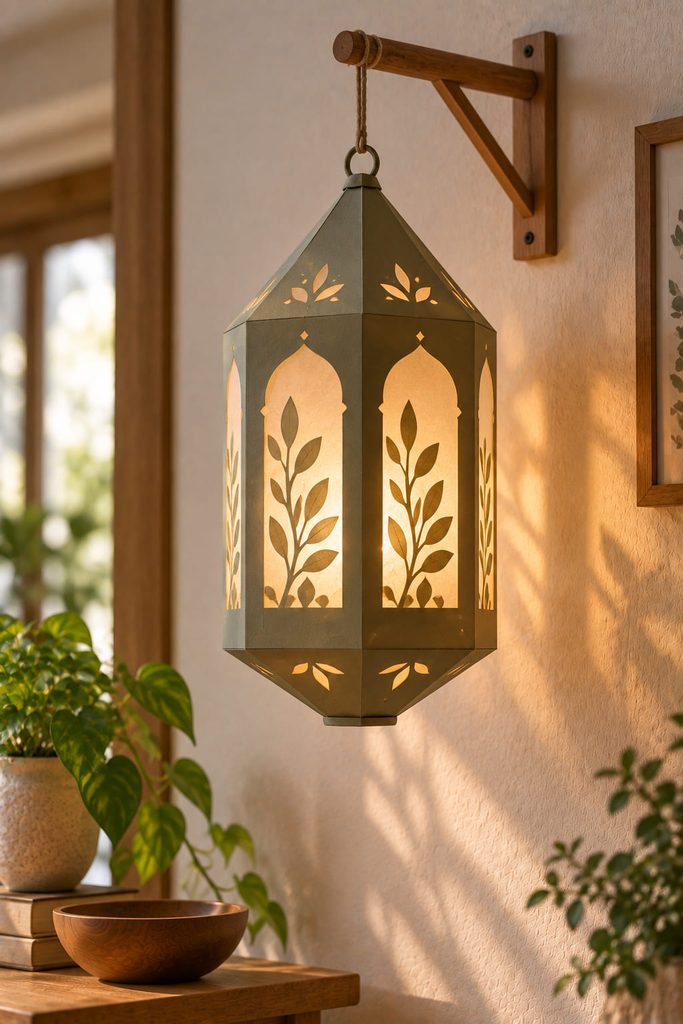
A hanging lantern adds a different kind of depth because its hollow interior and translucent panels affect how light moves through the object. Build a lightweight cardstock frame with generous window openings, back those openings with vellum, and close the sides around a stable lower panel. The finished lantern can hang from a wall-mounted bracket or hook with clear space behind and beneath it.
For an illuminated version, use only a cool, battery-powered LED source intended for this kind of decorative use. Keep the light path open: opaque reinforcing strips should stay around the perimeter instead of crossing the center of the vellum windows. The LED also needs an accessible opening so it can be inserted, removed, or switched without pulling the lantern apart.
Before hanging, confirm that the top attachment is reinforced and centered, the base does not distort, and the lantern remains clear of nearby paper decor.
Light Path Check: Place the LED temporarily inside before closing the final access flap. Dark bands across the windows usually indicate misplaced internal tabs or reinforcement, not a need for a brighter light.
The lantern should function as a lightweight decorative shell around a cool LED, never as a holder for a candle or other flame.
15. Suspended Layered Botanical Silhouette
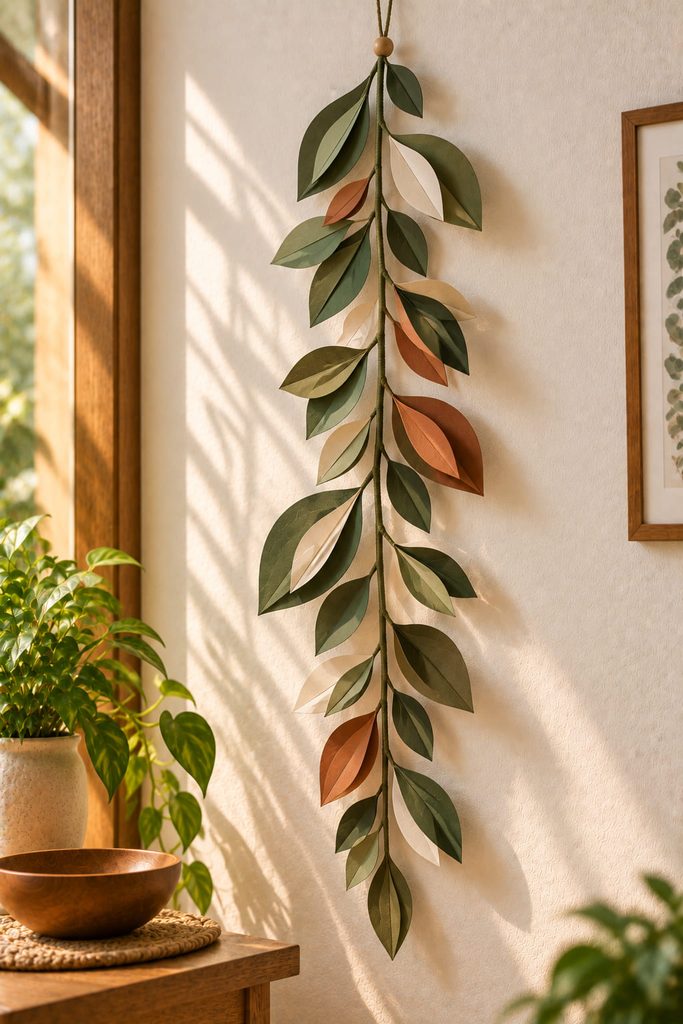
There are two useful ways to build a botanical hanging from cut-paper leaves. A single-layer version keeps every leaf flat and relies on strong negative space; it is lighter and better for a delicate suspension rail. A layered version pairs slightly offset leaves or adds small spacers at selected stems, producing deeper shadows and a more sculptural result.
Whichever route you choose, connect the stems to a continuous structural spine rather than letting each leaf carry another leaf below it. That spine can be a folded cardstock strip, narrow paper-wrapped cord, or reinforced central stem. The visual leaves remain light while the hidden support controls the load.
Choose the flat route when the silhouette itself is the main feature. Choose the layered route when the wall receives enough side light to make small depth changes worthwhile.
16. Folded Paper Tile Curtain
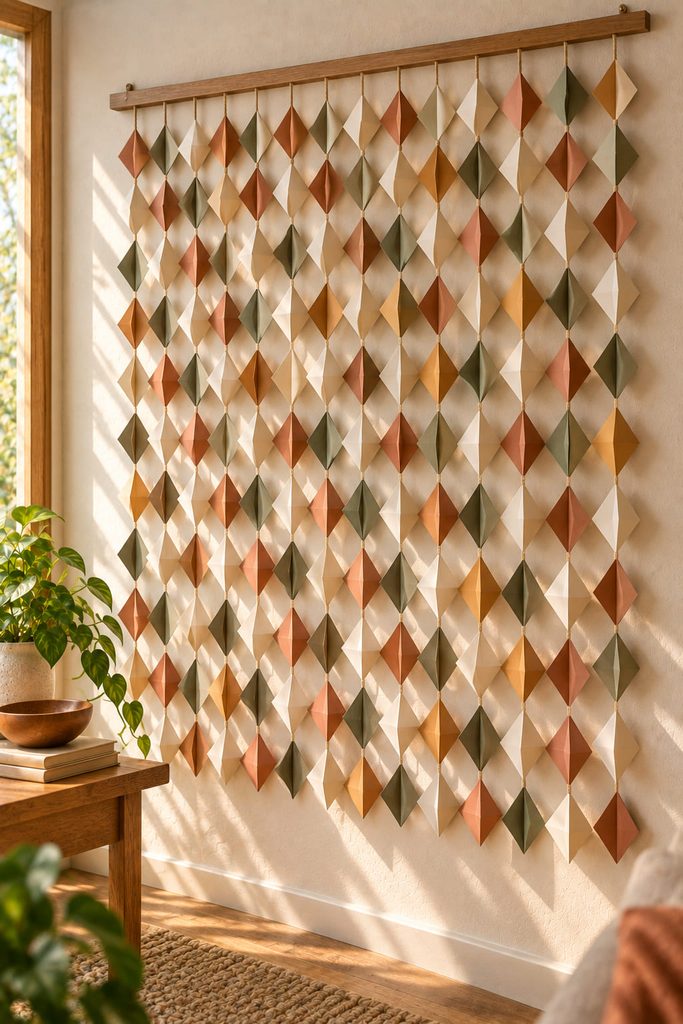
A paper curtain can cover more wall area than an individual mobile while remaining much lighter than a solid panel. Fold repeated tiles—triangles, shallow pyramids, or clipped diamonds—and connect them into vertical strands with consistent spacing. Mount those strands along one upper rail so the entire installation reads as a single field.
The key is restraint at the joints. If every tile is glued edge-to-edge, the curtain becomes rigid and difficult to hang straight. Small flexible connections allow each unit to settle independently, so minor differences in folding do not force the whole surface out of alignment.
Use one tile family throughout and create variation through orientation or depth rather than mixing unrelated shapes. From across the room, the repeated geometry forms the pattern; closer up, folds and shadows supply the detail.
For storage, remove the strands from the rail and lay them flat in shallow layers rather than folding the completed curtain into a tight bundle.
How to Make Paper Wall Hangings Look Intentional

The strongest DIY paper wall hanging ideas usually begin with the wall space rather than the paper pattern. A narrow empty strip beside a window calls for a vertical strand or spiral. Wide furniture benefits from a horizontal dowel arrangement. A wall with strong side light can support pleats, folds, overlapping scales, and shallow layers because those constructions create visible shadows.
Also consider movement before choosing the mounting position. Cranes, spirals, chains, and loose fringe need clearance from the wall; woven panels and pocket organizers are more successful when they remain relatively stable. Whatever the style, let the structural connection carry the load. Decorative leaf tips, pleats, tiny punched stars, or thin fringe should not double as the main hanging point.
Choose the Hanging Mechanism First
For the simplest starting point, try the cascading leaves, spiral curls, or folded diamond strand; each creates a clear wall feature from a small number of repeated paper operations. If you want more technique, the woven tapestry introduces genuine over-under construction, while the pocket organizer and vellum lantern require you to think about load, access, and reinforcement as well as appearance.
If heavier recycled material appeals to you, 17 Creative Cardboard Wall Decor Ideas for DIY Interiors explores corrugation, structural folds, dimensional panels, and other wall-focused constructions in cardboard.