

This post contains affiliate links. As an Amazon Associate I earn from qualifying purchases, at no extra cost to you. Thank you for supporting Diynify!
Big-impact holiday decor does not have to mean heavy materials, expensive supplies, or a room full of store-bought pieces. DIY paper Christmas decorations can cover a surprising amount of visual space because folds, repetition, hanging height, negative space, and light all make thin paper read as something much larger.
The ideas below are built around that principle. Some spread across a wall or window, some hang overhead, and others create enough height or depth to anchor a mantel or table. Most use cardstock, colored paper, wrapping paper, scissors, a ruler, and paper-safe adhesive. A few need paper bags, crepe or tissue paper, quilling strips, thread, a hoop or dowel, rigid backing board, vellum, or cool battery-powered LEDs. Choose the surface you want to change first, then pick a construction that suits that location.

1. Oversized Accordion Star Wall Cluster
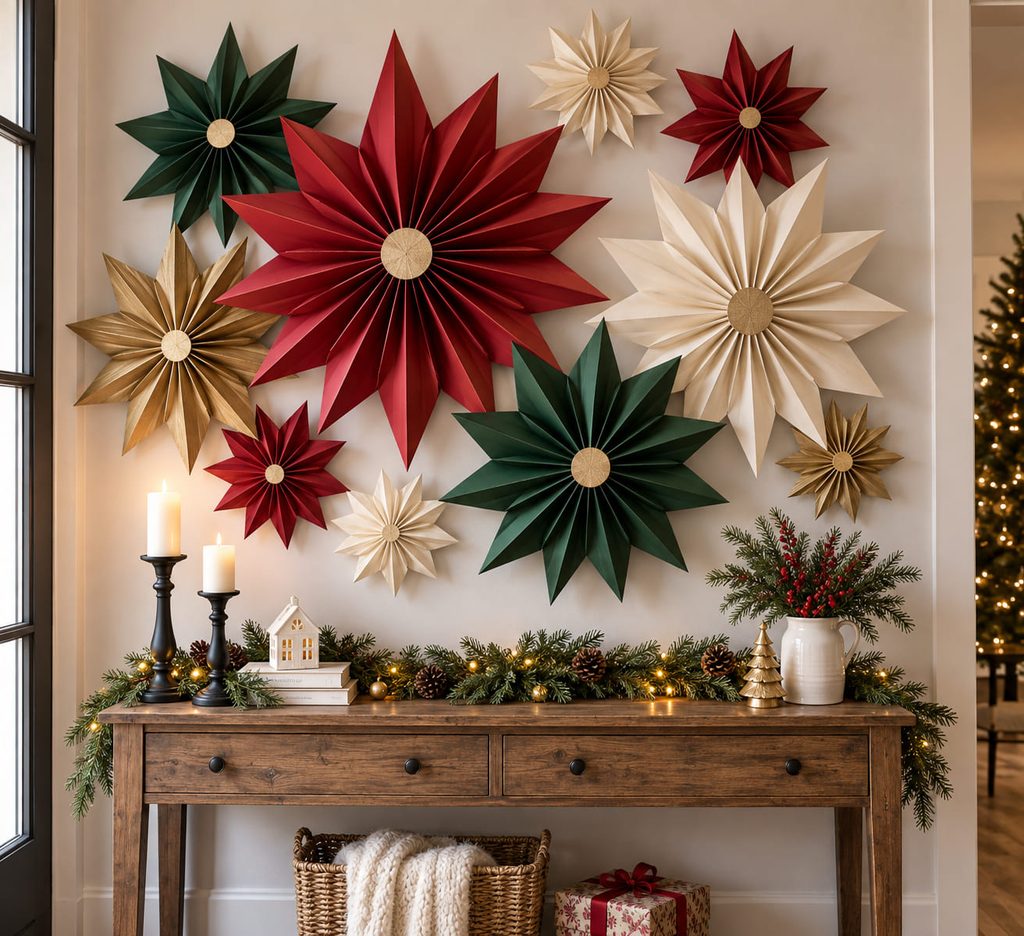
For a wall that needs one strong focal point, scale up accordion-fold stars and group them instead of scattering small ornaments everywhere. Score long paper strips at even intervals, fold them into pleats, join the short ends, and press each ring inward until it forms a starburst. Small cardstock disks glued over the center on both sides keep the folds from reopening and give you a safer place to attach hanging thread or removable wall tabs.
Varying diameter does more work than adding extra decoration. One large star, two medium stars, and several smaller ones create a clear hierarchy, while a restrained mix of red, cream, forest green, and metallic paper keeps the cluster readable from across the room. Scale Check: tape rough paper circles to the wall first; if the arrangement looks undersized from the doorway, enlarge the outer stars before doing any detailed folding.
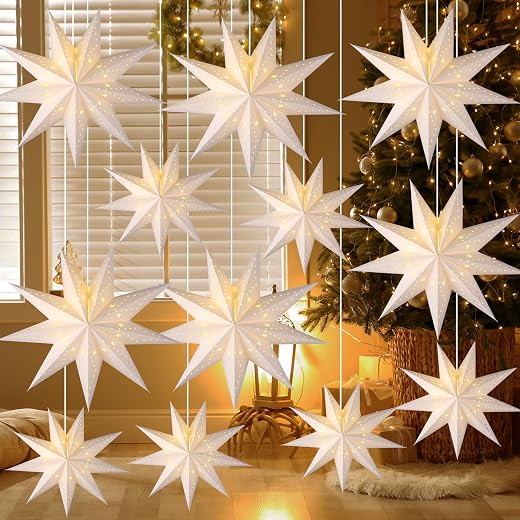
2. Floor-to-Ceiling Paper Snowflake Curtain

Start with the window or blank wall you want to cover, then treat the snowflakes as a hanging field rather than individual cutouts. Thin white or ivory paper keeps the pieces light, and changing both size and vertical spacing prevents the curtain from turning into a rigid checkerboard.
A practical sequence is:

- Cut several snowflake sizes, keeping the largest designs bold enough to survive handling.
- Tie or tape them to separate lengths of clear thread or fine white string.
- Hang the strands from a slim dowel, curtain rod, or removable hooks, staggering the lowest points.
- Step back in daylight and shift any dense clusters that block too much of the window.
The negative space is part of the design. Leaving clear gaps lets daylight outline the cuts and makes the whole installation feel larger without using more paper.
3. Honeycomb Paper Bauble Chandelier
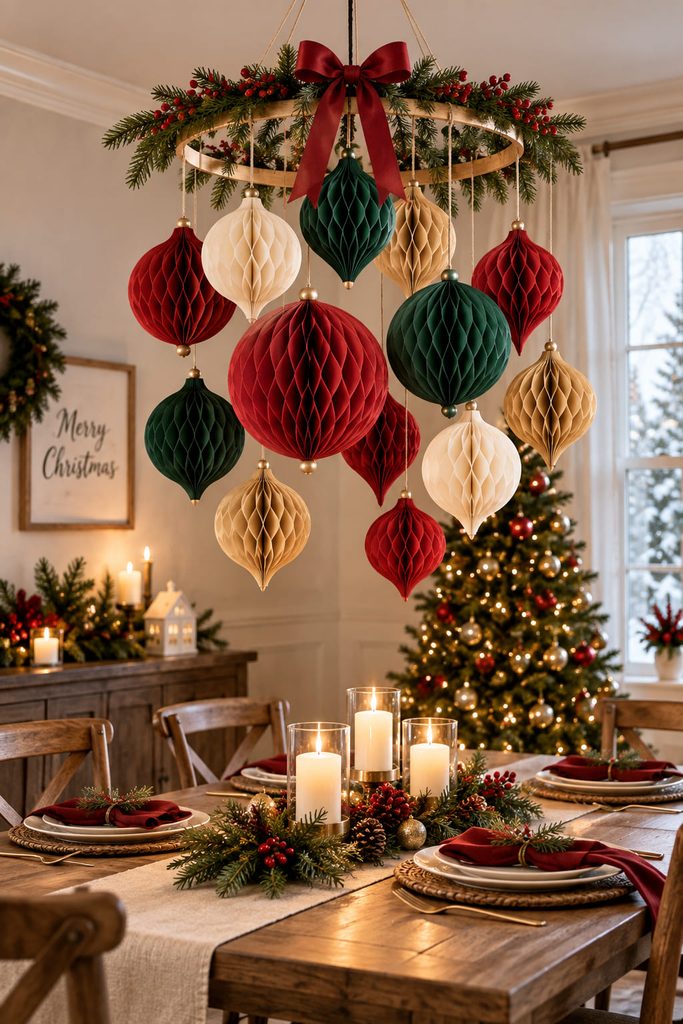
Suspended above a dining table or entry console, a cluster of honeycomb paper baubles creates volume without asking the ceiling attachment to carry much weight. Each bauble is built from stacked tissue or lightweight paper shapes joined along alternating glue lines; when the stack opens, those controlled bonds force the paper into a cellular sphere or oval. A cardstock spine at the top and bottom gives the hanging loop something firmer to pull against than tissue alone.
Build the cluster around a lightweight hoop rather than tying every ornament to one crowded ceiling point. Attach three or four support lines evenly around the hoop, bring them together above it, and hang the baubles below on separate threads. Keep the largest pieces closest to the center and allow smaller ones to drop lower around the edge so the weight and visual mass stay balanced.

Balance Check: lift the finished hoop by its main hanging loop before installation. If one side dips, move a bauble inward or shorten that side’s support line. Leave enough clearance that the paper forms do not brush candles, pendant bulbs, or door swings; use only cool, non-heating lighting nearby.
4. Giant Crepe-Paper Poinsettia Wreath
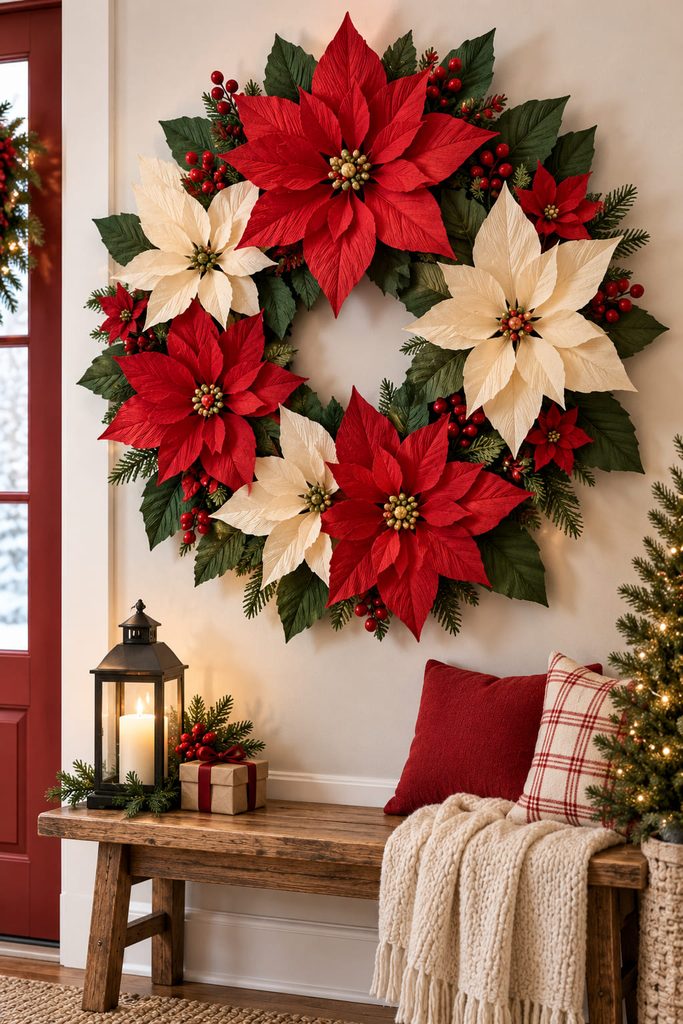
Crepe paper changes the character of an oversized wreath because the grain can stretch into cupped petals instead of staying flat. Cut broad poinsettia petals with the grain running from base to tip, gently stretch the center of each petal, and pinch the base before attaching it to a rigid ring.
For a large version, the useful supply set stays fairly short:

- heavy cardboard or chipboard for the ring;
- crepe paper for petals and leaves;
- paper-safe adhesive;
- a sturdy hanging loop.
Build the flower heads first and arrange them around the ring before gluing. A few large blooms can carry the composition; smaller leaves and buds should fill gaps rather than create a perfectly uniform floral band.
The backing matters more as the wreath grows. If the ring flexes when lifted from one side, laminate a second ring behind it or add short cross-braces on the back. Mount from two upper points instead of one center loop so the wreath does not rotate and expose the support.
5. Oversized Paper Chain Mantel Swag

The simplest route to a long, high-impact mantel decoration is repetition at a larger scale. Cut wide strips from sturdy colored paper or lightweight cardstock, close each loop with a generous glued overlap, and alternate loop sizes for a chain that feels graphic rather than classroom-small. Let the center dip lower than the ends, then add a second shorter swag if the mantel is wide enough to need depth. Because each link carries the next, weak closures are the real failure point: tug each seam before the chain goes up, and keep heavy ornaments off the paper links.
6. Folded Christmas Tree Wall Relief
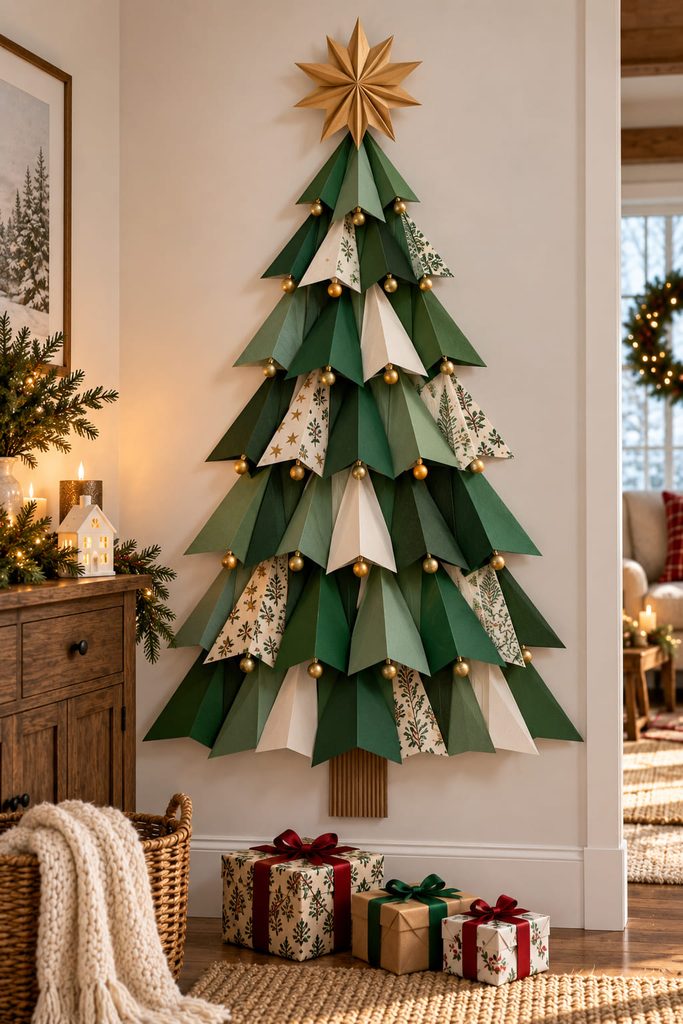
Flat wall trees save floor space, but a completely flat silhouette can disappear once the room is decorated. Give the tree relief by folding cardstock triangles along a center crease and mounting only their inner edges to a backing panel; the free sides lift away from the wall and cast narrow shadows.

There are two useful routes. For a clean architectural tree, repeat the same triangle shape in stepped rows and change only the scale. For a softer layered look, overlap several sizes so the lower edges behave like branches. The first route is faster to align; the second hides small cutting differences better.
Whichever version you choose, build on a removable backing board rather than attaching dozens of folded pieces directly to paint. The board preserves the spacing, makes the whole tree easier to store, and lets you test whether the bottom edge is visually wide enough to support the height.
7. Paper Bag Star Ceiling Canopy
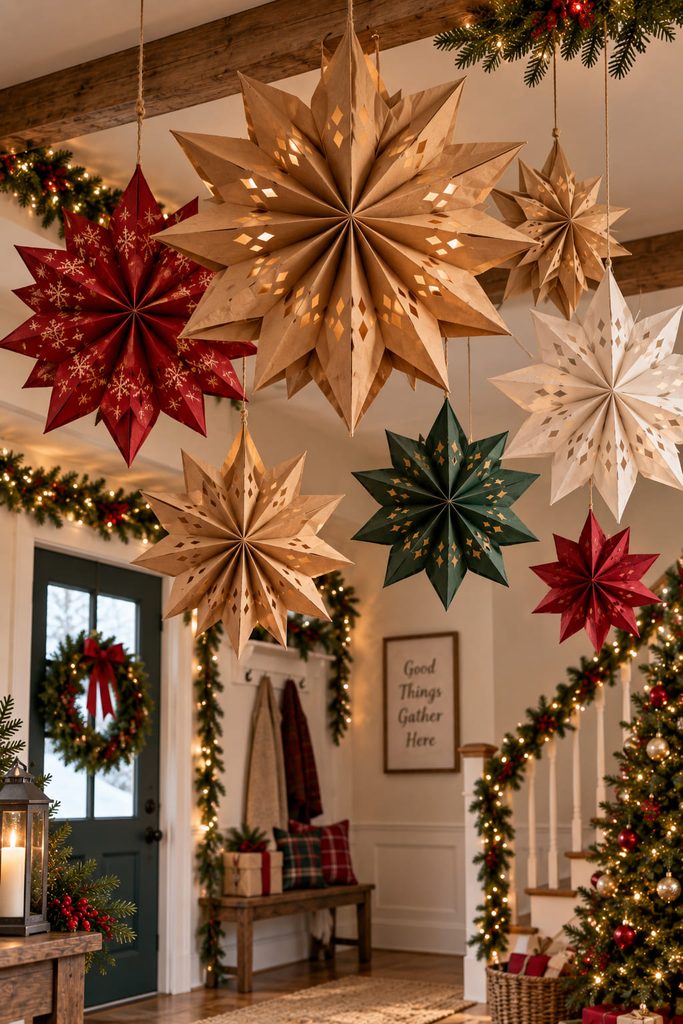
Paper bags earn their scale by doing two jobs at once: each bag supplies a repeated panel and a ready-made pocket of air. Glue a stack along the bottom edge and center line, trim the open ends into points, then fan the stack around until the first and last bags meet. The result is a large radial star with very little cutting.
Before hanging several stars overhead, check:
- every glued seam is fully dry;
- the suspension loop passes through a reinforced area;
- each star has clearance from light fixtures;
- the lowest point stays well above head height.
Mix open starbursts with a few smaller, tighter ones so the ceiling reads as a loose constellation rather than a row of identical disks.
8. Quilled Snowflake Window Medallion

Quilling works best at room scale when the coils are treated as structure, not tiny embellishments. Form larger teardrops, marquises, and open scrolls from paper strips, then assemble them symmetrically around a small central ring. Mount the finished snowflake inside a thin cardstock hoop so the outer points do not have to carry the entire load.

A window is a good location because backlight reveals the gaps between the coils. Keep the center denser and the outer arms more open; if every gap is the same size, the medallion can look visually flat. Hang it from the hoop at two nearby points to reduce twisting, especially if the piece is large enough to catch drafts.
9. Woven Paper Ribbon Christmas Tree Panel
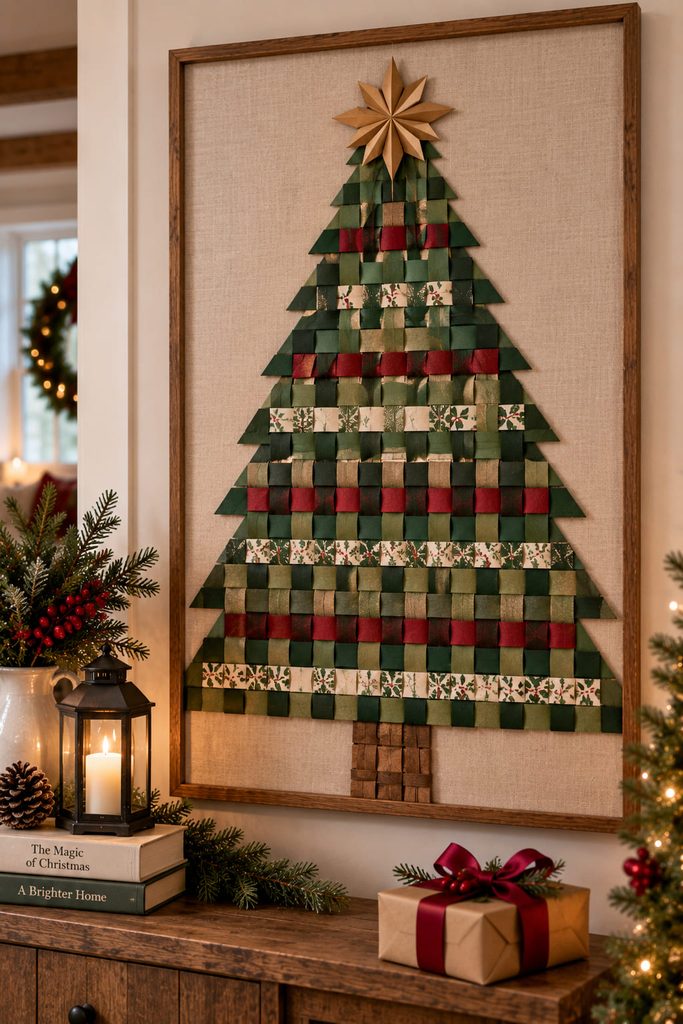
If the goal is a large decoration with real surface texture, weave the tree instead of merely layering strips on top of one another. Cut long strips from medium-weight paper, establish a vertical set of warp strips on a rigid backing or shallow frame, and pass the horizontal strips over and under them.
Build the taper in three controlled moves:
- Alternate the over-under path on every row so each crossing actually locks into the woven field.
- Shorten the horizontal strips gradually as you move upward, but leave extra length at the edges until the full tree silhouette is balanced.
- Secure the strip ends on the back of the frame only after the outline is correct, then add a separate trunk or base element.
Over-Under Check: follow one horizontal strip from side to side. If it passes over two neighboring vertical strips in succession, lift that row before the ends are glued and restore the alternating path. A small amount of irregularity can look handmade; a broken weave reads as a construction error.
For a large panel, the backing is not optional. The woven paper itself is flexible, so the frame carries the wall load while the strips provide the texture. This also makes the decoration easier to move and store without stretching the weave out of square.
10. Crepe-Paper Fringe Doorway Garland

A doorway gives fringe room to move, which makes a lightweight paper decoration feel much fuller than its material cost suggests. Fold long crepe-paper strips, cut deep fringe without severing the top band, open them, and layer two or three lengths along a cord or paper-wrapped rope. Concentrate the deepest fringe near the upper corners and let the vertical sides stay a little cleaner so the opening does not feel narrowed. Keep the garland outside the door’s swing and above grabbing height; stretched crepe paper can tear quickly if it is repeatedly brushed.
11. Paper Cone Forest Table Runner
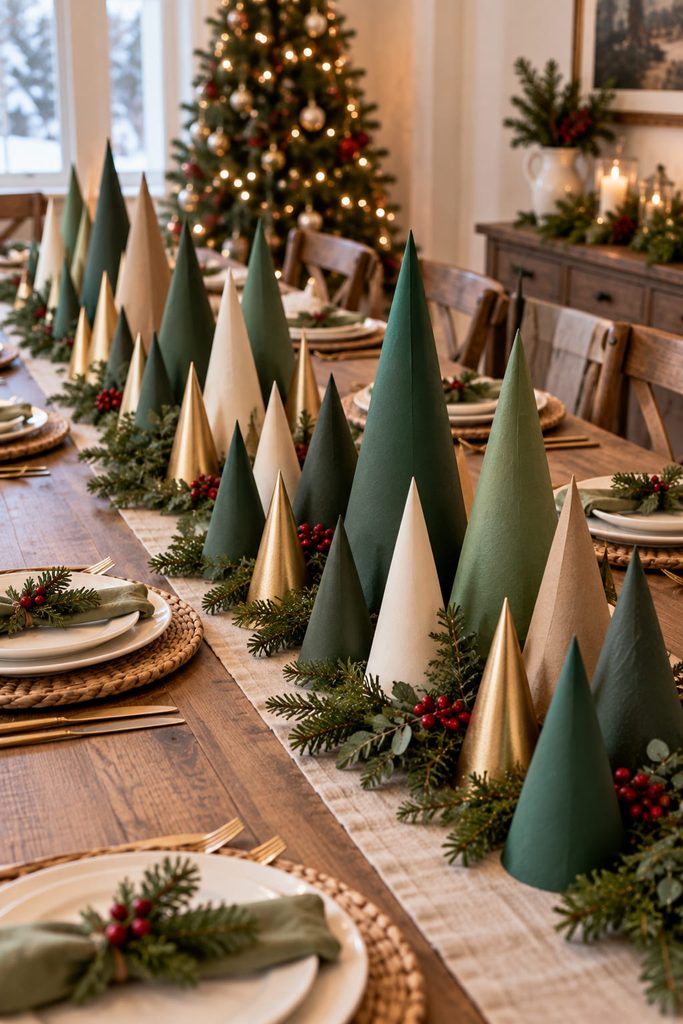
Instead of one large centerpiece, spread the impact along the table with a forest of paper cones in several heights. Roll cardstock into cones, overlap the seam enough to hold its curve, and trim the bottom edge so every tree sits flat. A wide base matters more than perfect symmetry: tall narrow cones look elegant until a small bump makes them fall into neighboring place settings.

Cluster trees in uneven groups and leave open sections between them for serving access. If the table is viewed from both sides, rotate visible seams inward toward the center line. Metallic paper works best in a few smaller cones; using it everywhere can flatten the shadows that make the forest feel dimensional.
12. Layered Paper Village Luminary
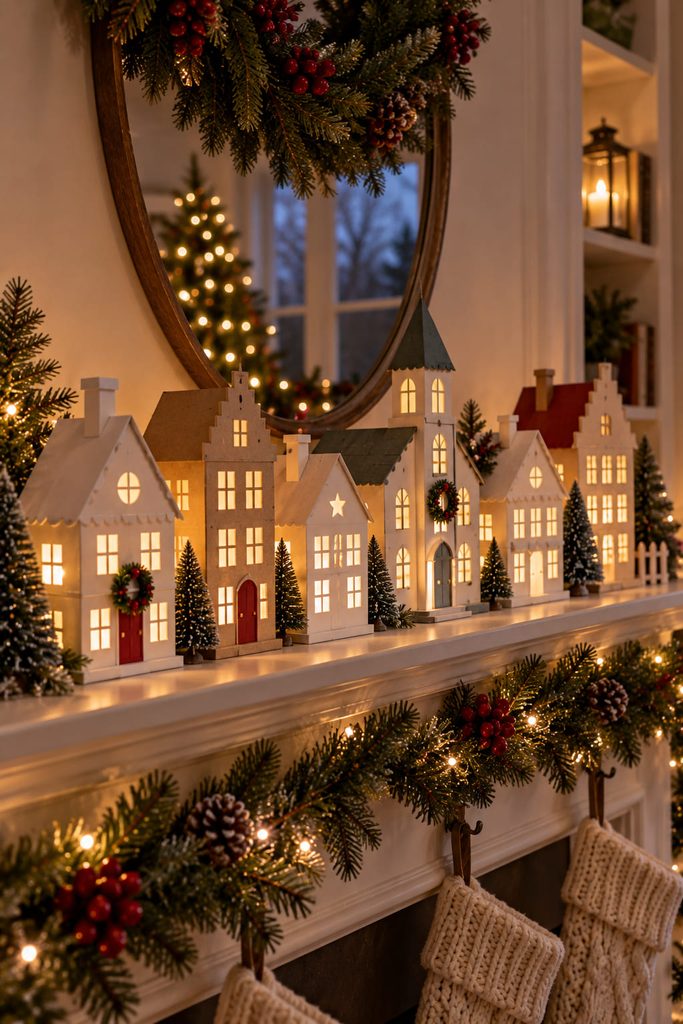
Once light enters the project, the paper house has to work as a structure as well as a decoration. Build each facade from cardstock with enough material around the windows to keep the walls rigid, score the corner folds cleanly, and use tabs wide enough for reliable glue contact. Vellum behind selected windows diffuses a cool battery-powered LED so the openings glow instead of showing a bright plastic point.
Build in this order:
- Cut and dry-fit walls, roof pieces, and floor or base tabs.
- Add vellum behind the windows while the facades are still flat and accessible.
- Close the wall joints and test the house on a level surface before adding the roof.
- Create a rear or bottom opening large enough to insert, switch, and remove the LED without crushing the house.
- Arrange several houses with varied rooflines, leaving a little space between them so each silhouette stays readable.
Light Path Check: darken the room briefly and look for blocked windows or light leaking through unintended wall seams. If a roof glows at the joint while the windows stay dim, reposition the LED or add an internal paper shield rather than adding a stronger light. Use only cool, battery-powered LEDs; never place a flame inside a paper luminary.
13. Spiral Paper Ornament Mobile
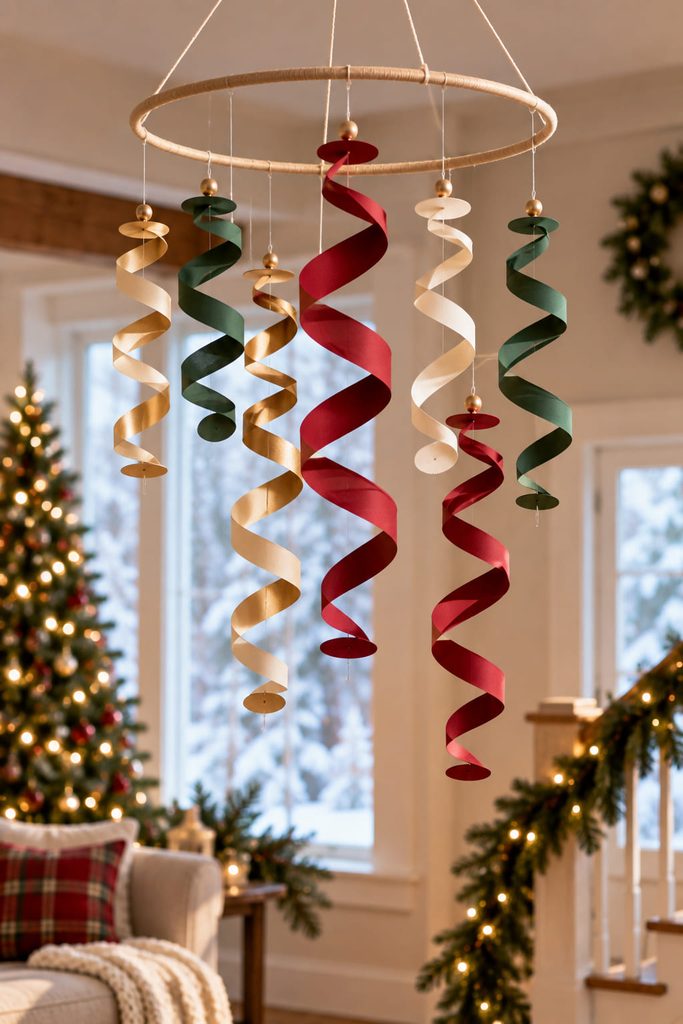
Movement is the reason this decoration works. Cut large circles from double-sided paper, turn each one into a continuous spiral, and suspend the center so the strip drops into a loose helix. Several spirals hanging from a hoop create a soft vertical mobile that reacts to small air currents.
If the mobile misbehaves, diagnose the symptom instead of adding random weight:
- One spiral leans: check for uneven spiral width and trim the wider section.
- Two pieces tangle: shorten one line or move its attachment point farther around the hoop.
- The hoop tilts: redistribute hanging points or adjust the main support lines.
Keep the longest spirals toward the center so they have room to rotate without catching the outer pieces.
14. Layered Fan-Rosette Fireplace Backdrop
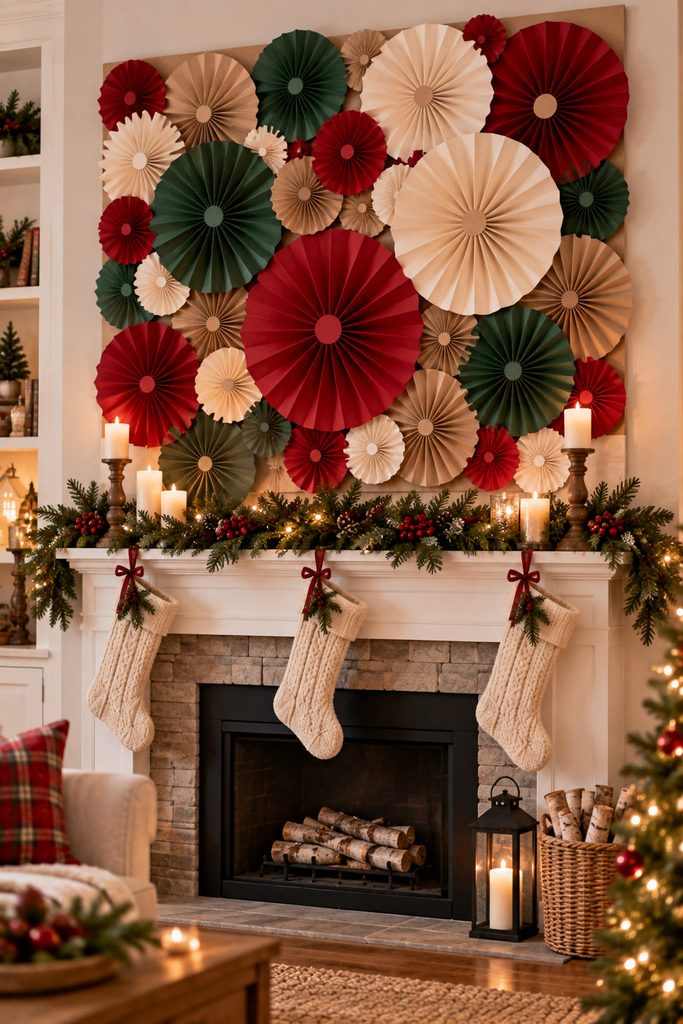
Rosettes become architectural when they overlap across a broad backing instead of appearing as separate party fans. Accordion-fold strips, join their ends into rings, compress the centers, and lock each one with a paper disk. Make a few very large rosettes first, then fill between them with smaller sizes so the edges disappear into one continuous relief.
The useful trick is to assemble the arrangement on foam board, corrugated board, or another lightweight rigid panel laid flat on the floor. You can rotate and overlap the rosettes until the negative spaces look intentional, then secure them to the panel rather than to the wall.
Mounting Check: lift the completed panel upright before installing it. Any rosette that sags now will sag more after hours on display. Reinforce its center or add a hidden attachment point before the panel goes above the mantel, and keep the paper well away from open flames or hot fireplace surfaces.
15. Rolled-Paper Candle Centerpiece
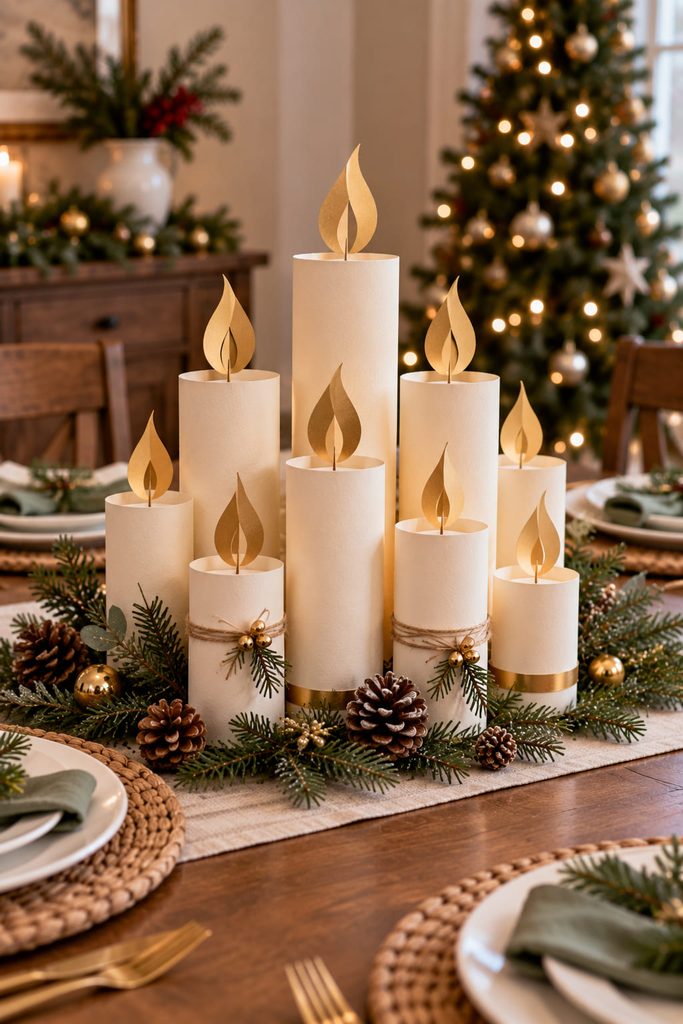
Paper candles can create the look of a tall candle cluster without pretending to be functional candles. Roll cardstock into tubes of different heights, overlap and glue the seams, then add flat paper bases so each cylinder stands independently. Shape separate flame silhouettes from gold, cream, or translucent paper and mount them on narrow inner tabs above the tubes. Group the tallest forms toward the middle and keep the outer candles shorter for stability. Treat the entire arrangement as decorative sculpture only—no real flame, hot bulb, or heating element belongs inside or beside the paper tubes.
16. Cut-Paper Winter Window Skyline
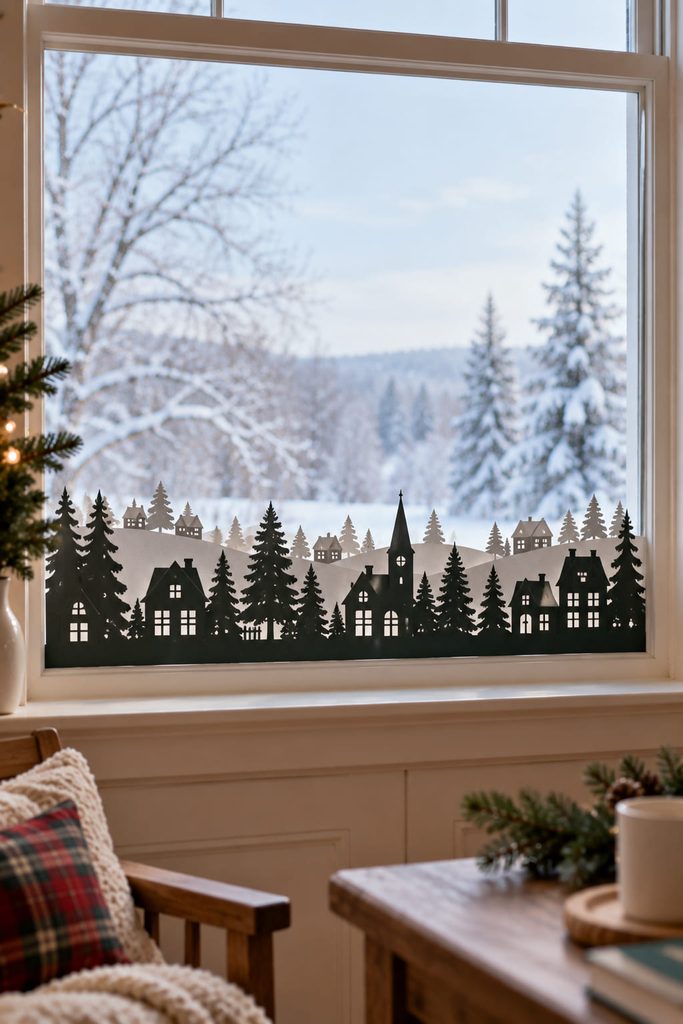
Windows reward strong silhouette more than surface detail. Cut a continuous row of houses, fir trees, rooftops, or distant hills from dark cardstock and mount it low across the glass so daylight turns the paper edge into a crisp horizon. A second, lighter layer can sit slightly higher or lower to suggest depth without covering the whole pane.
Keep narrow bridges between roofs and trees thick enough to survive handling, and divide a very long skyline into overlapping sections rather than forcing one fragile strip across the entire window. Removable transparent mounting dots or tiny tabs at several points distribute the load better than one long line of tape. Leave plenty of clear glass above the scene; the empty area is what gives the skyline its scale.
17. Giant Paper Gift Bow Door Accent
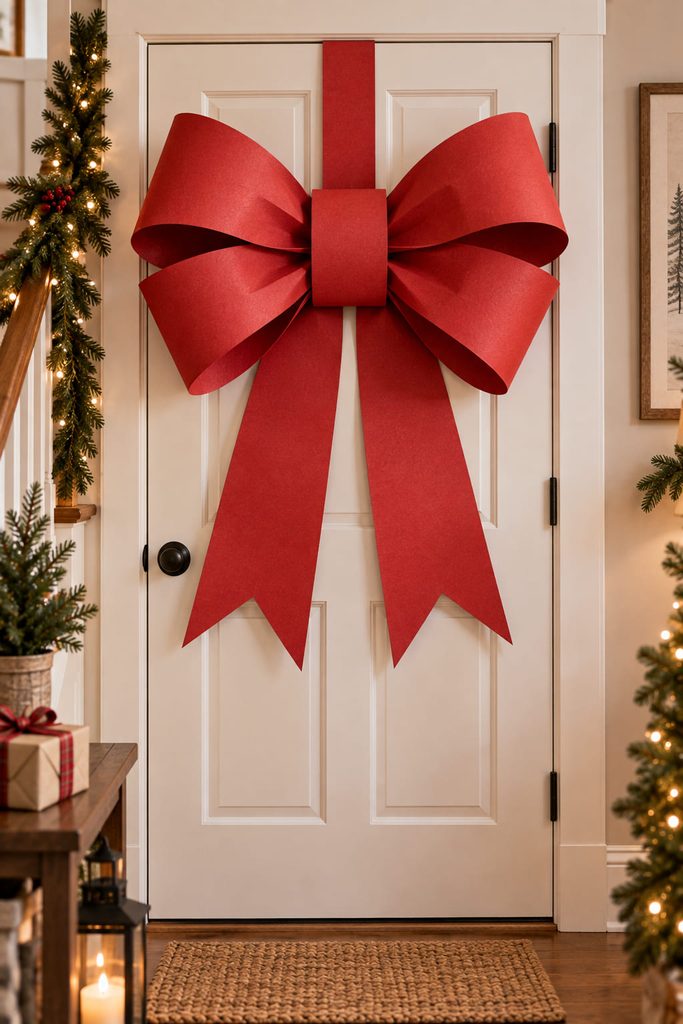
A bow this large needs structure in the loops, not just a bigger sheet of paper. Form two broad looped bands from sturdy wrapping paper backed with lightweight cardstock, pinch or overlap them at the center, and lock the join with a narrow paper band. Add separate fishtail tails behind the loops so gravity can pull them straight without flattening the bow.
Mount the finished bow to a rigid card base or wide hanging strap before it goes on the door. That spreads the load and keeps repeated opening and closing from pulling directly on the center seam. If the door is exposed to damp outdoor weather, move the bow inside to an entry wall or interior door; ordinary paper and water are a poor combination.
How to Scale DIY Paper Christmas Decorations for a Whole Room
Large paper decor succeeds or fails at viewing distance. Before committing to detailed cuts, tape rough paper shapes where the finished project will live and look at them from the doorway, sofa, dining seat, or hallway approach. If the silhouette disappears, increase the overall size or simplify the outline rather than adding smaller details.
For wall pieces, build on removable backing when many parts must stay aligned. For hanging work, reinforce the attachment point and check clearance from doors, fans, light fixtures, and walkways. Freestanding pieces need a broad enough footprint to resist small bumps, while window projects benefit from open areas that let daylight remain part of the composition.
This is also where repetition helps DIY paper Christmas decorations feel intentional. Repeat a mechanism—stars, folds, cones, or silhouettes—but vary scale, spacing, or height. A controlled group usually reads as one installation, while many unrelated small crafts can turn into visual clutter.
Choose the Surface Before the Craft
Start with the surface that feels most unfinished at Christmas. A blank wall can take a star cluster or woven tree; a tall window can carry a snowflake curtain or skyline; a long table benefits from a low forest; and an empty ceiling zone can handle lightweight hanging forms. Choosing the location first keeps “big impact” tied to scale and function instead of simply making every object oversized.
If the room already feels full and you would rather work smaller, shift the same attention to folds, hanging points, and silhouette with Diynify’s tree-focused collection, 16 Paper Christmas Ornaments for a Truly Handmade Tree.








