
This post contains affiliate links. As an Amazon Associate I earn from qualifying purchases, at no extra cost to you. Thank you for supporting Diynify!
Handmade Christmas tree cards work especially well when the tree shape stays familiar but the construction adds something a printed card cannot—raised paper, translucent windows, stitching, folded layers, movement, or real shadow. Traditional evergreen, cream, kraft, red, and muted gold keep these designs rooted in a classic holiday palette while leaving plenty of room for different paper techniques.
Most ideas use folded cardstock, decorative paper, scissors or a craft knife, a ruler, scoring tools, and paper-safe adhesive. A few also need vellum, embroidery thread, a piercing or embossing mat, paper doilies, narrow quilling strips, or a rounded stylus. Choose by how the card will be used: flatter designs suit a mailing list, while easel, rosette, pocket, and shadow-frame constructions make more sense for hand delivery or display.
1. Scalloped Bough Christmas Tree Card
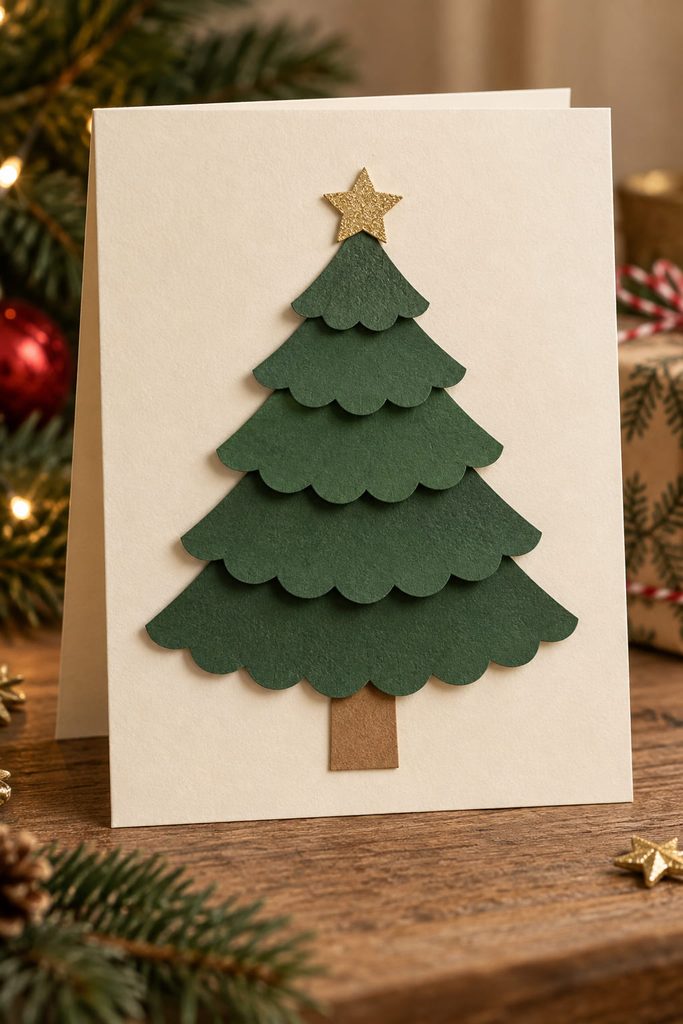
Build the tree from shallow scalloped strips rather than one solid triangle. Cut three to five bands of evergreen cardstock with gently curved lower edges, stack them from widest to narrowest, and let each row overlap the one below by a small amount. The repeated curves suggest full spruce branches while keeping the front almost flat enough for ordinary mailing. A cream card base, a narrow brown trunk, and one small gold star are enough to push the design toward a traditional Christmas look; extra ornaments can hide the rhythm that makes the layered boughs work.
2. Dry-Embossed Evergreen Relief Card
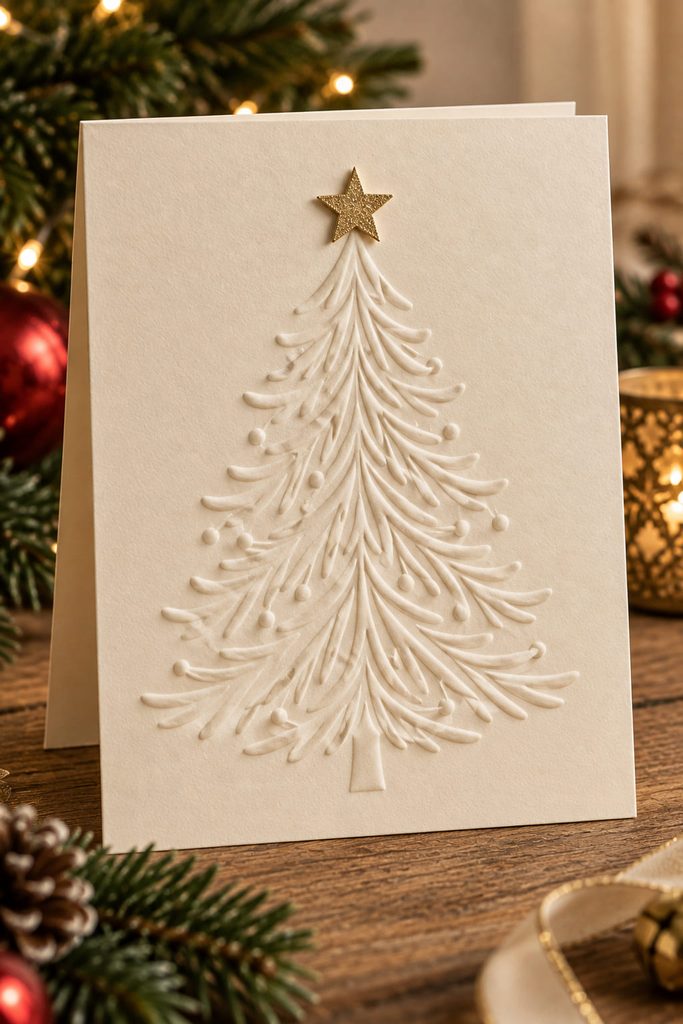
Raised lines can make a plain sheet feel surprisingly finished when the light catches them. Lightly mark the tree on the reverse of the card front, place it face-down on a soft embossing mat, and follow the evergreen outline and selected branch lines with a rounded stylus. Turn the panel over and those recessed working lines become shallow raised details. Smooth, medium-weight cardstock handles the pressure better than brittle or heavily textured stock.
For a quieter card, keep the relief the same color as the base and add only a small metallic star. For stronger contrast, mount the embossed panel on a darker folded card with a narrow border. Run a fingertip lightly across the finished surface: the lines should feel raised without torn fibers or deeply crushed grooves.
3. Hand-Stitched Christmas Tree Card
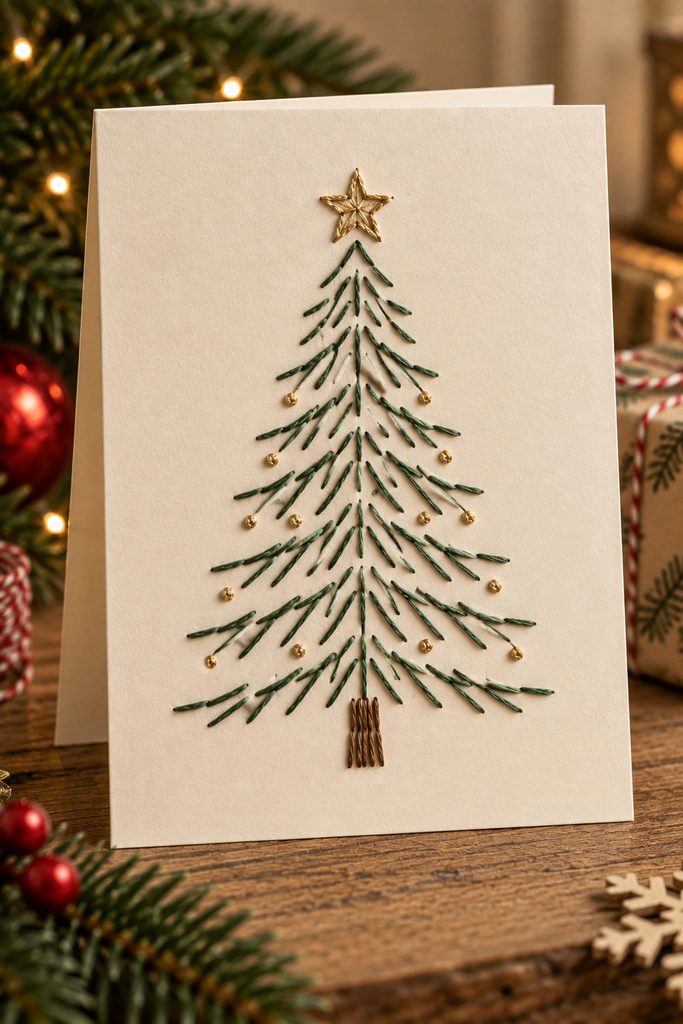
A stitched tree is useful when you want a card that feels handmade before any extra decoration is added. Keep the path simple enough that the thread, not a crowded pattern, carries the design.
- Pencil a tall triangle or sparse branch outline on a removable paper guide.
- Place the card front on a piercing mat and make evenly spaced holes along the path.
- Remove the guide, then stitch with embroidery floss or fine metallic thread, keeping the tension firm but not tight enough to bow the cardstock.
- Tie or tape the ends on the reverse, then cover that working side with a thin inner liner.
Close the card after stitching. If the front curls toward the thread, loosen the last few stitches or press the panel under a clean book before adding the liner.
4. Herringbone Paper Inlay Tree Card
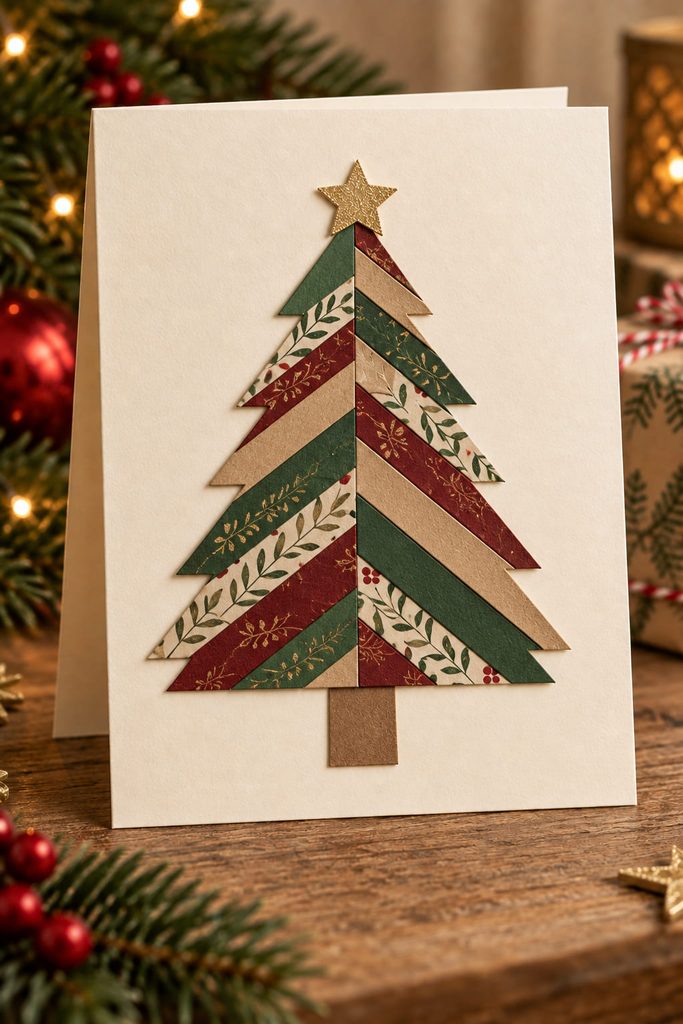
Choose between flush inlay and raised overlay before cutting the first patterned strip. For a flush look, cut a tree-shaped opening in a cover panel, fill the opening from behind with short angled paper strips, and add a backing sheet to trap the pieces. The finished surface stays nearly level, which is useful for mailed cards.
For a more tactile version, assemble the same angled strips on a scrap-paper triangle first, trim the edges clean, and mount the whole panel on top of the card. That route is easier if the strips are narrow or patterned, but it creates a thicker edge. In either version, align one central seam first; if that line drifts, the herringbone pattern will look crooked even when the outer tree silhouette is correct.

5. Vellum Window Christmas Tree Card
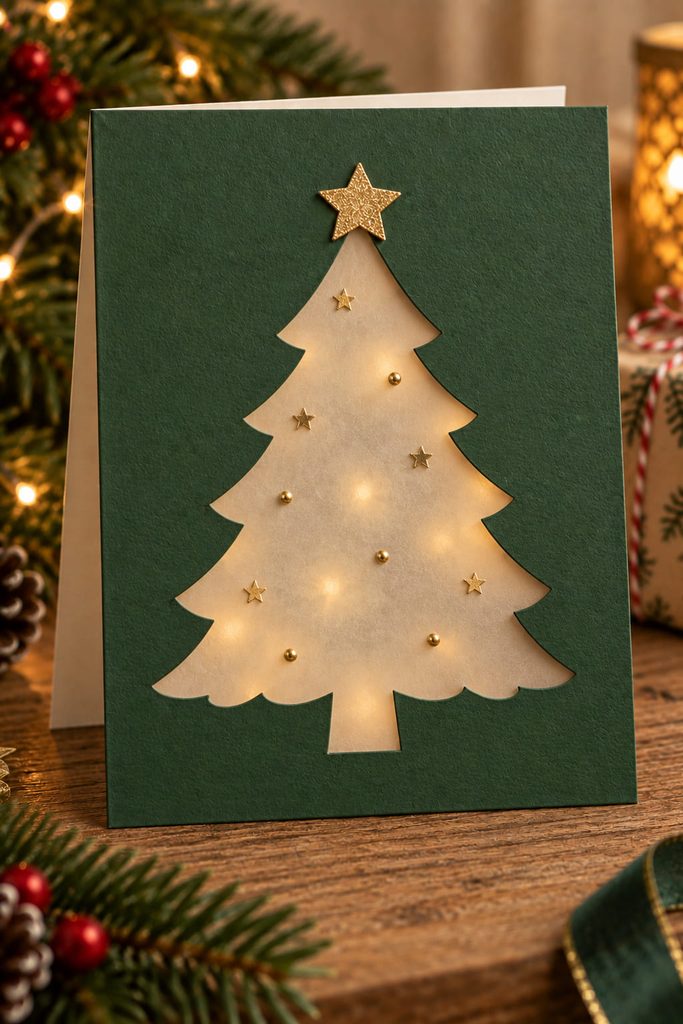
A vellum-backed tree window gives classic green-and-cream stationery a softer layer without turning the card into a deep dimensional project. Cut one clean tree aperture in a cardstock front panel, attach vellum behind it, then cover the raw adhesive edge with an inner liner before mounting the panel to the folded base.
Check the construction before gluing everything down:

- The vellum extends beyond every edge of the tree opening.
- Adhesive sits outside the visible aperture, not in the translucent field.
- The inner liner hides the vellum edge and glue line.
- The folded card still closes without the window panel buckling.
A few tiny paper stars or punched dots can sit on the vellum, but leaving some open translucent space keeps the tree recognizable from across a table.
6. Cut-and-Lift Branch Tree Card
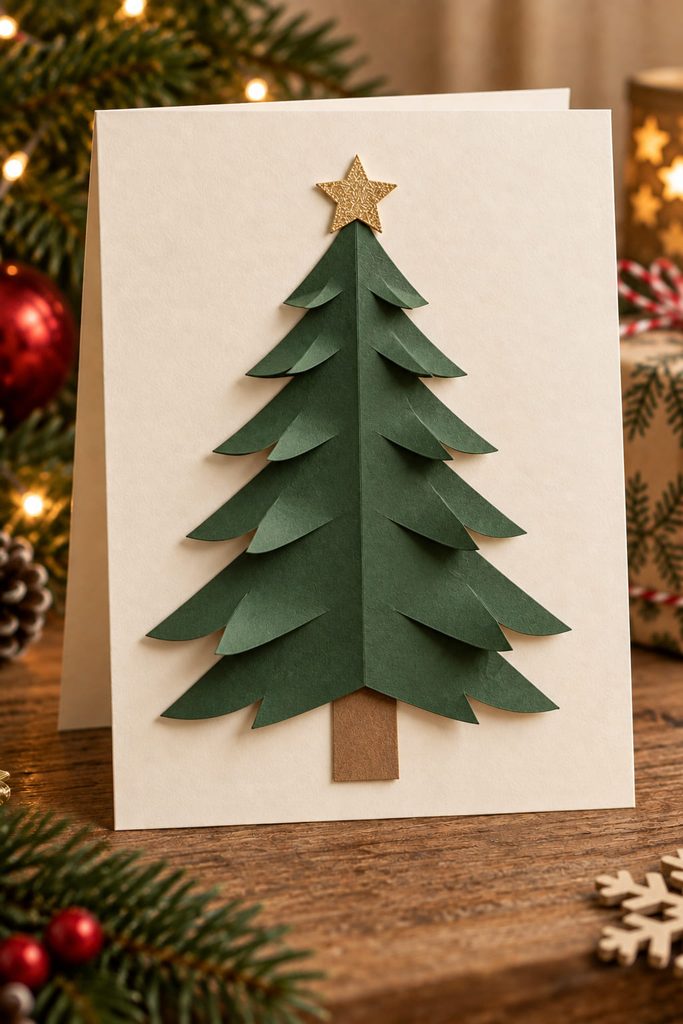
Use the cuts themselves to create the branches. Start with a solid green paper tree, make short horizontal or slightly upward slits from each side toward the center without cutting all the way through, then fold alternating branch tabs forward by a few millimeters. Those lifted edges catch side light and give the tree a shallow carved effect while the center spine stays flat against the card. Keep the folds restrained: once the tabs project too far, the tree stops reading as crisp cutwork and starts fighting the envelope.

7. Tiered Pocket Christmas Tree Card
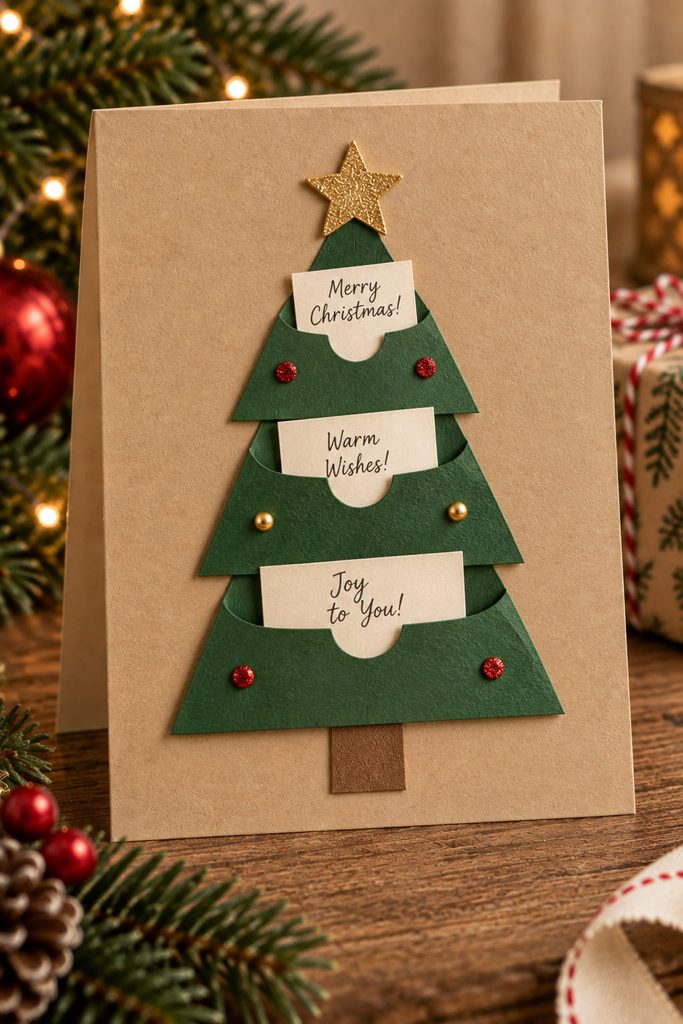
If the tree is going to hold tiny notes, the pockets need to work before the decoration matters. Stack three shallow trapezoid pockets from widest to narrowest on the card front so their open top edges form the tree tiers; each pocket can carry a small handwritten slip, gift clue, or short holiday wish.
If a note slides out, deepen the pocket or reduce the slip height. If a tier bows, move glue farther toward the side edges instead of sealing the center. If the recipient cannot grip the paper, cut a small thumb notch into the opening. Finish by loading every pocket and closing the card once; the notes should stay retained without making the front spring open.
Pocket Fit Check: let the lowest tier carry the largest slip while the upper tiers stay progressively lighter, so the tree does not become bulky or visually top-heavy.
8. Gatefold Christmas Tree Card
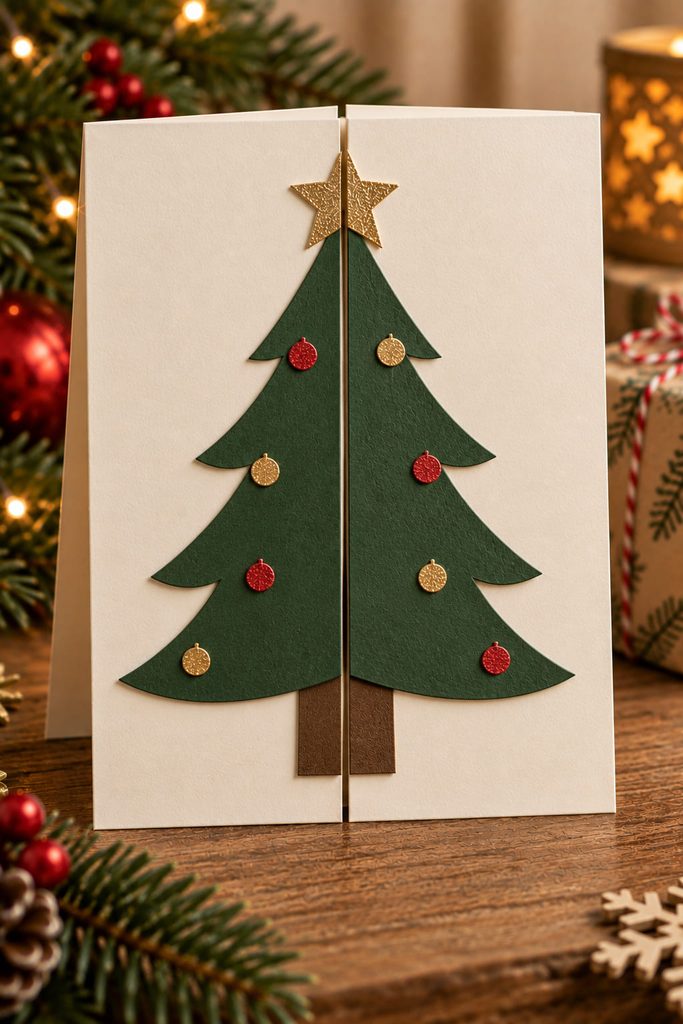
On a gatefold, the evergreen halves become the closure: one sits on the left front panel and the matching half sits on the right, meeting only when the card is fully shut. That makes alignment more important than ornament placement.
Score two vertical folds so the side panels meet at the center without overlapping. Lay the closed card flat, position one complete tree template across the seam, then divide the design along that seam before attaching the halves. Branch tips may cross visually, but no glued piece should bridge the opening or the card will tear when it is opened.
For a classic finish, use deep green paper on warm white or kraft cardstock and place the star entirely on one side rather than trying to split a tiny shape across the fold. Add the greeting inside after the gate movement is proven.
Closed-State Test: open and close the card several times. The two tree halves should meet with an even center line, the folds should lie flat, and no branch should catch on the opposite panel. If the tree looks skewed only when shut, correct the panel folds before moving the paper pieces.
9. Iris-Folded Tree Window Card
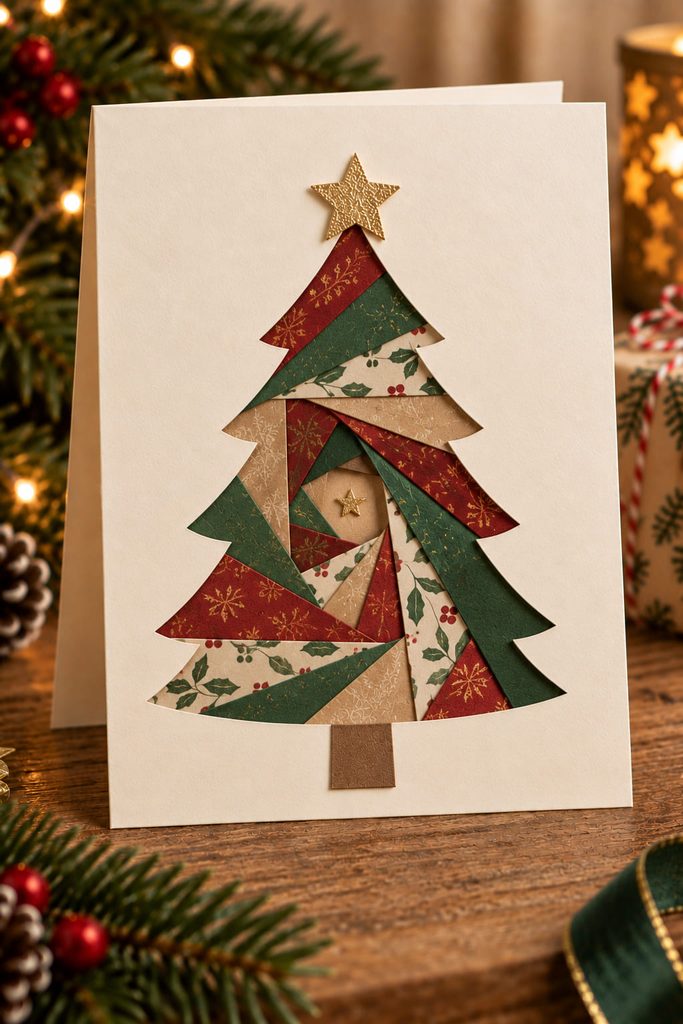
Iris folding looks neat from the front only when the hidden overlap order stays disciplined. Cut a simple tree-shaped aperture in a cover panel, place it face-down over a guide, and add folded paper strips behind the opening in a repeating direction. Each strip covers part of the previous one, gradually reducing the central gap.
The common failure is not an imperfect outer edge; it is a center that walks sideways as the strips build up. Keep each folded edge parallel to the guide line it follows and correct small drift over several strips instead of forcing one sharp adjustment. A tiny metallic paper piece can close the final opening, and an inner liner should cover the taped or glued construction before the card is written.

10. Easel Christmas Tree Display Card
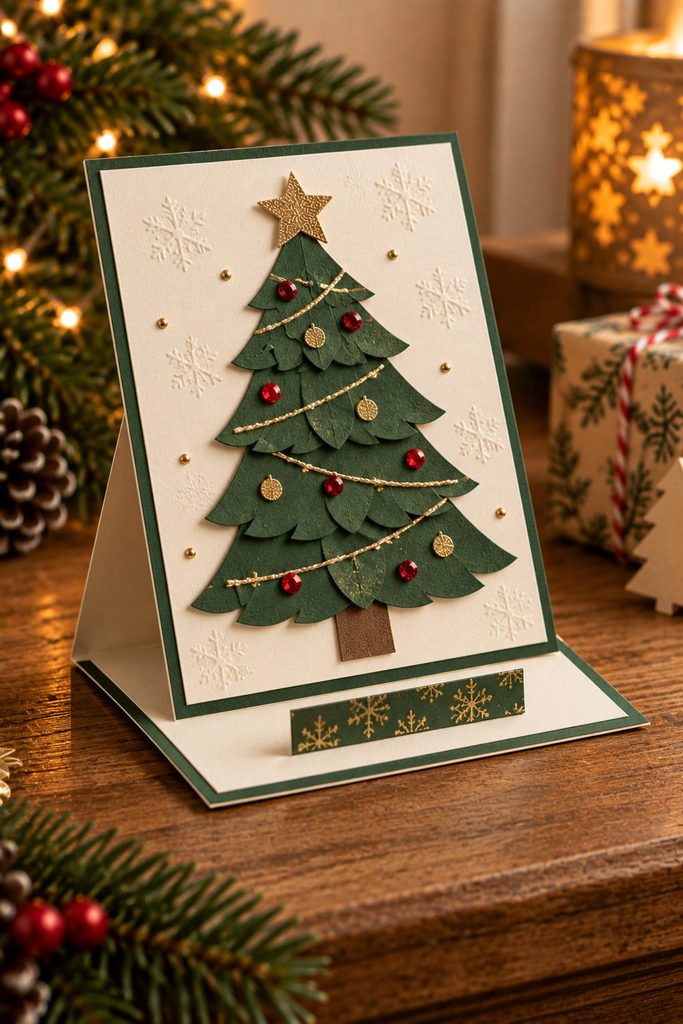
Choose an easel format when the card is meant to stay on a mantel or shelf after it is opened. The display works because the front panel folds back against a raised stop on the base, not because the tree itself props the card up.
- Make a standard folded card base, then score the front panel horizontally so its upper section can hinge forward.
- Attach the decorated tree panel only to the lower half of that hinged front.
- Add a low-profile paper strip or layered sentiment inside the card to act as the stop.
- Open the card, tuck the front edge behind the stop, and adjust the angle until the tree faces forward rather than upward.
- Flatten the easel completely and confirm that the stop does not create excessive mailing bulk.
Stability Check: set the card on a smooth table and tap the surface lightly. If the display collapses, raise the stop slightly or shorten the easel angle; adding heavier decoration to the tree usually makes the problem worse.
11. Suspended Tree Window Card
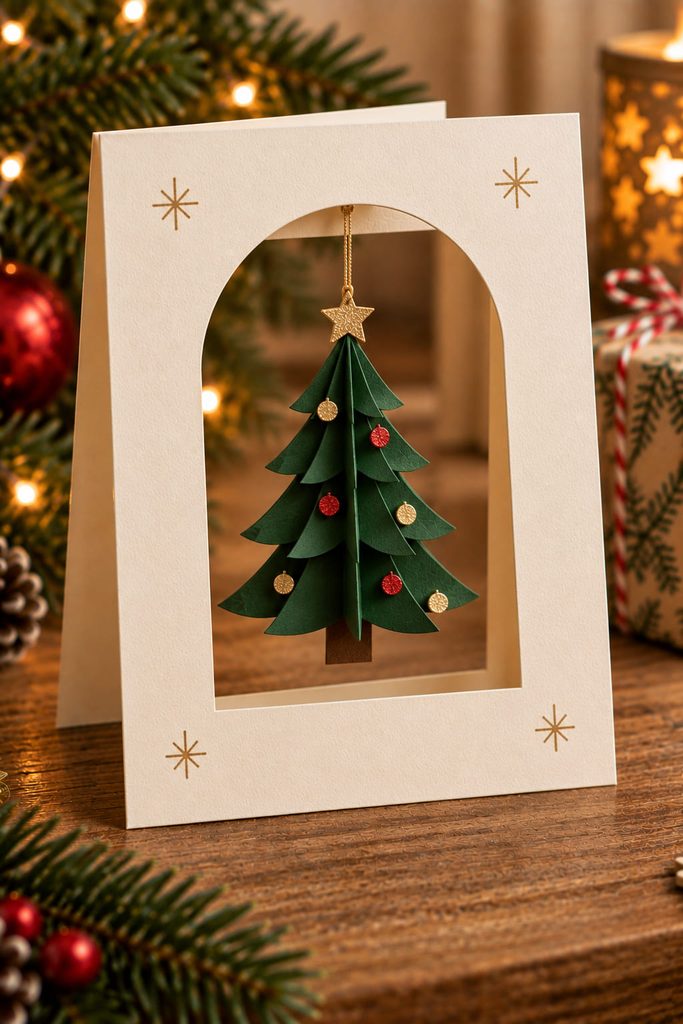
Movement can stay elegant when only one element is allowed to swing. Cut a generous window in the front panel, hang a small paper tree from the top edge with fine thread, and keep the tree narrow enough that it clears the window frame as it turns. Reinforce the attachment point with a second scrap of cardstock on the reverse so the thread is not pulling against a single paper layer.
Balance the tree before sealing the front panel to the card. Its hanging hole should sit on the centerline above the visual weight of the shape, and the lower branches should not touch the frame when the card is tilted. A restrained red, green, and gold palette keeps the moving insert feeling like classic stationery rather than a novelty toy.
12. Quilled Scrollwork Christmas Tree Card
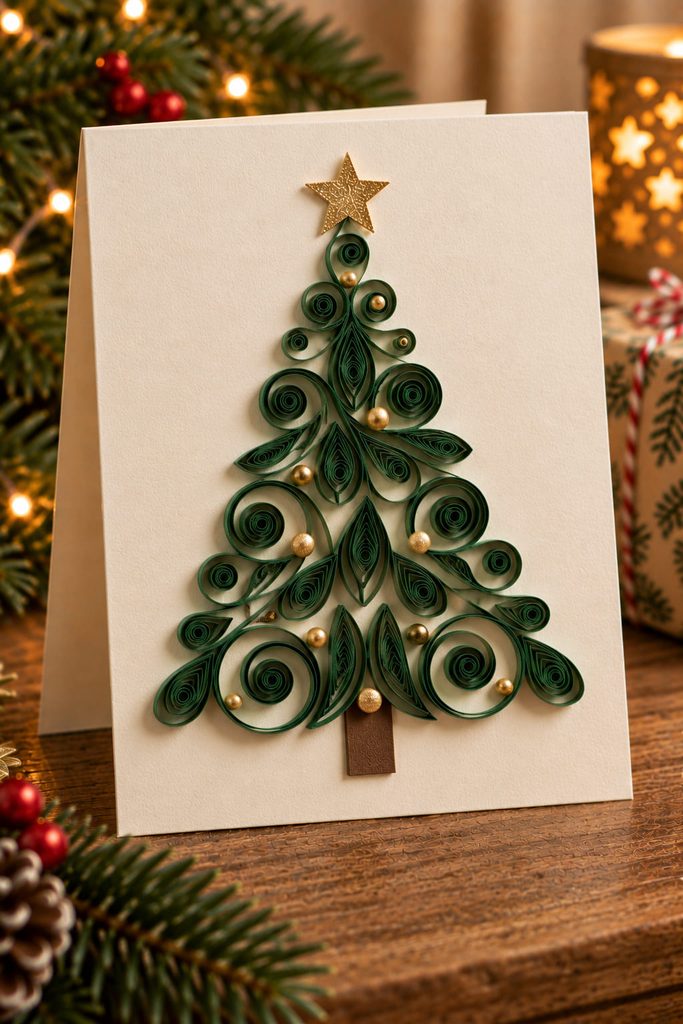
For a tree that looks decorative without many separate embellishments, shape narrow paper strips into loose quilled scrolls and teardrops, then arrange them into a triangular evergreen silhouette. Glue only the small contact points where the coils touch the card and one another; flooding the curls with adhesive collapses the open spaces that make the scrollwork readable. Use larger coils near the base and smaller ones toward the top, leaving a little card color visible between forms so the tree keeps a light, lace-like edge.
13. Folded Paper Doily Tree Card
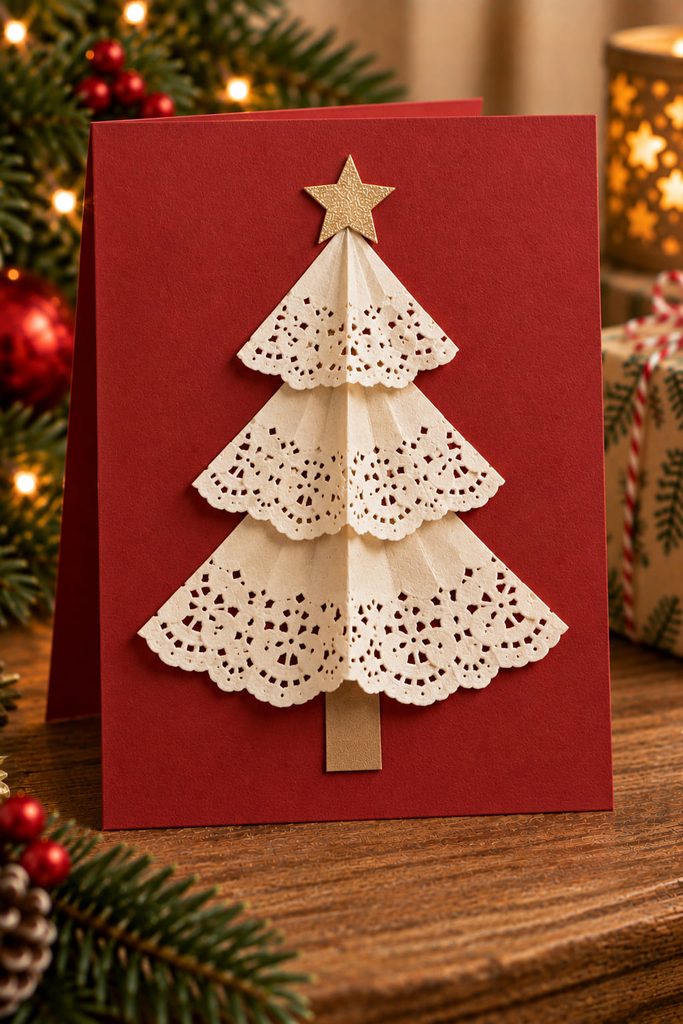
Paper doilies can give a Christmas tree the look of old-fashioned lace, but the fold matters more than the pattern. One route is to quarter small round doilies and stack the folded wedges as broad tree tiers; this creates a soft, symmetrical silhouette.
For a narrower fir, fold semicircular doily sections into cones, flatten them gently, and overlap the pointed shapes down a central trunk. The cone route has more depth, while the quartered route mails more easily. Choose thin paper doilies, and test one fold first: if the perforated edge cracks, the stock is too brittle for repeated creasing.
14. Rosette Medallion Christmas Tree Card
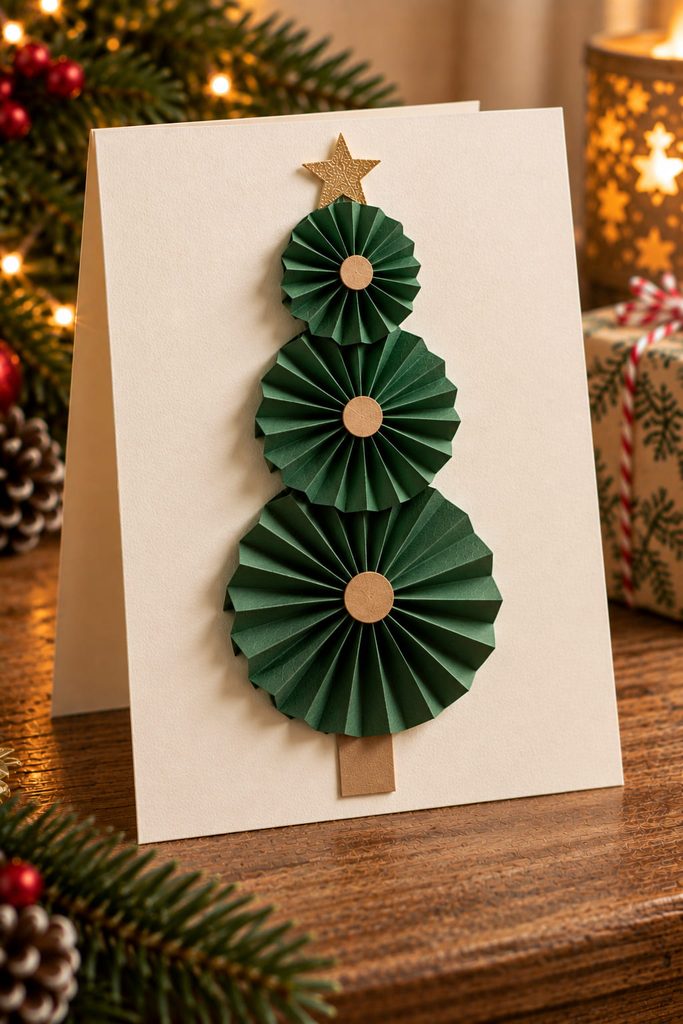
Rosette medallions turn repeated scoring into the ornament. Use three narrow accordion-folded paper strips in descending lengths, close each one into a ring, press it into a flat fan, and stack the finished medallions vertically so the widest one becomes the lowest tree tier.
- Score each strip at equal intervals before folding.
- Join the strip ends to form a ring, then press the center inward to flatten it into a rosette.
- Secure the center with a small paper circle on the back.
- Mount the three medallions in a straight vertical line and add a slim trunk below.
- Close the card gently before the glue fully cures so you can see whether the rosettes are too deep.
The design suits hand-delivered cards especially well. If ordinary envelope mailing matters, use narrower pleats and fewer layers rather than crushing thick medallions flat.
15. Paper Lace Cutout Tree Card
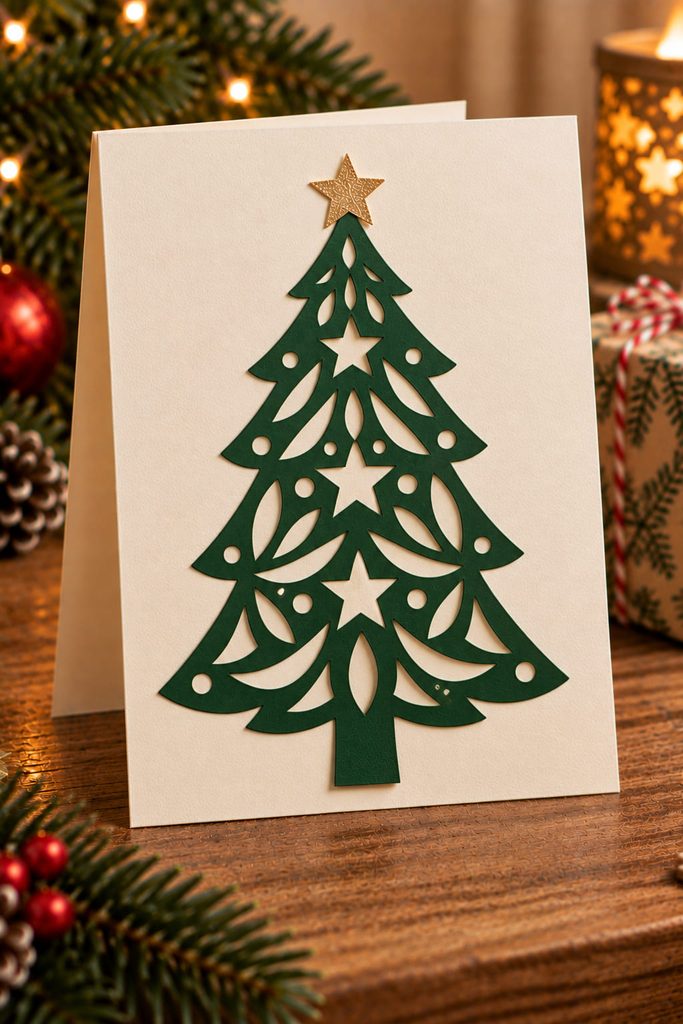
Negative space does as much work as the cardstock in a paper-lace tree. Start with one sturdy tree silhouette and remove a limited set of interior shapes—small arches, stars, teardrops, or simple branch gaps—while keeping an unbroken outer frame strong enough to hold together.
Before mounting it, check:
- Narrow bridges are wide enough to survive handling.
- No cutout weakens the trunk-to-branch connection.
- A contrasting backing paper shows clearly through the openings.
- The design still reads as a tree when viewed from arm’s length.
Distance Check: if the cut pattern becomes a gray blur from a few feet away, remove a few details or enlarge the main openings. Classic cutwork looks stronger when the negative space forms a clear rhythm rather than a dense lace field.
16. Hand-Stamped Evergreen Card
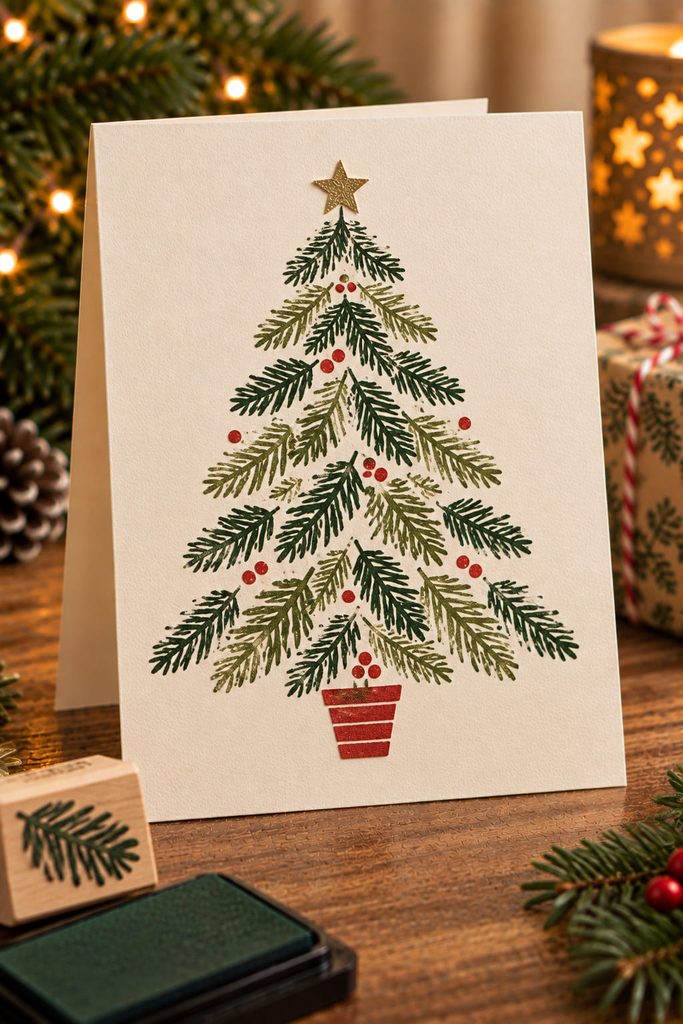
Hand stamping is the fastest route here when you need a coordinated stack of cards. Use one small branch or evergreen stamp and build the tree from repeated impressions, keeping the lowest row broad and the upper rows progressively shorter. Small variations make the surface feel handmade, but the outer silhouette should remain deliberate.
For batch work, stamp all light impressions first, then add the darker layer or trunk after the first color dries. Working by color reduces smearing and keeps the cards related without making every tree identical. Leave open paper around the stamped shape so a short greeting does not compete with the branch texture.
17. Layered Shadow-Frame Christmas Tree Card
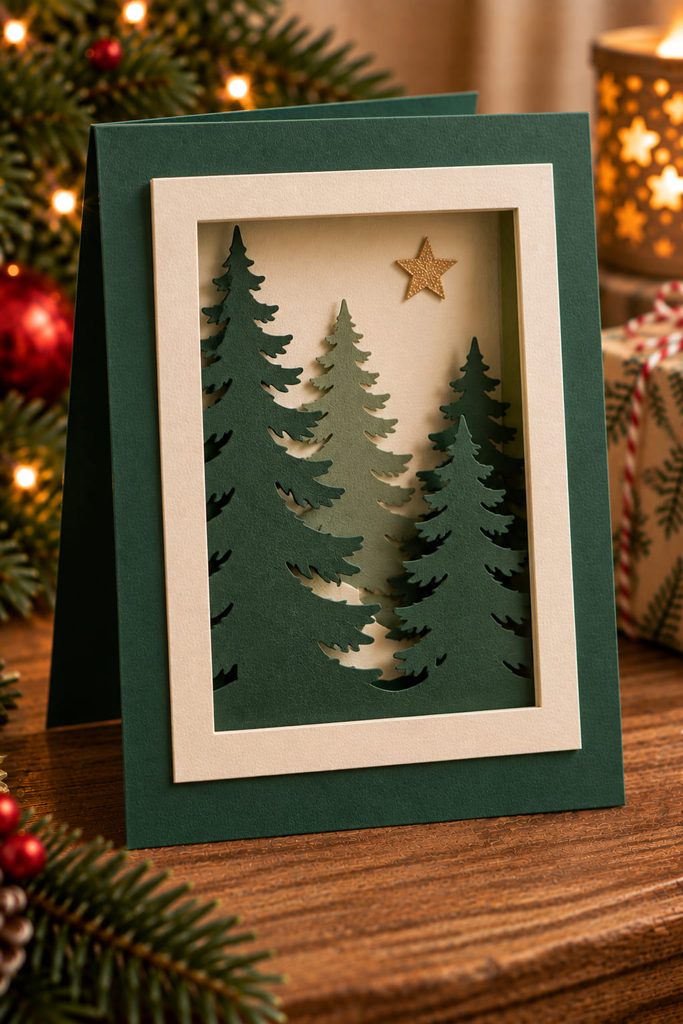
A shallow shadow-frame card is the choice for a tree that should feel like a small keepsake rather than ordinary mail. Build the front from a rigid outer frame, thin cardstock spacers, and two or three tree or forest layers set at different depths. The spaces between layers create real shadow, so the cut silhouettes can stay simpler than a flat collage.
Keep the deepest layer attached to a full backing sheet, then add narrow spacer strips around the perimeter before placing the next layer. Every spacer needs continuous support along the frame; isolated blocks made from paper scraps can telegraph bumps through the cover. Leave the center clear enough that the tree silhouette is not swallowed by the frame.
Test the finished card both open and closed. The front should stay square, the layers should not collide, and no loose branch should snag when the card is handled. If the structure bows, reduce spacer depth before adding heavier cardstock.
For the final depth decision, a shallow frame keeps the card closer to normal greeting-card behavior and is easier to protect in the mail. A deeper frame creates stronger side shadows and a more display-like result, but it is better suited to hand delivery or a protective mailer.
How to Keep Christmas Tree Cards Looking Classic
A classic result usually comes from restraint rather than adding more Christmas symbols. Pick one construction feature—the stitching, vellum, rosette folds, cutwork, or layered frame—and let it dominate. Deep evergreen with cream, kraft, burgundy, muted red, or restrained metallic gold gives the tree an immediately traditional context without requiring tiny baubles on every branch.
Paper finish matters too. Uncoated cardstock, subtle linen texture, old-fashioned prints, translucent vellum, and quiet tartan or herringbone patterns tend to reinforce the handmade character better than several shiny surfaces competing at once. Before making a batch, close one complete sample and place it in the envelope you intend to use; that simple check catches bulky folds, projecting branches, tight windows, and raised details while they are still easy to change.
Pick the Card by What Happens After It Is Opened
For a larger mailing list, start with the scalloped bough, embossed relief, herringbone inlay, vellum window, cut-and-lift branches, or stamped evergreen. When the card is part of the gift, the pocket tree, gatefold, easel, suspended window, rosettes, or shadow frame give the recipient more to handle or display.
If you want to branch out from tree-focused designs while keeping the construction straightforward, the next useful read is 15 Easy Handmade Christmas Cards Without Fussy Techniques.