This post contains affiliate links. As an Amazon Associate I earn from qualifying purchases, at no extra cost to you. Thank you for supporting Diynify!
Paper advent calendar ideas are much more interesting when the countdown changes what you do each day, not just the number you see. A paper calendar can hold a tiny treat, reveal an activity, send someone on a clue hunt, grow into holiday decor, or slowly build a scene as Christmas gets closer.
Most of these projects use cardstock or decorative paper, scissors or a craft knife, a ruler, a scoring tool, and paper-safe glue or double-sided tape. A few need thread or ribbon, a branch or dowel, clips, a paper fastener, tissue honeycomb paper, small paper bags, a rigid backing board, or whatever treats and notes you plan to add. Choose the interaction first—open, pull, spin, tear, hang, or build—then match the construction to what the calendar actually needs to hold.

1. Accordion Envelope Garland for Flat Surprises
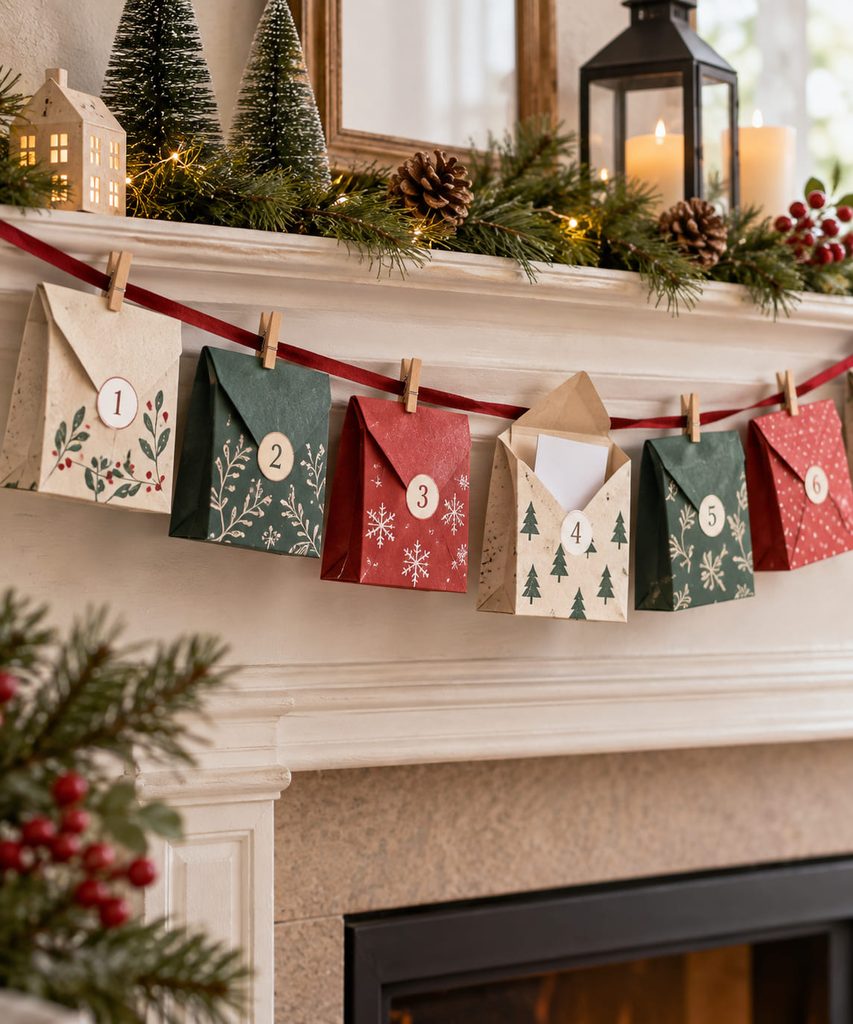
Run a row of small accordion-sided envelopes across a mantel, stair rail, or empty wall when the daily surprise is mostly flat. The gusset is the useful detail: unlike a standard envelope, it gives a folded note, sticker sheet, photo, or wrapped chocolate a little breathing room without turning every day into a box. Score each side gusset before gluing the bottom and side tabs, and keep the top flap free so the envelope can be opened without pulling the garland off its support.
String the finished envelopes through reinforced holes near the upper corners, or clip them to ribbon if you want to rearrange the dates. Keep heavier items out of the outer ends of a long garland, where sagging is most noticeable. For a family activity calendar, vary the contents rather than the envelope construction so the row still reads as one clean countdown.
2. Matchbox Drawer Christmas Tree for Tiny Gifts
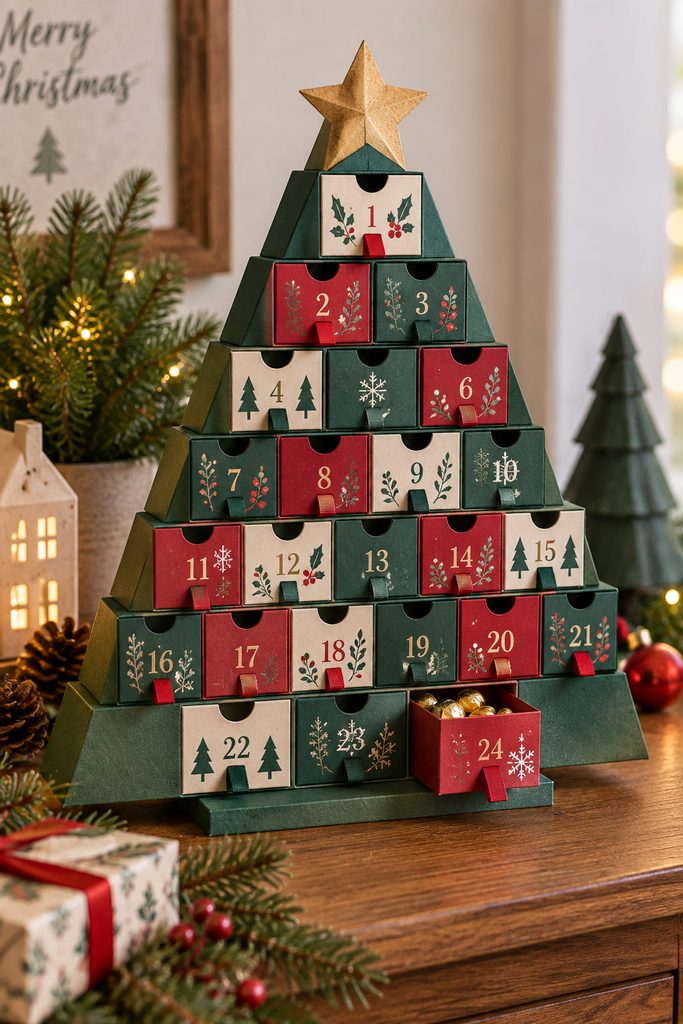
Twenty-four sliding drawers can make a compact tabletop tree, but the sleeves have to behave like structure rather than decoration. Build identical rectangular sleeves first, test one drawer inside a finished sleeve, and only then batch-cut the remaining pieces. A drawer that fits perfectly before glue can bind once the sleeve seam adds thickness, so leave a small, consistent clearance instead of forcing a tight fit.

A reliable build order is:
- Make and test one complete sleeve-and-drawer pair.
- Batch-fold the remaining drawers and sleeves to that proven size.
- Arrange the closed units into a stepped tree silhouette on a rigid backing or shallow base.
- Glue the sleeves in place while every drawer is removed, then reload the drawers after the structure is fully dry.
Use the lowest rows for the heavier surprises and reserve the upper drawers for paper notes or lightweight candy. Small paper pull tabs are easier to grip than tiny glued-on knobs and keep the front face mostly paper.
Drawer Clearance Check: Pull every drawer halfway out after the tree is assembled. If neighboring units pinch it, correct the sleeve alignment before adding numbers or embellishments.
3. Mini Paper Village With Lift-Off Roof Boxes
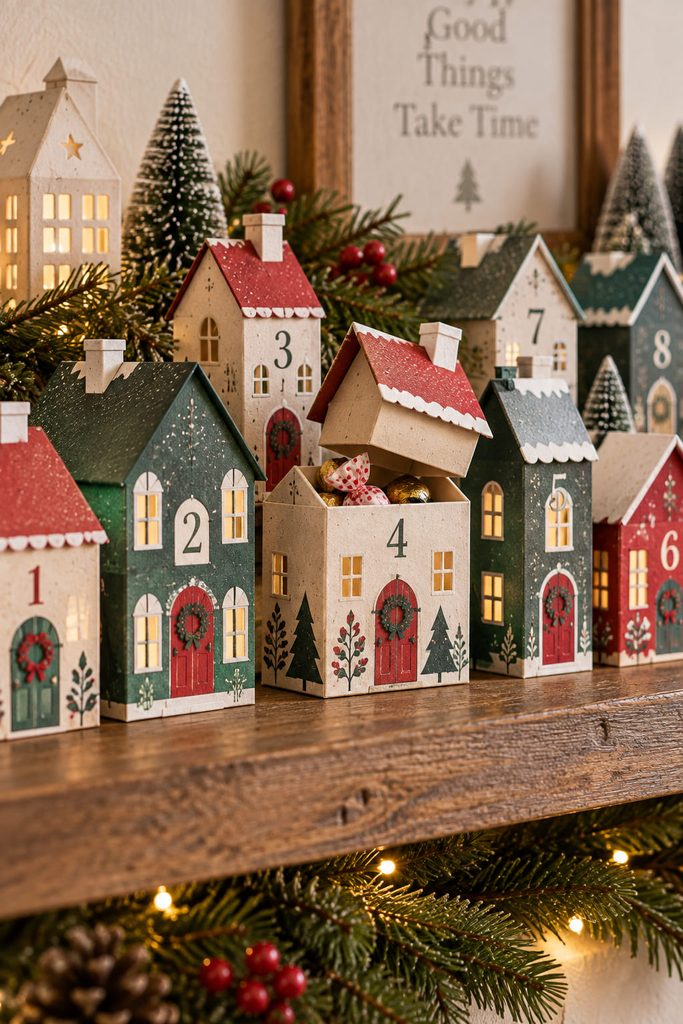
Turn the countdown into a row of small houses whose roofs act as lids. Each house needs a closed floor, four joined walls, and a roof that lifts without tearing the wall tabs; that makes the project better for individually wrapped sweets, tiny ornaments, or folded messages than for loose candy. Use slightly heavier cardstock for the house body and lighter decorative paper for shutters, doors, and trim so the shell stays square.
Keep the construction consistent but vary the rooflines enough to create a village silhouette. A narrow house can take a steep gable, while a wider one can use a lower roof or dormer detail. The useful test is access: you should be able to lift the roof with two fingers and retrieve the contents without squeezing the walls. Arrange the finished houses along a shelf rather than stacking them, so opening one day never disturbs the next.

4. Hanging Paper Cone Calendar on a Winter Branch
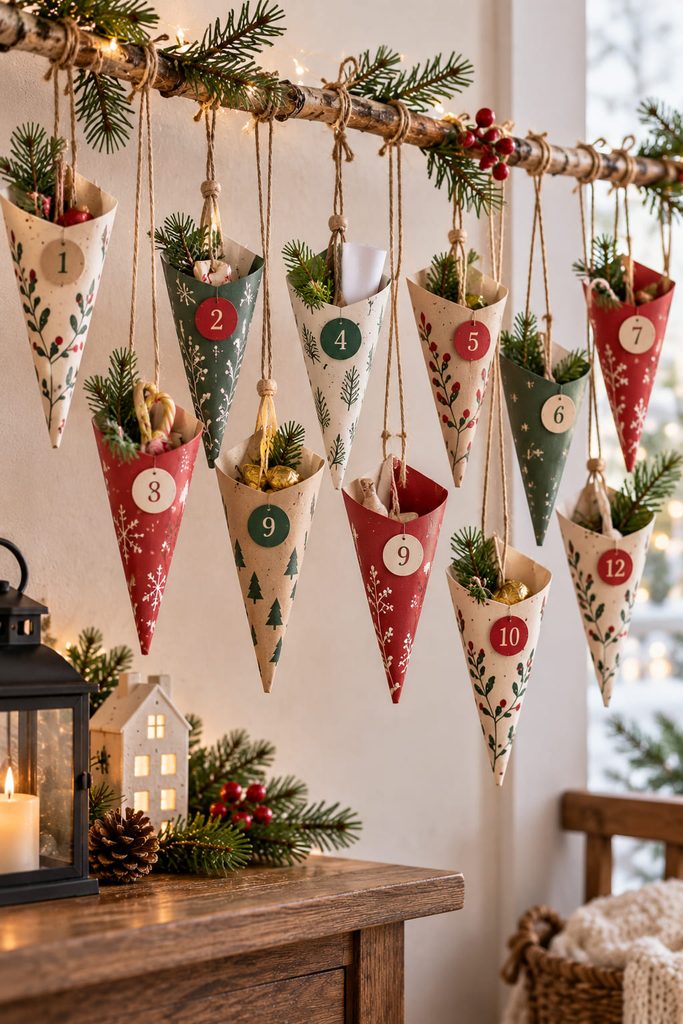
Paper cones work well when the surprise is light and easy to grab. Roll medium-weight paper into tapered pockets, glue the overlapping seam, then reinforce two opposite points at the rim before punching holes for string. The open top becomes the access point, so there is no flap or closure to fight with each morning. Hang the 24 cones at staggered heights from a sturdy decorative branch or dowel, keeping the longest strings near the center and the shortest near the ends to avoid a flat curtain effect. Fill them with rolled activity slips, wrapped candy, or lightweight trinkets; anything dense enough to distort the cone belongs in a box or bag calendar instead.
5. Fold-Out Accordion Book for Daily Activities
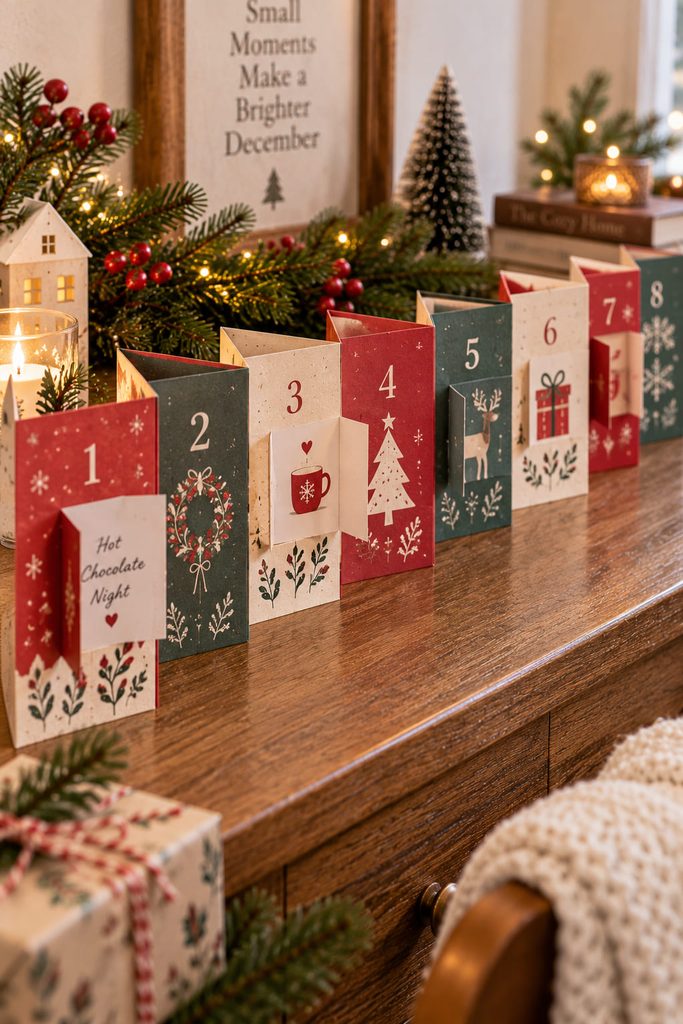
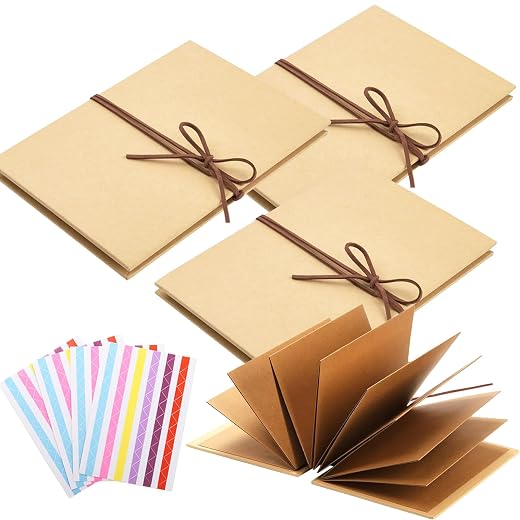
A concertina book turns an advent calendar into something you can stand on a console, then fold shut when you want the surface back. Score a long strip into 24 panels, or join several shorter strips with reinforced overlaps, and alternate mountain and valley folds so the book collapses cleanly. Each panel can carry one covered activity prompt, mini illustration, or family challenge.

The main design choice is whether the prompt is visible immediately or hidden behind a small paper gate. Visible prompts make the whole month feel like a plan; covered prompts preserve the surprise. If you add gates, hinge them only along one edge and keep the fold line away from the book’s main creases. A gate that crosses a concertina fold will buckle every time the book closes.
6. Grow-a-Link Paper Chain Countdown
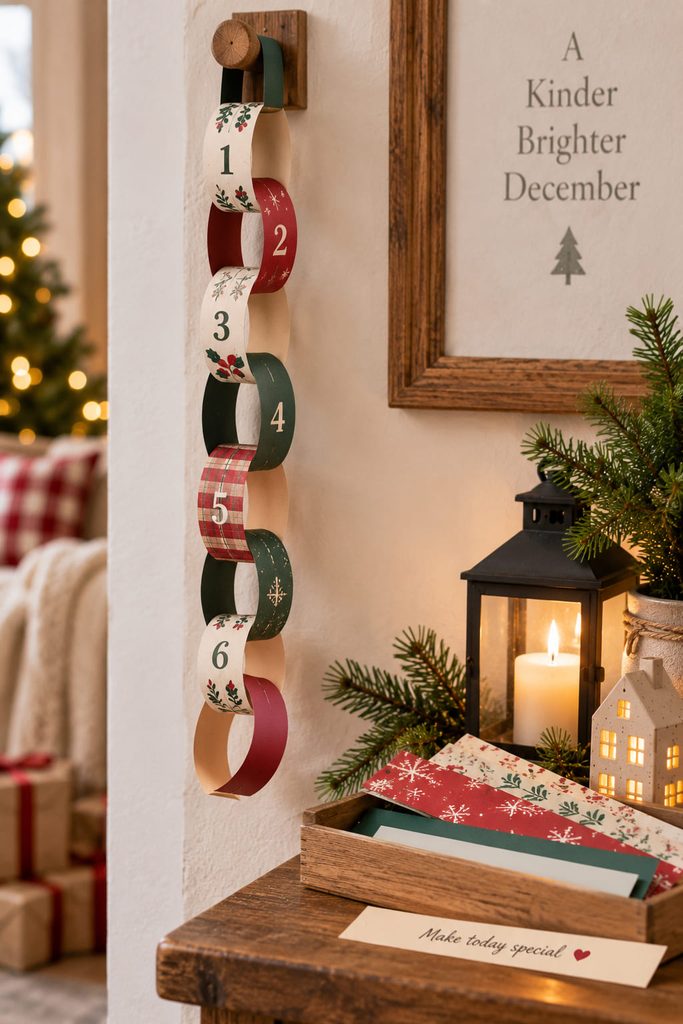
Instead of removing a link each day, start December with one sturdy hanging loop and add a new paper link every evening. The chain becomes a record of the month and finishes as a full garland you can drape across a doorway or tree. Prepare 24 strips in advance and write a memory, gratitude note, or short activity on the inside of each one before it is joined.
The order matters:

- Store the unused strips flat in date order.
- Read or complete the day’s prompt.
- Loop that strip through the last finished link.
- Glue or tape only the overlap, keeping the written side turned inward.
A heavier first loop makes a better anchor, while the daily links can be ordinary craft paper. Because the decoration grows instead of shrinks, this version is especially useful when you want the calendar to become part of the Christmas decor rather than disappear by December 24.
7. Lift-the-Flap Poster With 24 Hidden Prompts
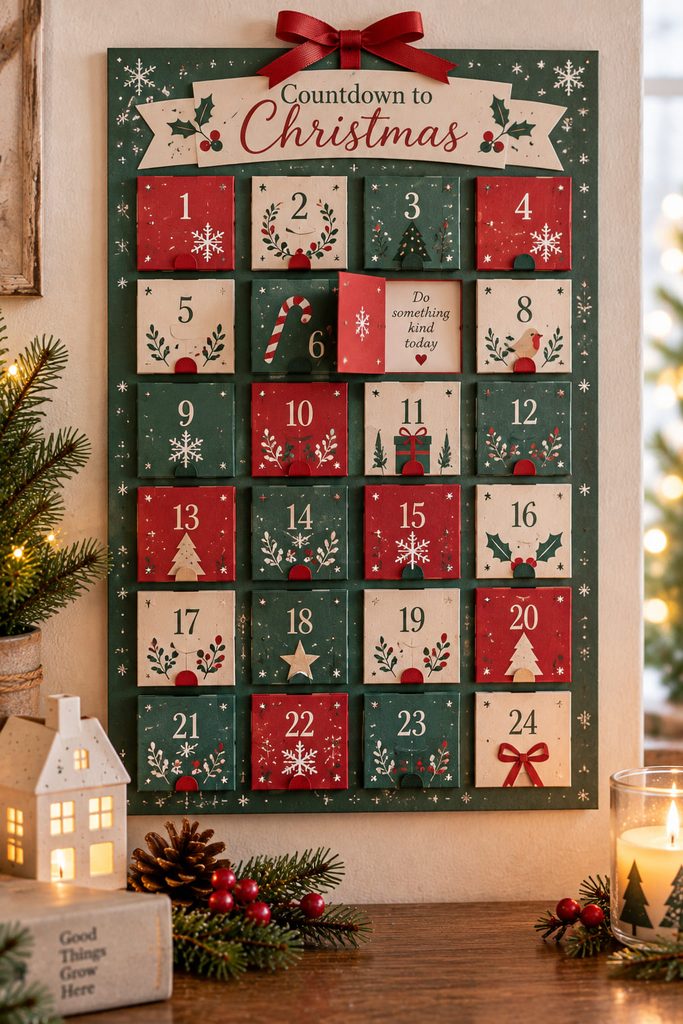
For a calendar that stores nothing bulky, cut 24 doors into a top sheet and mount it over a second sheet printed or handwritten with activities, jokes, clues, or tiny drawings. Leave one uncut edge on each door as the hinge. A sharp score along that hinge makes the flap open where you intend instead of creasing unpredictably.
If the doors will not open cleanly, diagnose the problem before decorating the front:

- The flap bows outward: the hinge was scored too deeply or the top sheet is too thin; reinforce the back of the hinge with a narrow paper strip.
- The hidden message shows at the edges: increase the overlap between the door and the reveal area underneath.
- Several doors catch each other: widen the spacing rather than making the doors smaller after assembly.
- The poster ripples: use less wet glue or switch to narrow double-sided adhesive around the perimeter.
Mount the finished calendar to chipboard or another rigid paperboard backing so repeated opening does not curl the whole sheet.
8. Rotating Paper Wheel Advent Calendar
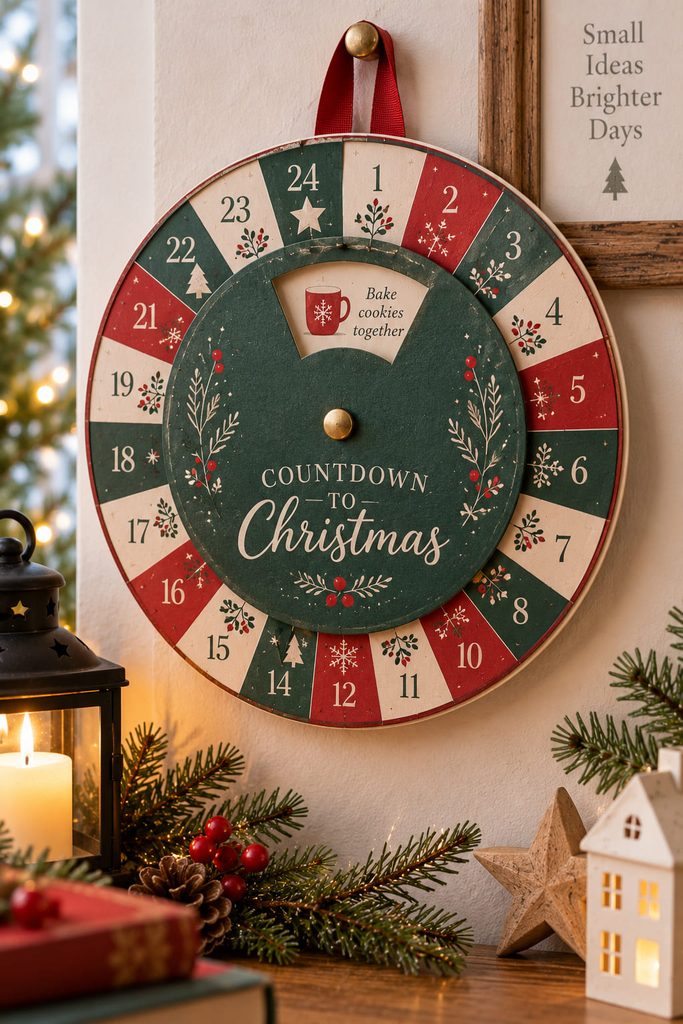
A rotating wheel, or volvelle, is a good choice when you want one compact calendar with almost no loose pieces. Stack two cardstock circles around a paper fastener: the lower disc holds 24 prompts around its perimeter, while the upper disc has one viewing window. The upper layer must rotate freely without exposing neighboring prompts, so spacing and pivot placement matter more than embellishment.
Mark the center of both circles before cutting the window. Divide the lower disc into 24 equal sectors, then place the text far enough from the outer edge that the window can frame it completely. Attach the discs with a split pin or paper fastener and add a thin paper washer between them if the printed surfaces drag.
Rotate the top disc through a full circle before committing to the final trim. The window should reveal one prompt at every stop, the discs should stay flat, and the fastener should not tear the center hole.
Pivot Check: If the wheel wobbles, enlarge the paper washer rather than tightening the fastener. Too much pressure can stop the rotation and crease the cardstock around the center.
This format is better for activities, riddles, or kind acts than for treats, but it packs a full month of interaction into a piece that can hang on a small wall or refrigerator side.
9. Sliding Chimney Marker for a No-Fill Countdown
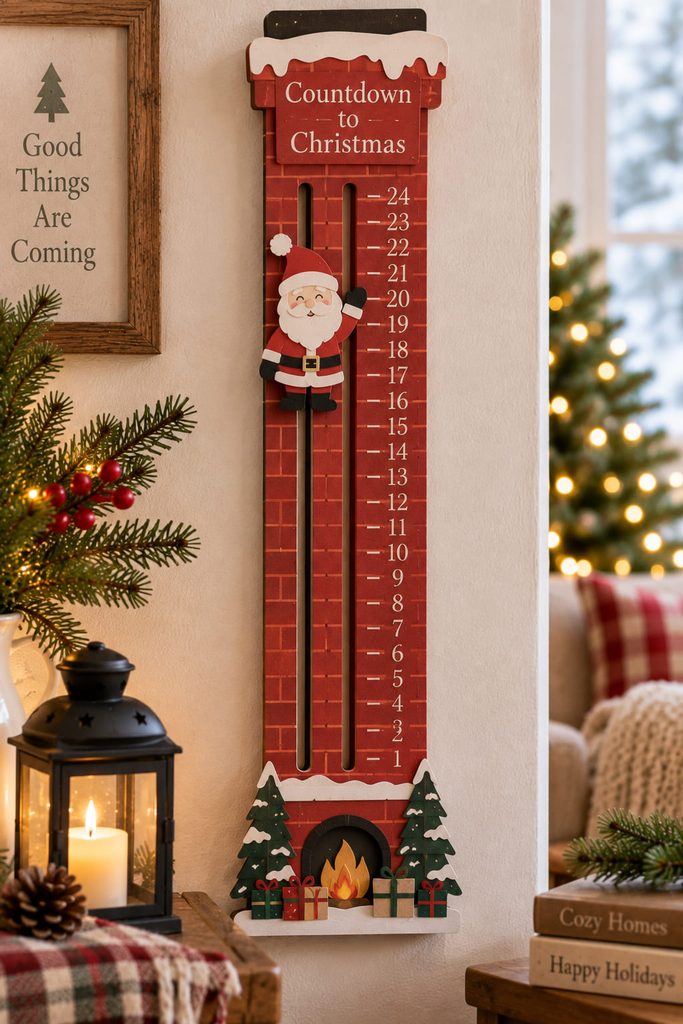
Track the month without 24 compartments by sliding a Santa, star, or gift marker down a tall paper chimney. Cut two parallel slots in a reinforced chimney panel and run a folded paper slider through them from the back. Mark 24 positions down the front; each day, move the character one step closer to the fireplace, rooftop, or stack of gifts at the bottom. The slider should be wider behind the panel than the visible slot so it cannot pull through. Keep decorations away from the movement path, and test the full travel before gluing the chimney to its backing. This is a useful low-mess option for classrooms, offices, or small spaces where the countdown itself matters more than a daily prize.
10. Folded Star Clue Mobile for a December Scavenger Hunt
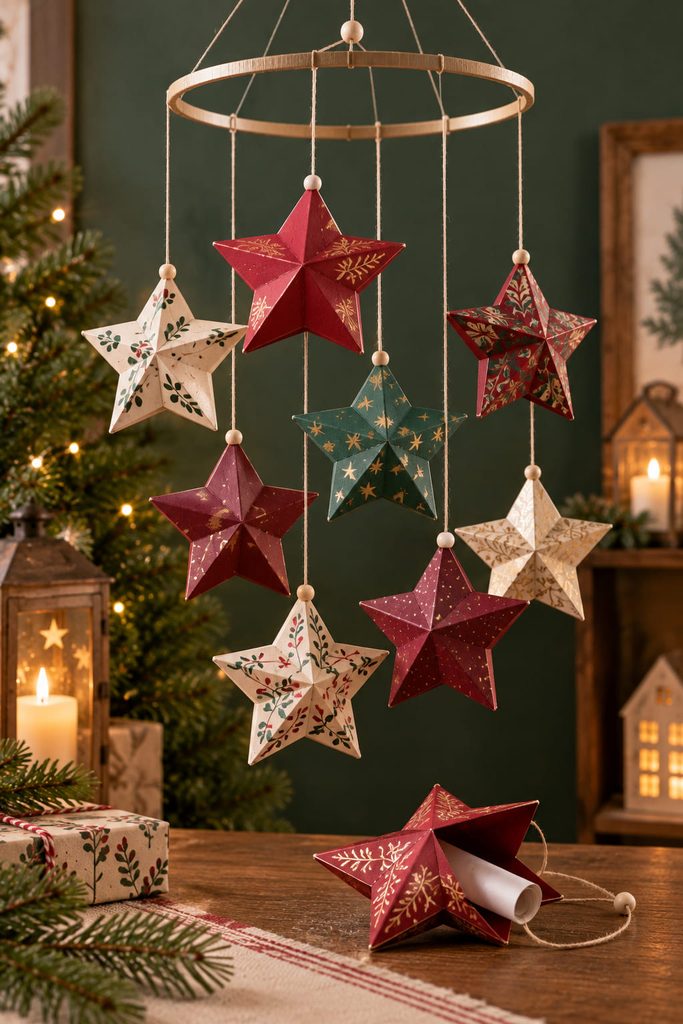
Make the calendar part of a clue hunt with 24 lightweight star-shaped packets hanging from a hoop, branch, or crossbar. Cut two matching five-point stars for each day, join most of the perimeter with narrow glue tabs, and leave one short edge as a tucked closure for a rolled message. The interaction is to detach one star, open the tuck, and follow the clue to a hidden treat or family activity somewhere else.
Keep the clues tiny and the stars light; a thick insert can bow the packet faces apart. Space the hanging points so neighboring stars do not lock together when the mobile moves, and balance the longest strings around the center rather than putting them all on one side. If the support tilts, shift a few stars before shortening strings—the problem is usually weight distribution, not height.
11. Paper Cracker Parcel Garland for Small Treats
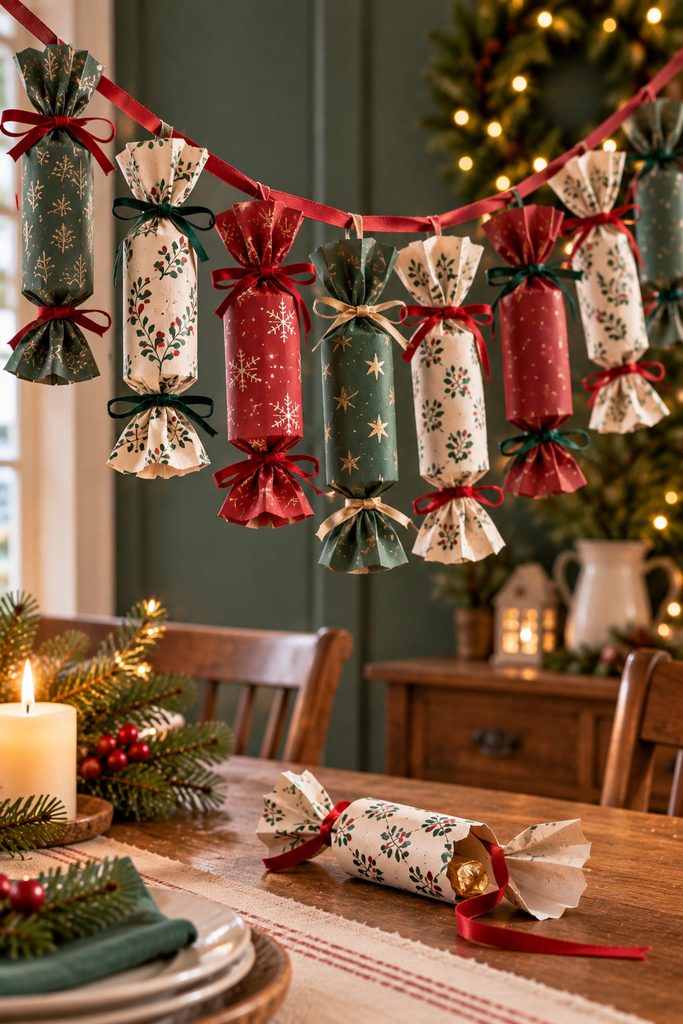
Lightweight paper gathers neatly at the neck of a cracker-shaped parcel, giving this countdown a dimensional look without requiring rigid boxes. Roll decorative paper around a small wrapped treat, pinch the paper inward near both ends, and tie those necks with thread or narrow ribbon. The center stays cylindrical while the ends flare outward, creating the familiar cracker silhouette without needing a snap. Use lighter paper than you would for a drawer or house so the necks gather instead of splitting, and hang the parcels individually from a ribbon rather than threading the main garland through the treat area. When it is time to open one, untie an end and slide the contents out; tearing the paper is optional, not required.
12. Tear-Out Coupon Book for December Plans
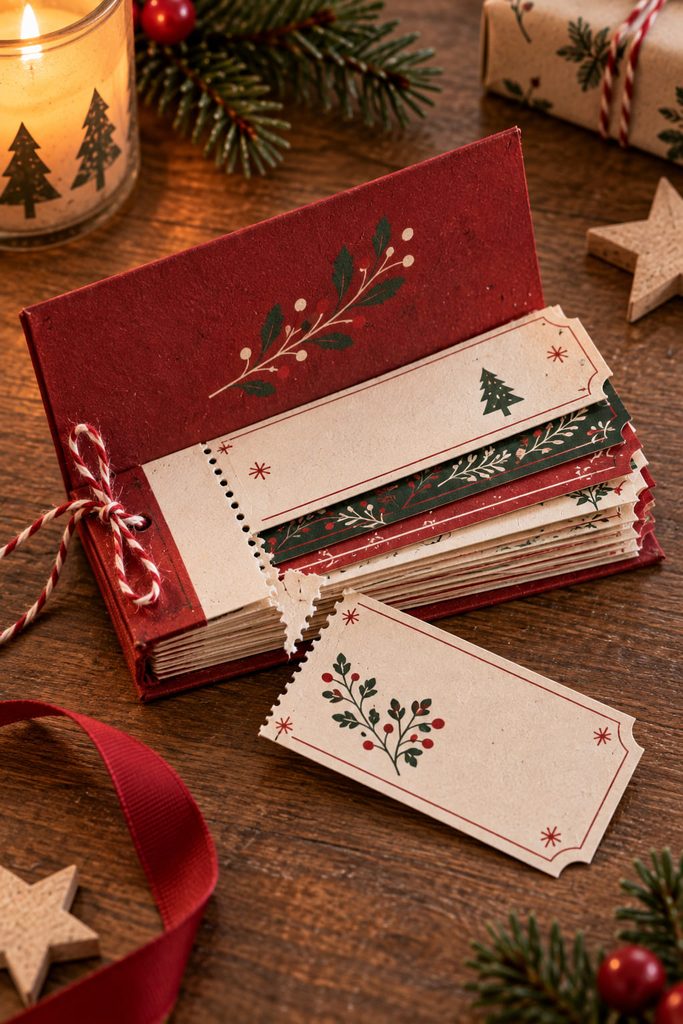
When the best advent surprises are things to do together, bind them into a 24-page coupon book: hot chocolate night, choose the movie, bake cookies, pick the music, or take an evening walk to see lights. Use two heavier covers and leave enough inner margin for binding so the written area is not trapped under staples, thread, or a paper fastener.
For clean daily removal:
- Stack and align the pages before making any tear lines.
- Score or perforate each coupon close to the binding edge, leaving a stable stub behind.
- Bind through the stub area, never through the detachable portion.
- Tear one coupon along the prepared line instead of pulling from the outer corner.
If you do not want perforation tools, use a deep score and a narrow fold-back strip; the coupon will separate more predictably after it has been folded once along that line.
13. Add-an-Ornament Paper Tree Calendar
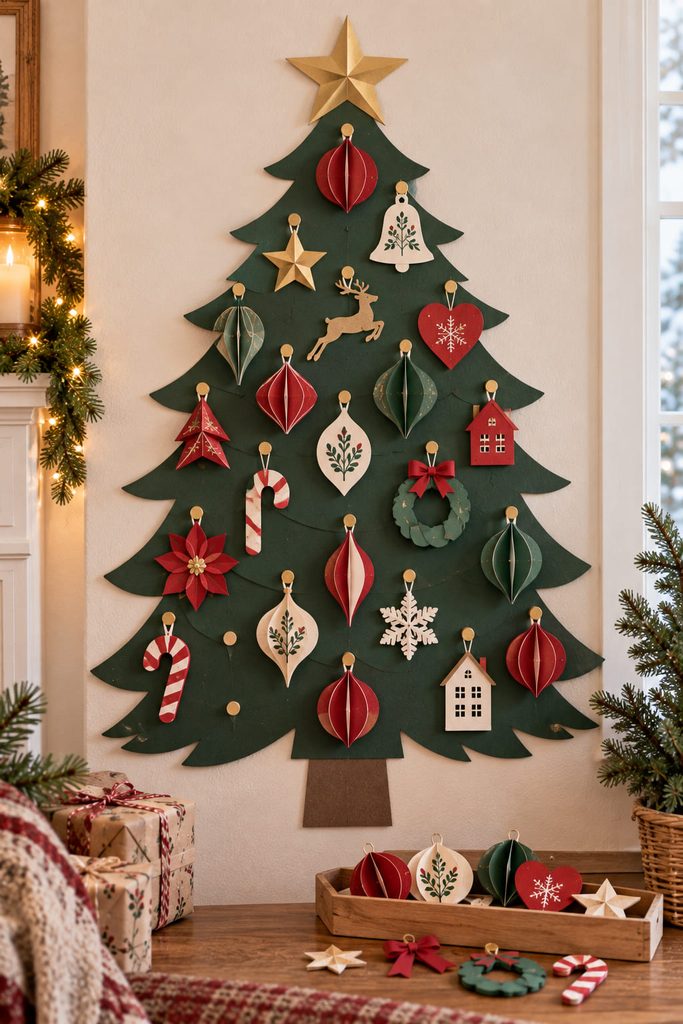
Start with a large flat paper tree on the wall and 24 paper ornaments stored beside it. Each day, add one ornament through a slit-and-tab connection, a removable paper loop, or a tiny clip mounted to the backing; by Christmas Eve, the plain tree has become a complete piece of layered wall decor. Keep the ornaments visually different but structurally compatible, with attachment points in the same position so they sit predictably. Vary the silhouettes—baubles, stars, bells, candy canes, bows, tiny houses—rather than changing the hanging mechanism every day, and leave enough empty space around every connection point that the final few ornaments do not cover earlier ones.
14. Woven Paper Pocket Wall Hanging
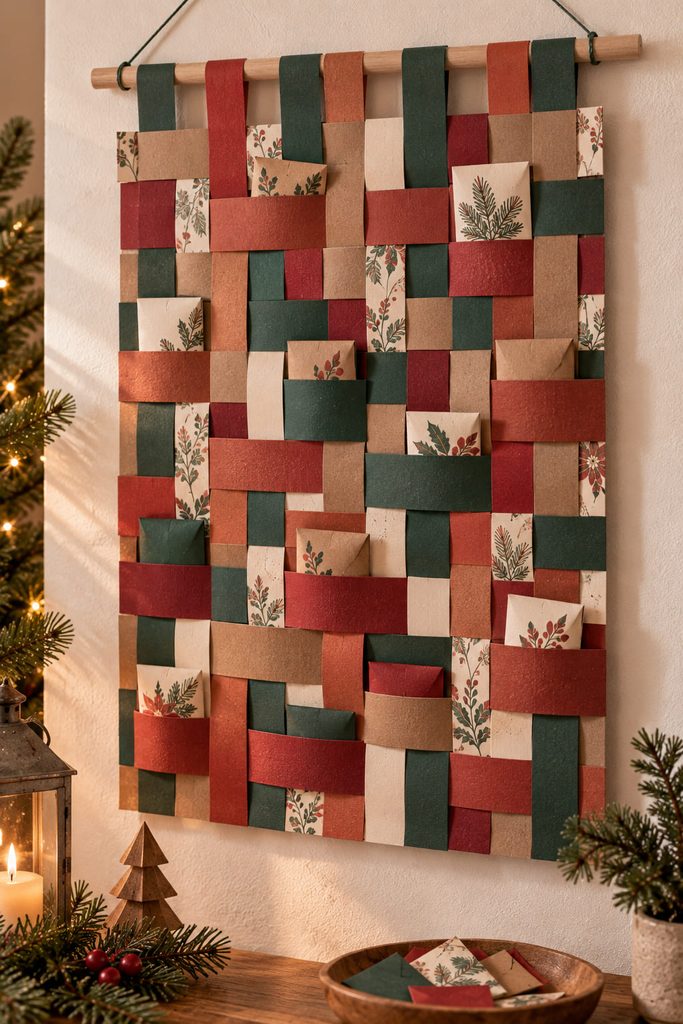
Weaving the calendar face lets the pockets become part of the structure instead of 24 separate envelopes glued to a backing. Cut sturdy vertical warp strips and slightly wider horizontal weft strips, then weave them over and under so selected intersections remain open at the top. Add a backing sheet behind those openings; the backing closes the rear of each pocket while the woven face forms the front.
Plan the pocket rows on paper before cutting strips. Not every crossing should become storage, or the weave will lose its rhythm and the pockets will compete for the same space. Use the wider weft strips where you need pocket depth and narrower strips where the pattern only needs to continue visually.
A practical sequence is to weave the full face first, secure the outer edges, mark the 24 pocket zones, and then attach the backing around—but not across—their openings. Load each pocket from the top and keep the contents flatter than the strip width so they do not distort the over-under path.
Pocket Test: Slide the thickest planned surprise into the smallest pocket before closing the backing. If the weave bows forward, reduce the contents or widen that pocket zone; extra glue will not solve a depth problem.
The finished panel is especially effective for activity cards, tea packets, flat ornaments, or wrapped sweets because the weaving remains visible even when the pockets are filled.
15. Folded Paper Bag Mantel Calendar for Bulkier Treats

Paper bags are the practical route when the surprises are too bulky for envelopes but do not justify building 24 rigid boxes. Small flat-bottom bags stand on a shelf or mantel and accept irregular shapes easily; hand-folded gusset bags look more tailored and can be sized to a specific gift, but they take longer to batch.
Whichever route you choose, fold the top edge down once or twice and close it with a paper clip, mini clothespin, or punched ribbon. That keeps the contents hidden while preserving easy access. Arrange heavier bags near the center of the shelf and lighter ones toward the ends, and avoid overfilling: a bag that cannot sit flat is a sign that the item belongs in a wider package.
16. Fold-Flat Honeycomb Ornament Advent Board
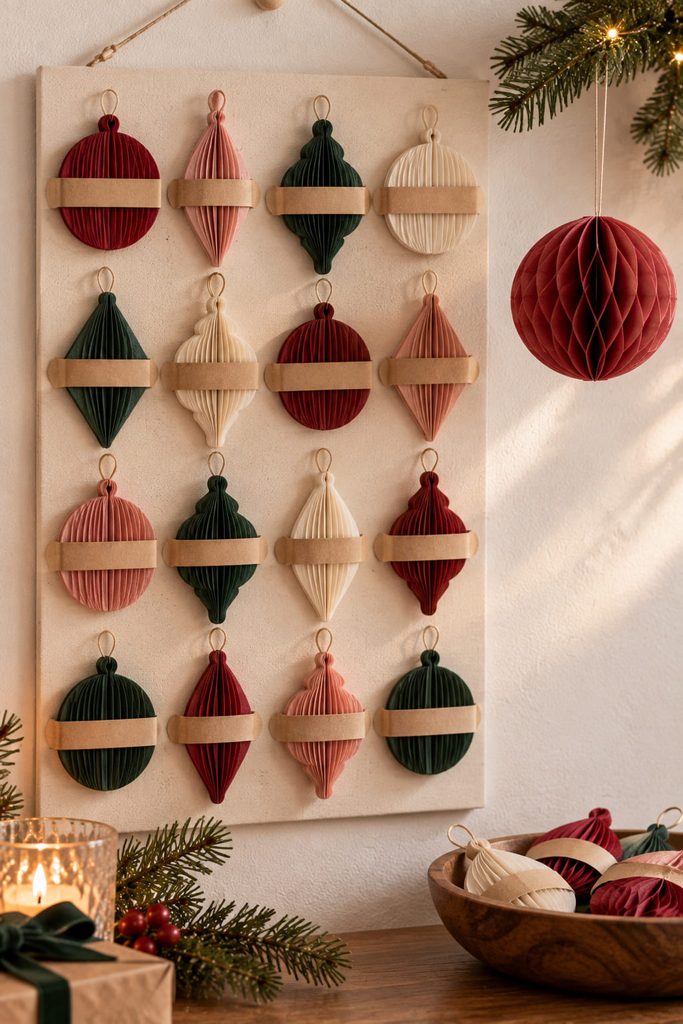
For a calendar that changes from flat storage into tree decor, mount 24 collapsed tissue-paper honeycomb ornaments on a board with removable paper bands. Each day, release one ornament, open the honeycomb around its center seam, secure it with the intended tab or removable closure, and hang it on the tree. The board gets quieter as the tree gets fuller.
Before making a full set, check three things:
- the ornament opens without tearing the tissue cells;
- the closure can be released again if you want the ornament to store flat after Christmas;
- the hanging loop is attached to the center support, not to fragile tissue layers.
Use small, lightweight forms so the board can hold all 24 without deep shelves. This project is less suitable for daily treats, but it is excellent when the countdown itself should produce reusable decorations.
17. Build-a-Village Slot-Together Countdown Scene
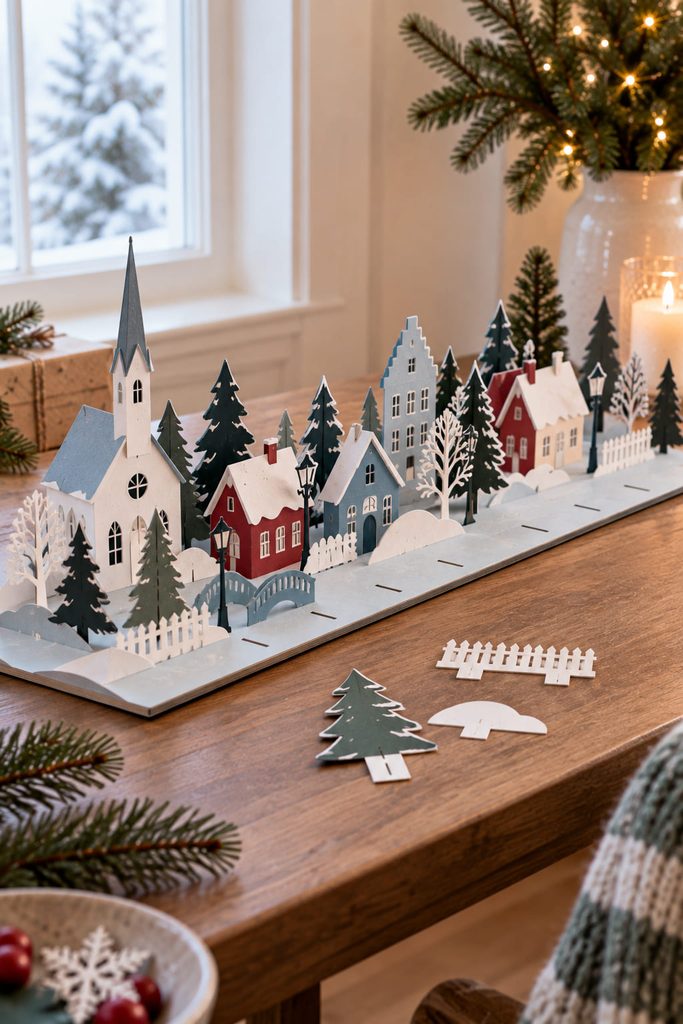
Let the village grow one piece at a time: each day adds a flat-packed building, tree, fence, lamppost, or snowbank to the tabletop scene. Cut tabs into the bottom of each piece and matching slots into a long cardstock base so the elements can stand without glue. The calendar begins almost empty and becomes denser as the month progresses.
Mix tall and low pieces so later additions do not hide everything placed earlier. Buildings need wider tabs than trees or signs, and large pieces may need two tabs to stop them twisting. Number the storage sleeves rather than the scene pieces if you want the finished village to look like decor rather than a calendar after December 24.
The key difference from a village made of treat boxes is interaction: nothing opens and nothing has to hold a gift. The value is in building the display one component at a time, which also makes the pieces easy to flatten and store when the season ends.
18. Rotating Tabletop Carousel With Daily Paper Pockets
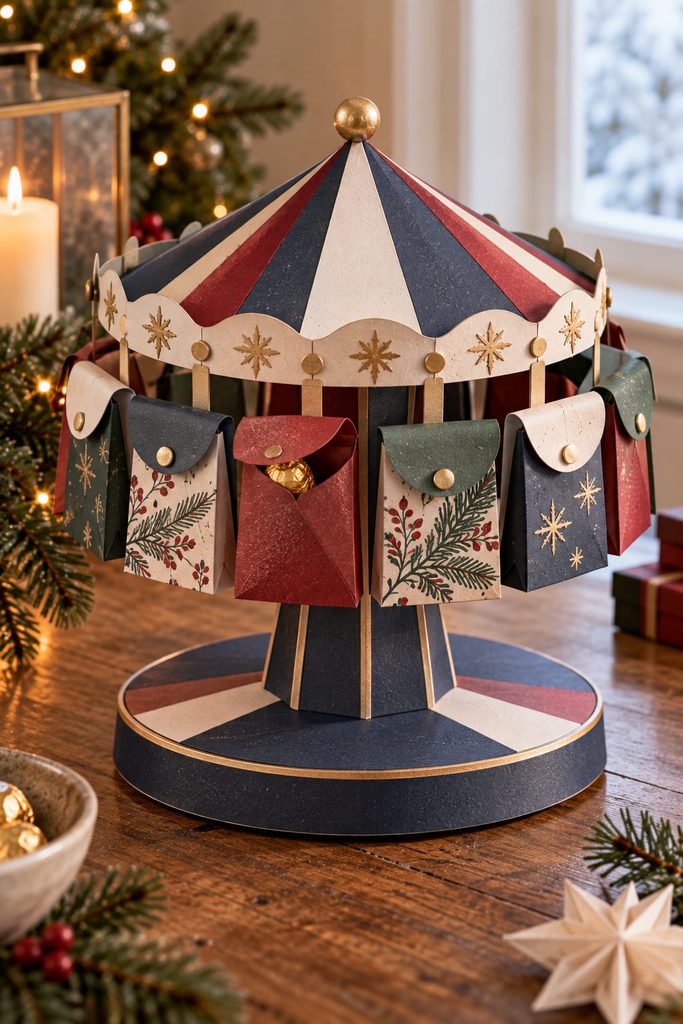
If the calendar will sit at the center of the table, a carousel adds storage and movement—but it needs a stable core before the pockets go on. Build a rigid paperboard base, a vertical center tube or folded prism, and two circular plates that keep the structure upright. Attach 24 lightweight folded pockets around the outer edge in evenly spaced positions, leaving enough clearance to reach into one pocket without crushing the next.
There are two sensible ways to handle the rotation. A fixed base with a rotating upper plate is more interactive but needs a paper fastener or simple axle that can carry the load. A fully fixed carousel is easier to build; you rotate the whole piece by hand on the table instead of engineering a moving joint. Choose the first only if the turntable itself is part of the fun.
Keep the contents similar in weight and load opposite sides in pairs while filling the calendar. Deep pockets create leverage that can tip a narrow base, so widen the footprint before making the pockets taller.
Balance Check: Give the loaded carousel a gentle quarter-turn. If the base lifts or the center column leans, reduce pocket weight or enlarge the base before decorating the rim.
This is one of the better choices for a shared family calendar because all 24 days stay visible and easy to reach, while the circular shape feels more like a centerpiece than a storage organizer.
How to Choose Among These Paper Advent Calendar Ideas
Start with what happens on a normal December morning. If the calendar needs to hold candy or small gifts, choose drawers, roof boxes, cones, bags, crackers, woven pockets, or the carousel. For activities and notes, the accordion book, flap poster, paper wheel, coupon book, or grow-a-link chain keeps bulk to a minimum. If you want the countdown to become decoration, the ornament tree, honeycomb board, hanging star clues, or slot-together village gives every day a visible effect.
Also consider access. A wall calendar needs comfortable reach, a hanging calendar needs light contents and secure attachment points, and a tabletop build needs a footprint wide enough for its loaded weight. The best design is not the one with the most detail; it is the one you can open, move, or refill without damaging the next day.
Make the Countdown Do Something
The most memorable paper advent calendars change a little as December moves forward. A chain gets longer, a tree fills with ornaments, a village grows across the table, or a drawer disappears into the morning routine after its surprise is found. Pick the interaction your household will actually enjoy, then choose the simplest paper mechanism that can handle it reliably.
If you want a few projects to make alongside the calendar, 17 Simple Paper Christmas Crafts That Skip Fussy Details is a useful next read for approachable holiday decorations that do not depend on intricate cutting.